

My Family Tree Table
My family tree in a table! Made out of a tree!
Wood Class Project
Winter-Spring 2016
Project Overview

Project Scope: Design and Woodworking
Role: Principal Woodworker
Team: Solo Project (with Instructor Oversight)
Project Start Date: January 2016
Project Duration: 7 months
Methods: Sketching, Prototyping, CAD, Turning, Joinery, Laser Cutting, CNC Routing
Tools: Tablesaw, Chopsaw, CNC Router, Laser Cutter, Rhino 3D CAD
Awards: First Place Overall (Kern County Fair), Judge’s Choice Award (Kern County Fair), Best of Show (Kern County Fair)
Throughout the spring of 2016, I took a class called Wood: Joinery and Turning. My coursework included a final project in which I was instructed to create any wooden object that utilized two foundational woodworking processes: joinery and turning.
I ultimately chose to create a table representation of my family tree. I have three older siblings and now 19 cousins (some were born after I finished my table), 19 aunts and uncles, and three grandparents, and family is very near and dear to me. I wanted to create something that was meaningful to me and also fun to build, and a table with my family seemed like the perfect intersection of those two goals. I also loved the metaphor that my family tree was built into a table from a tree—it seemed very full circle to me, and made it fun to talk and write about.
My final table was awarded the Judge’s Choice Award, First Place Overall, and Best of Show in the Kern County Fair in the summer of 2016, and I gifted it to my mom soon after.
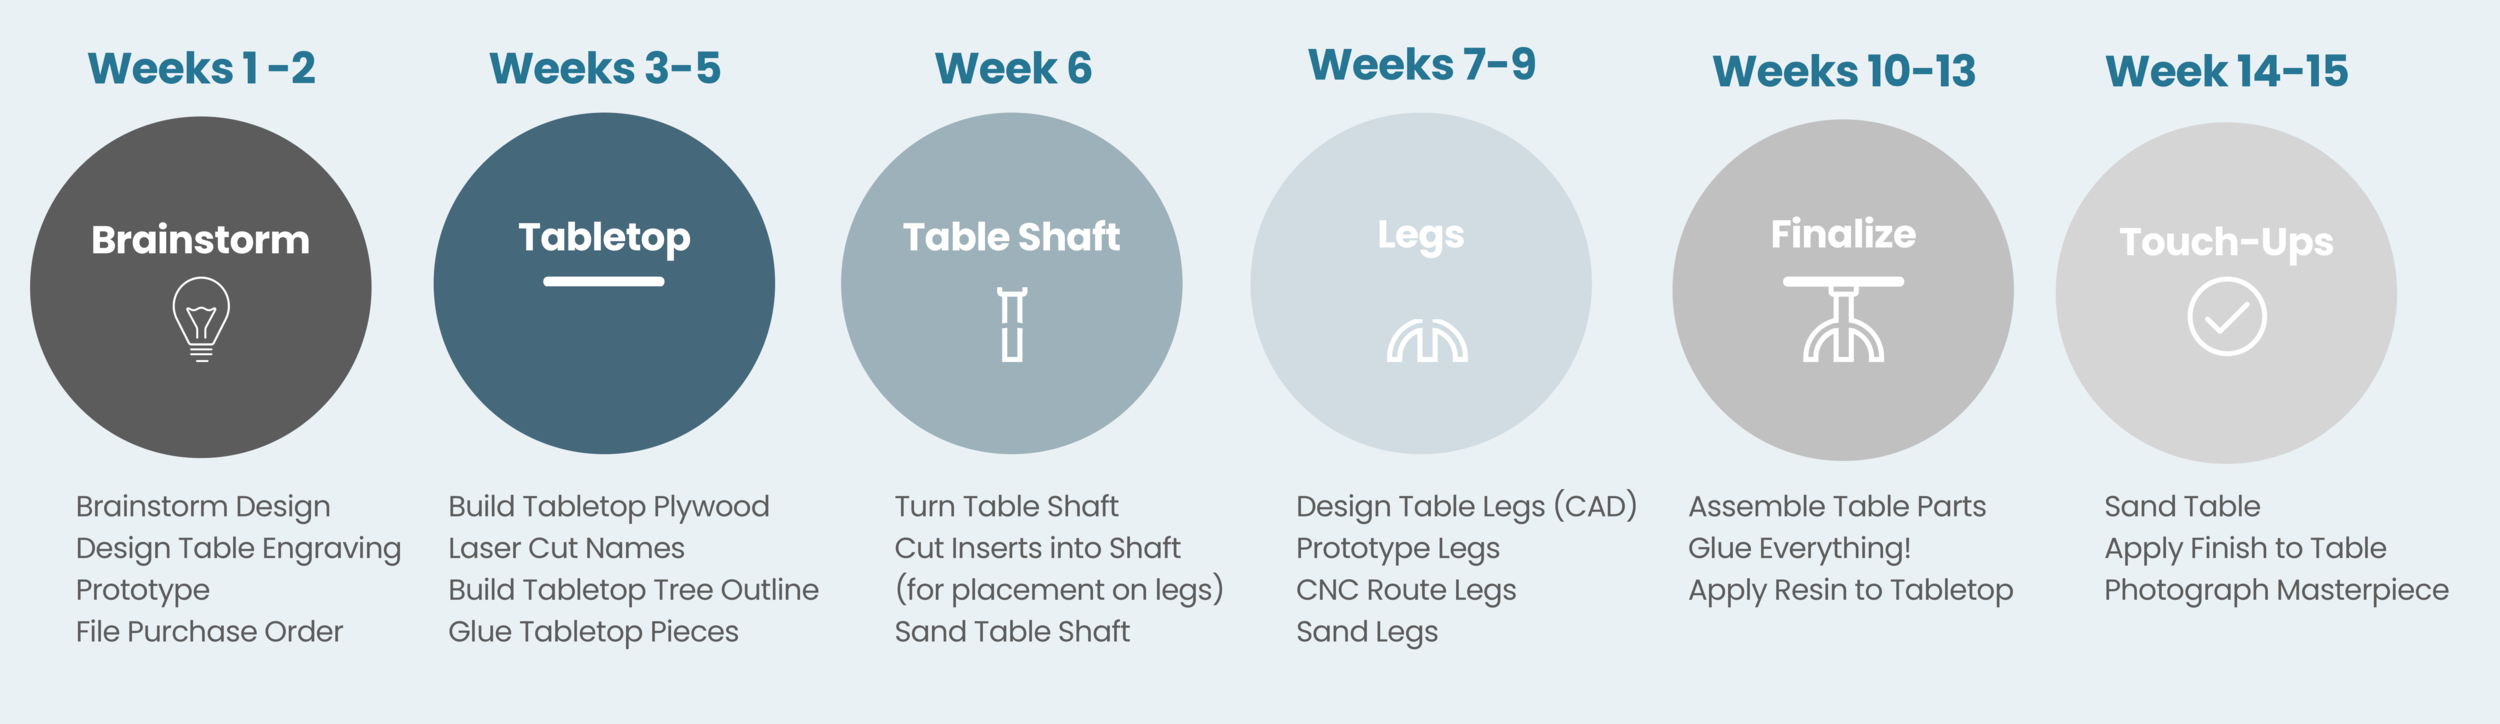
My Timeline
From a mere idea to a final product, this table took a total of 15 weeks (one full school semester) to build. I ran into many challenges—most of which were unpredictable—but I was able to address each problem as it arose and find workarounds to create something I am very proud of. My timeline for the project is detailed below.

Brainstorming
What are some initial ideas?
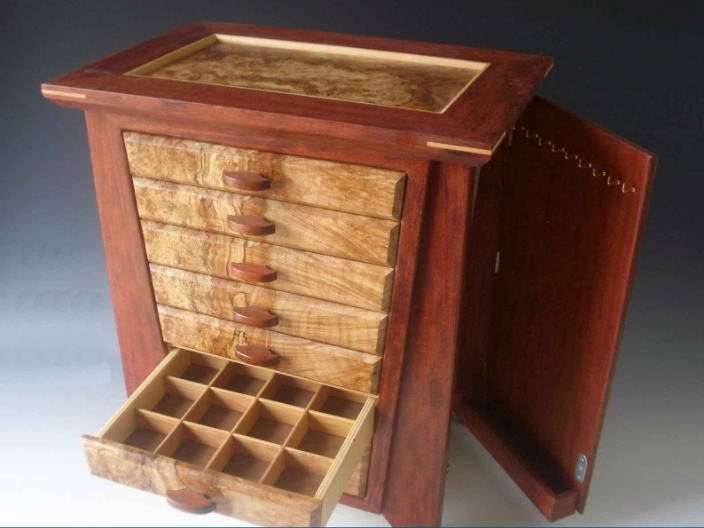
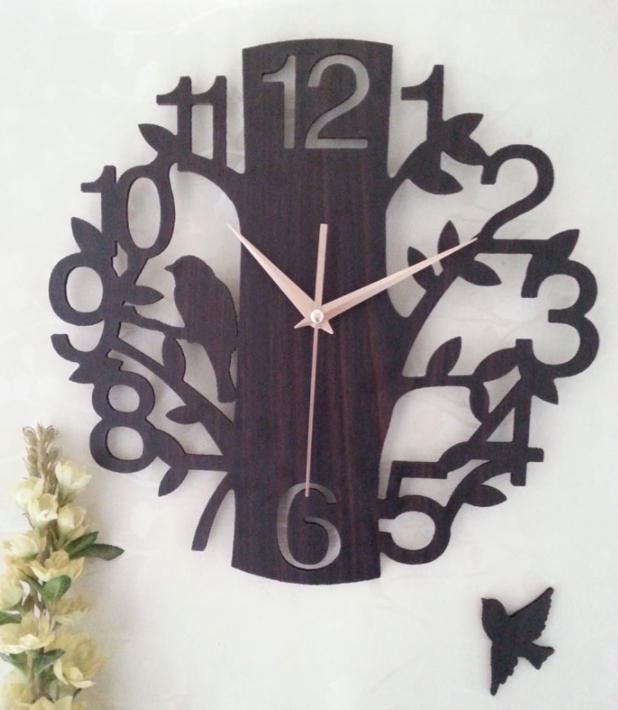
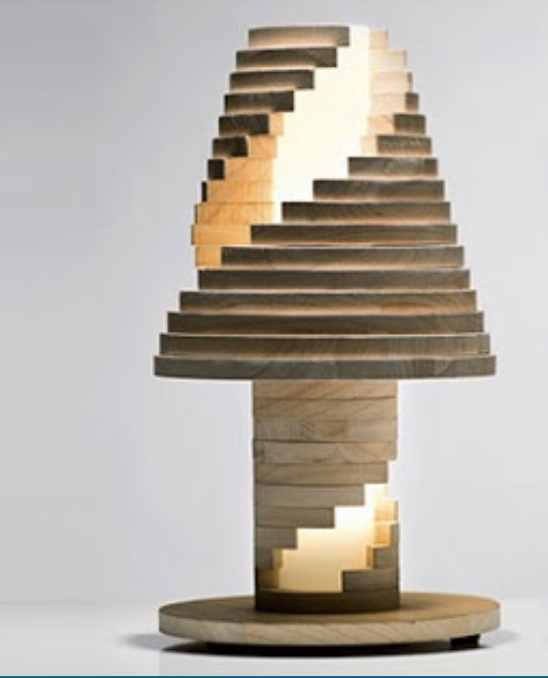
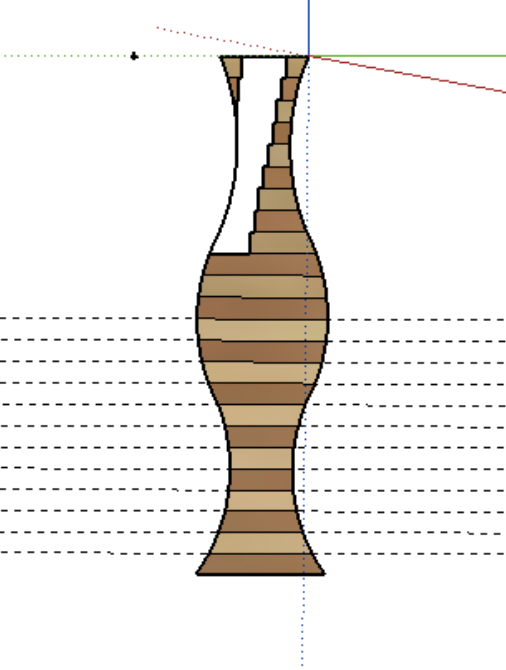
I began the design process by brainstorming ideas for what I was going to create. I spent a lot of time looking through Google to gather some inspiration and ultimately decided I wanted to do some form of furniture (i.e. a lamp, desk, drawer unit, or table).
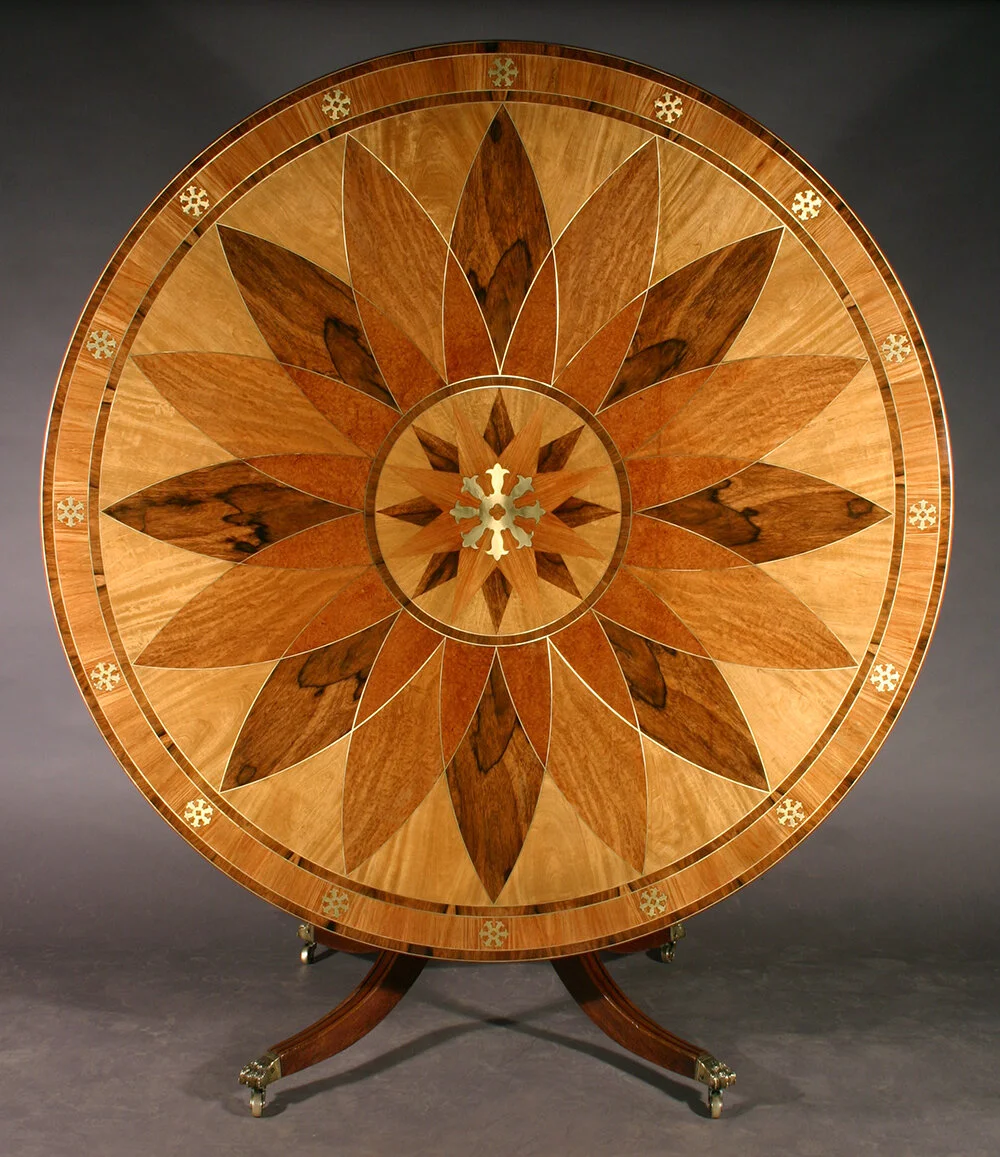
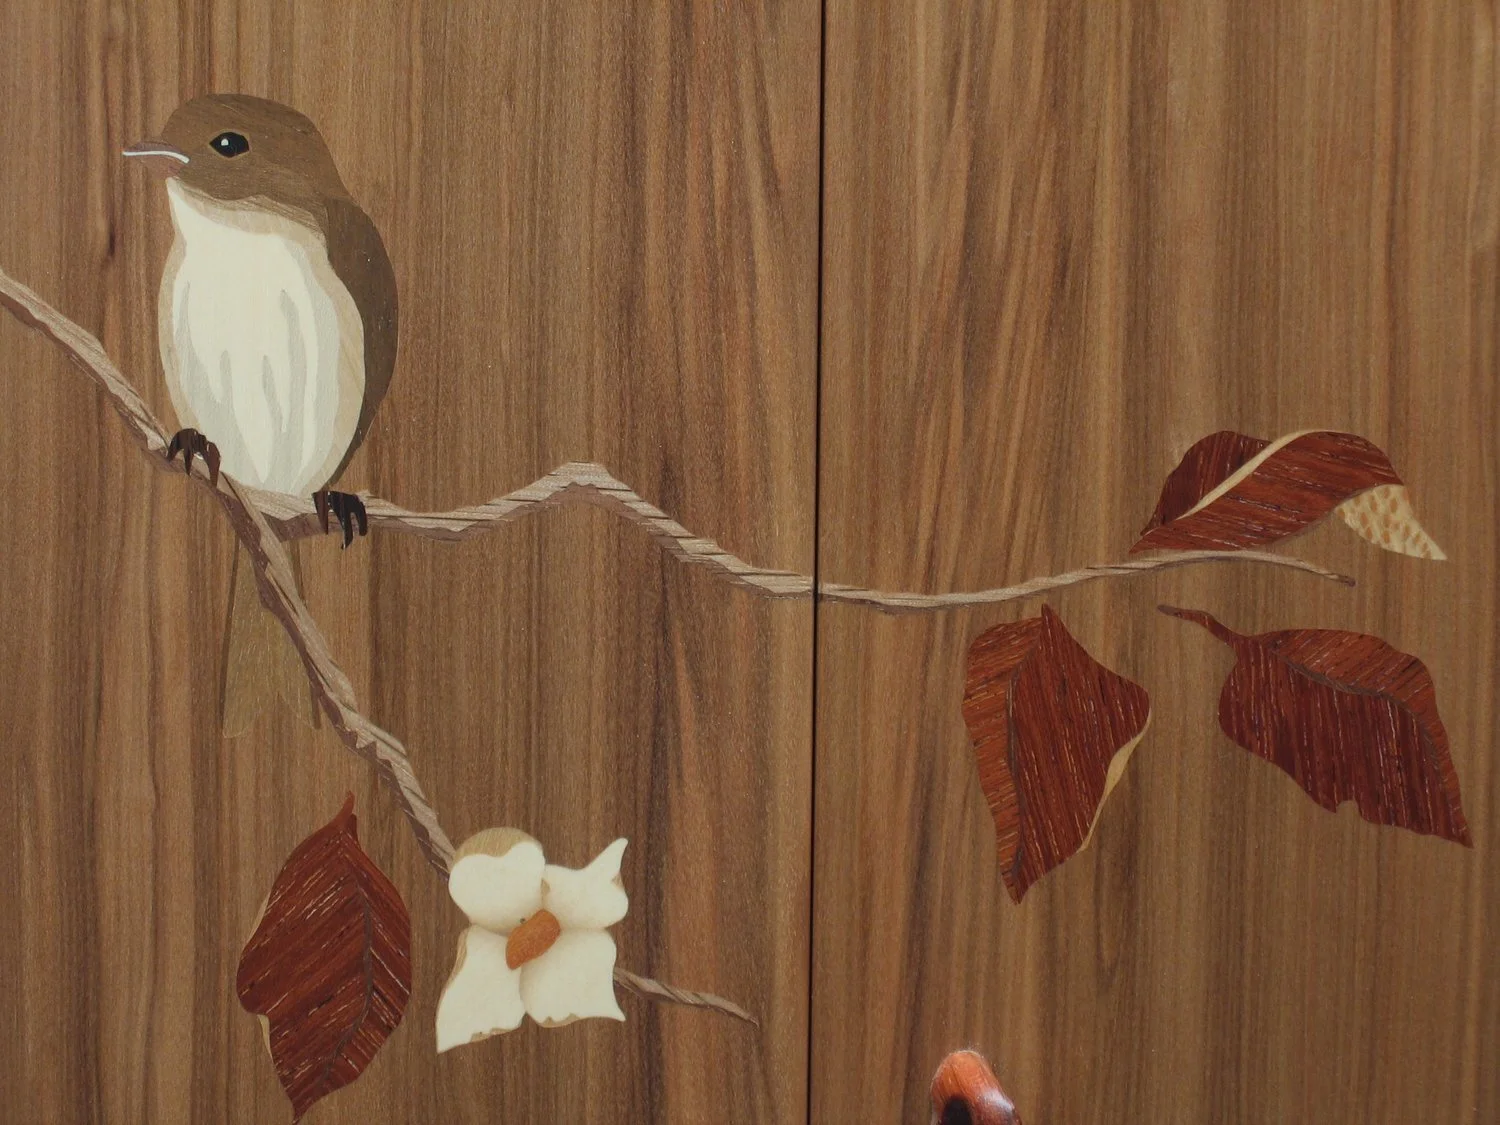
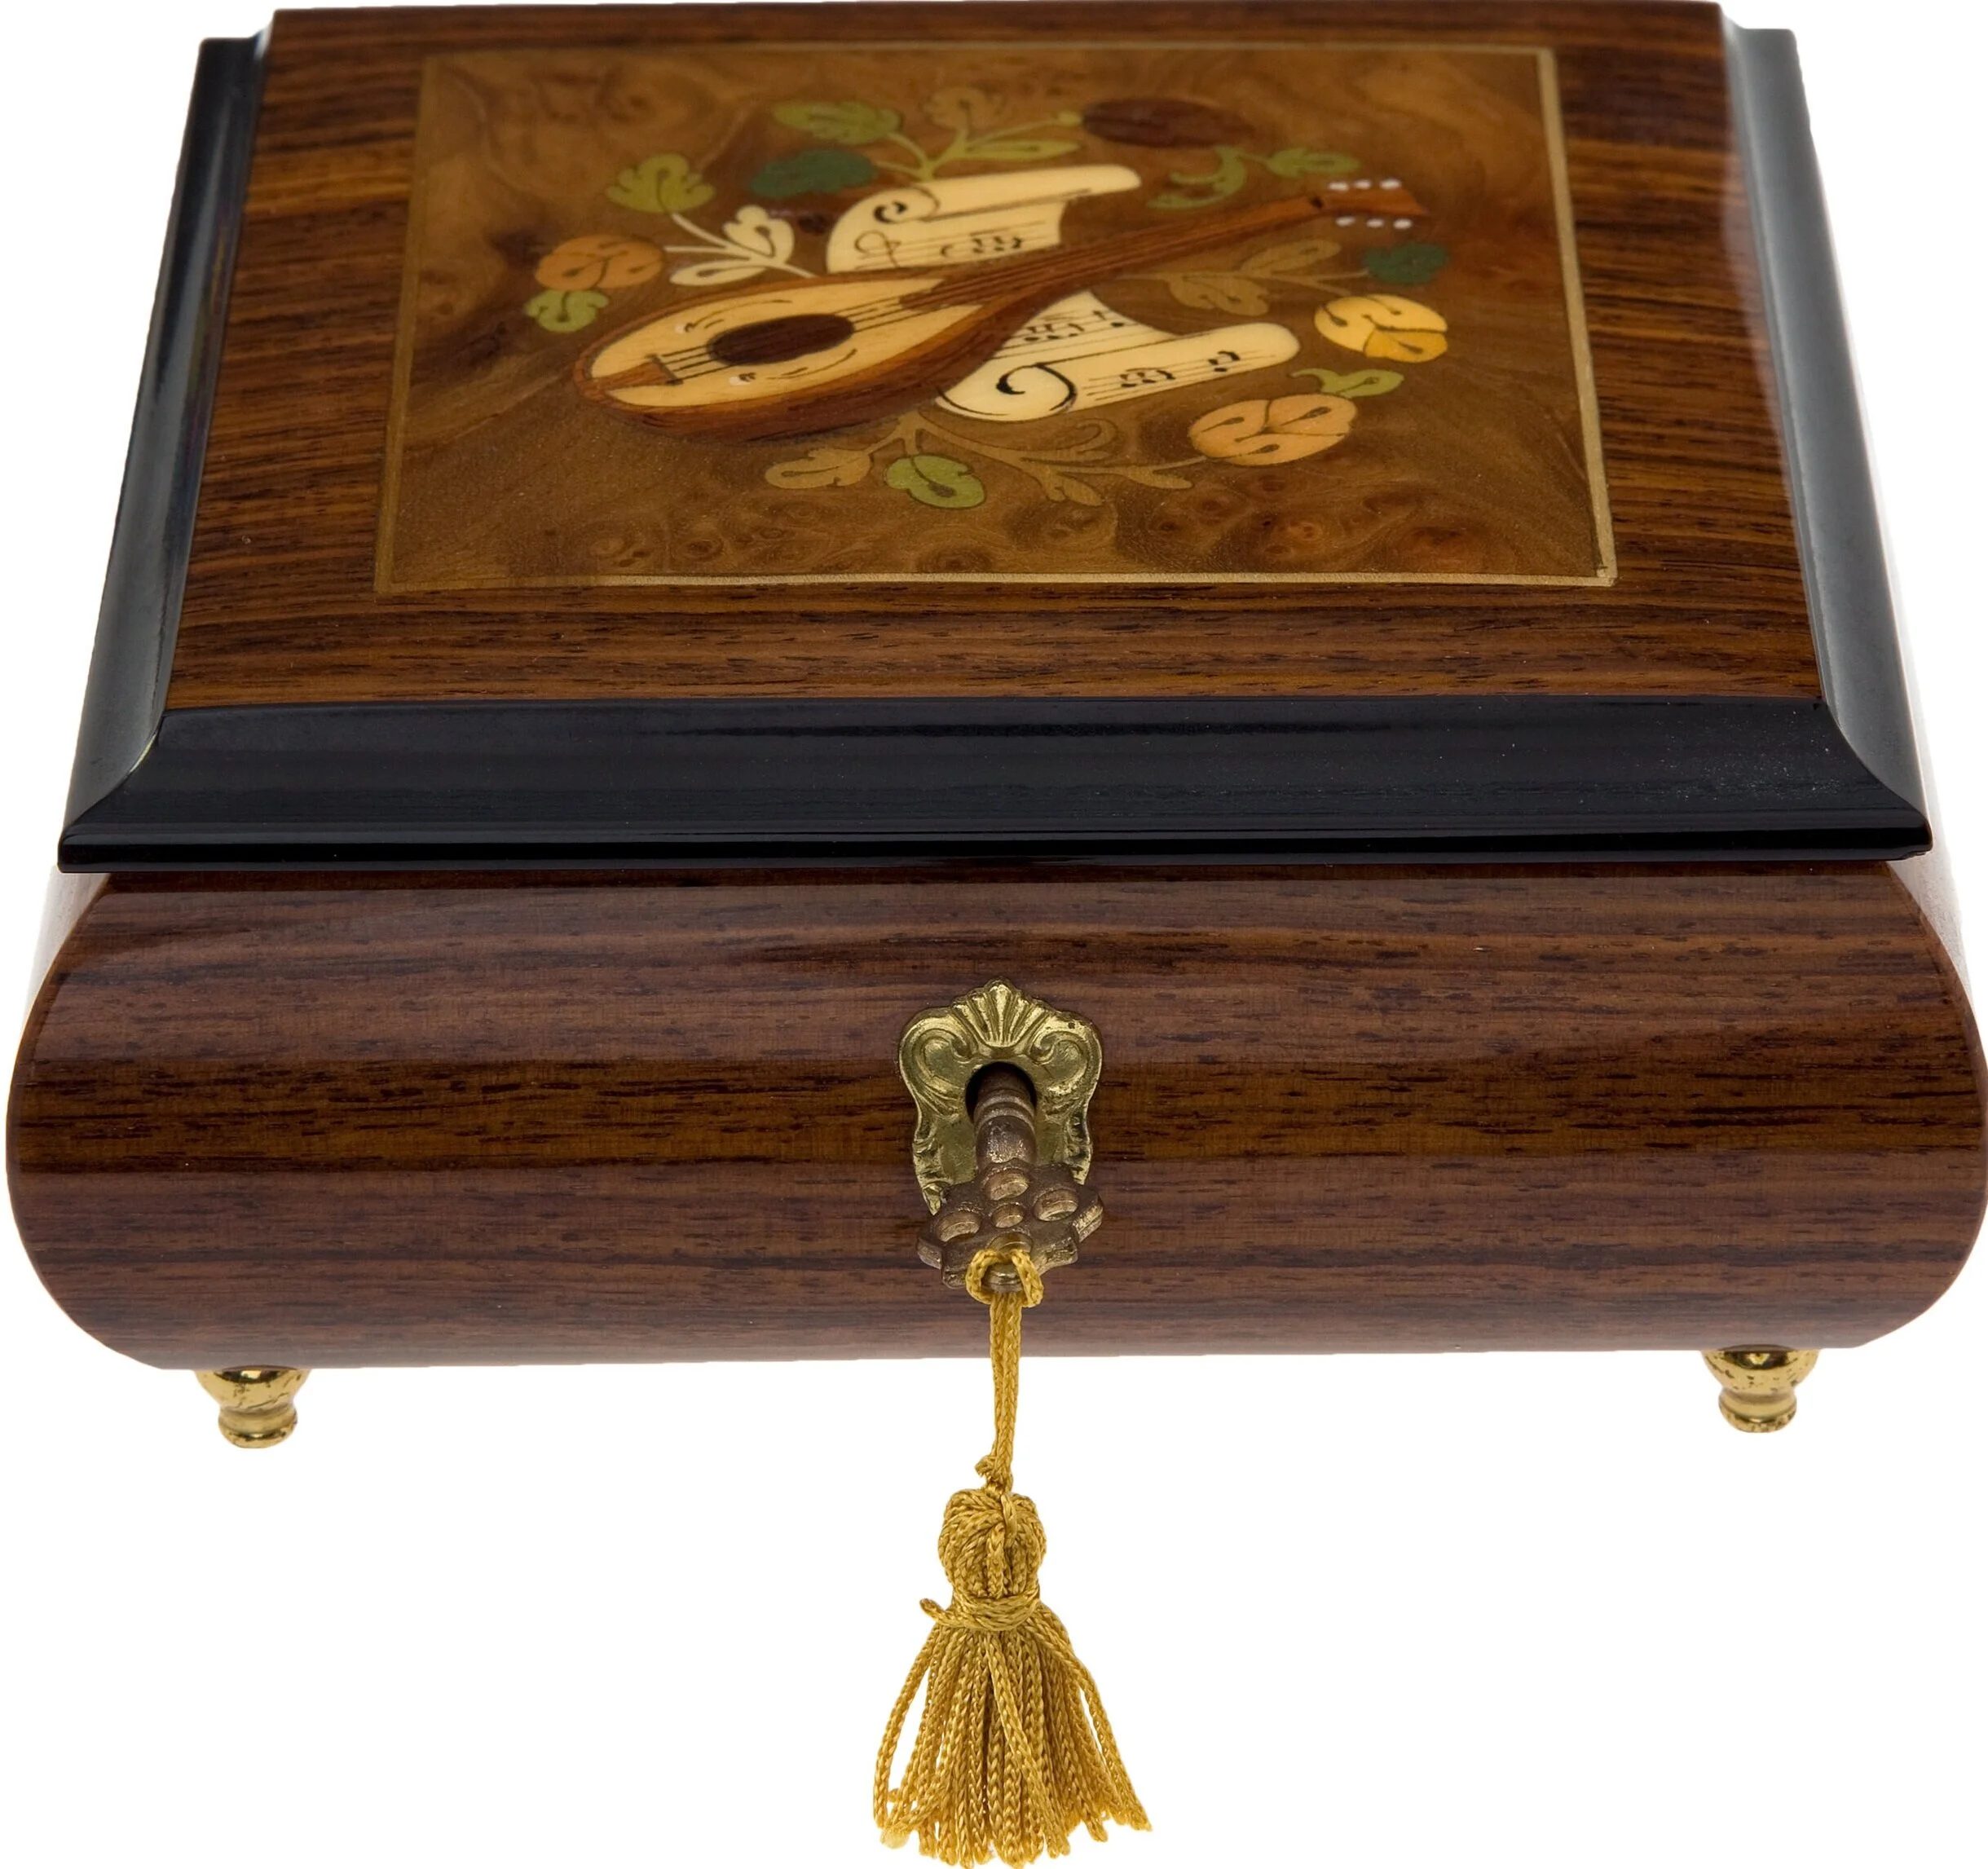
Below are some initial ideas I had for potential projects. I really loved the concept of marquetry—a type of woodworking that involves inlaid work made from small pieces of variously colored wood. Though extremely challenging and quite unforgiving, marquetry is beautiful when done correctly and it has always appealed to me as a potential large project.
Deciding on a Design
How can I narrow down my ideas to one final design?
Once I started looking at different marquetry projects, I decided that I wanted to build a table of sorts. This pushed me to start thinking about the different ways in which I could use marquetry in the making of a table, which is where I developed a fascination for trees. As I mentioned above, I loved the idea that I was building a tree out of a tree—it felt very full circle to me. Yet, I wanted to make my table a little more personal, which was when I got the idea of building my family tree.
Once I came up with the idea of a family tree table, I started sketching some ideas just to get something on paper.
Initial Sketches
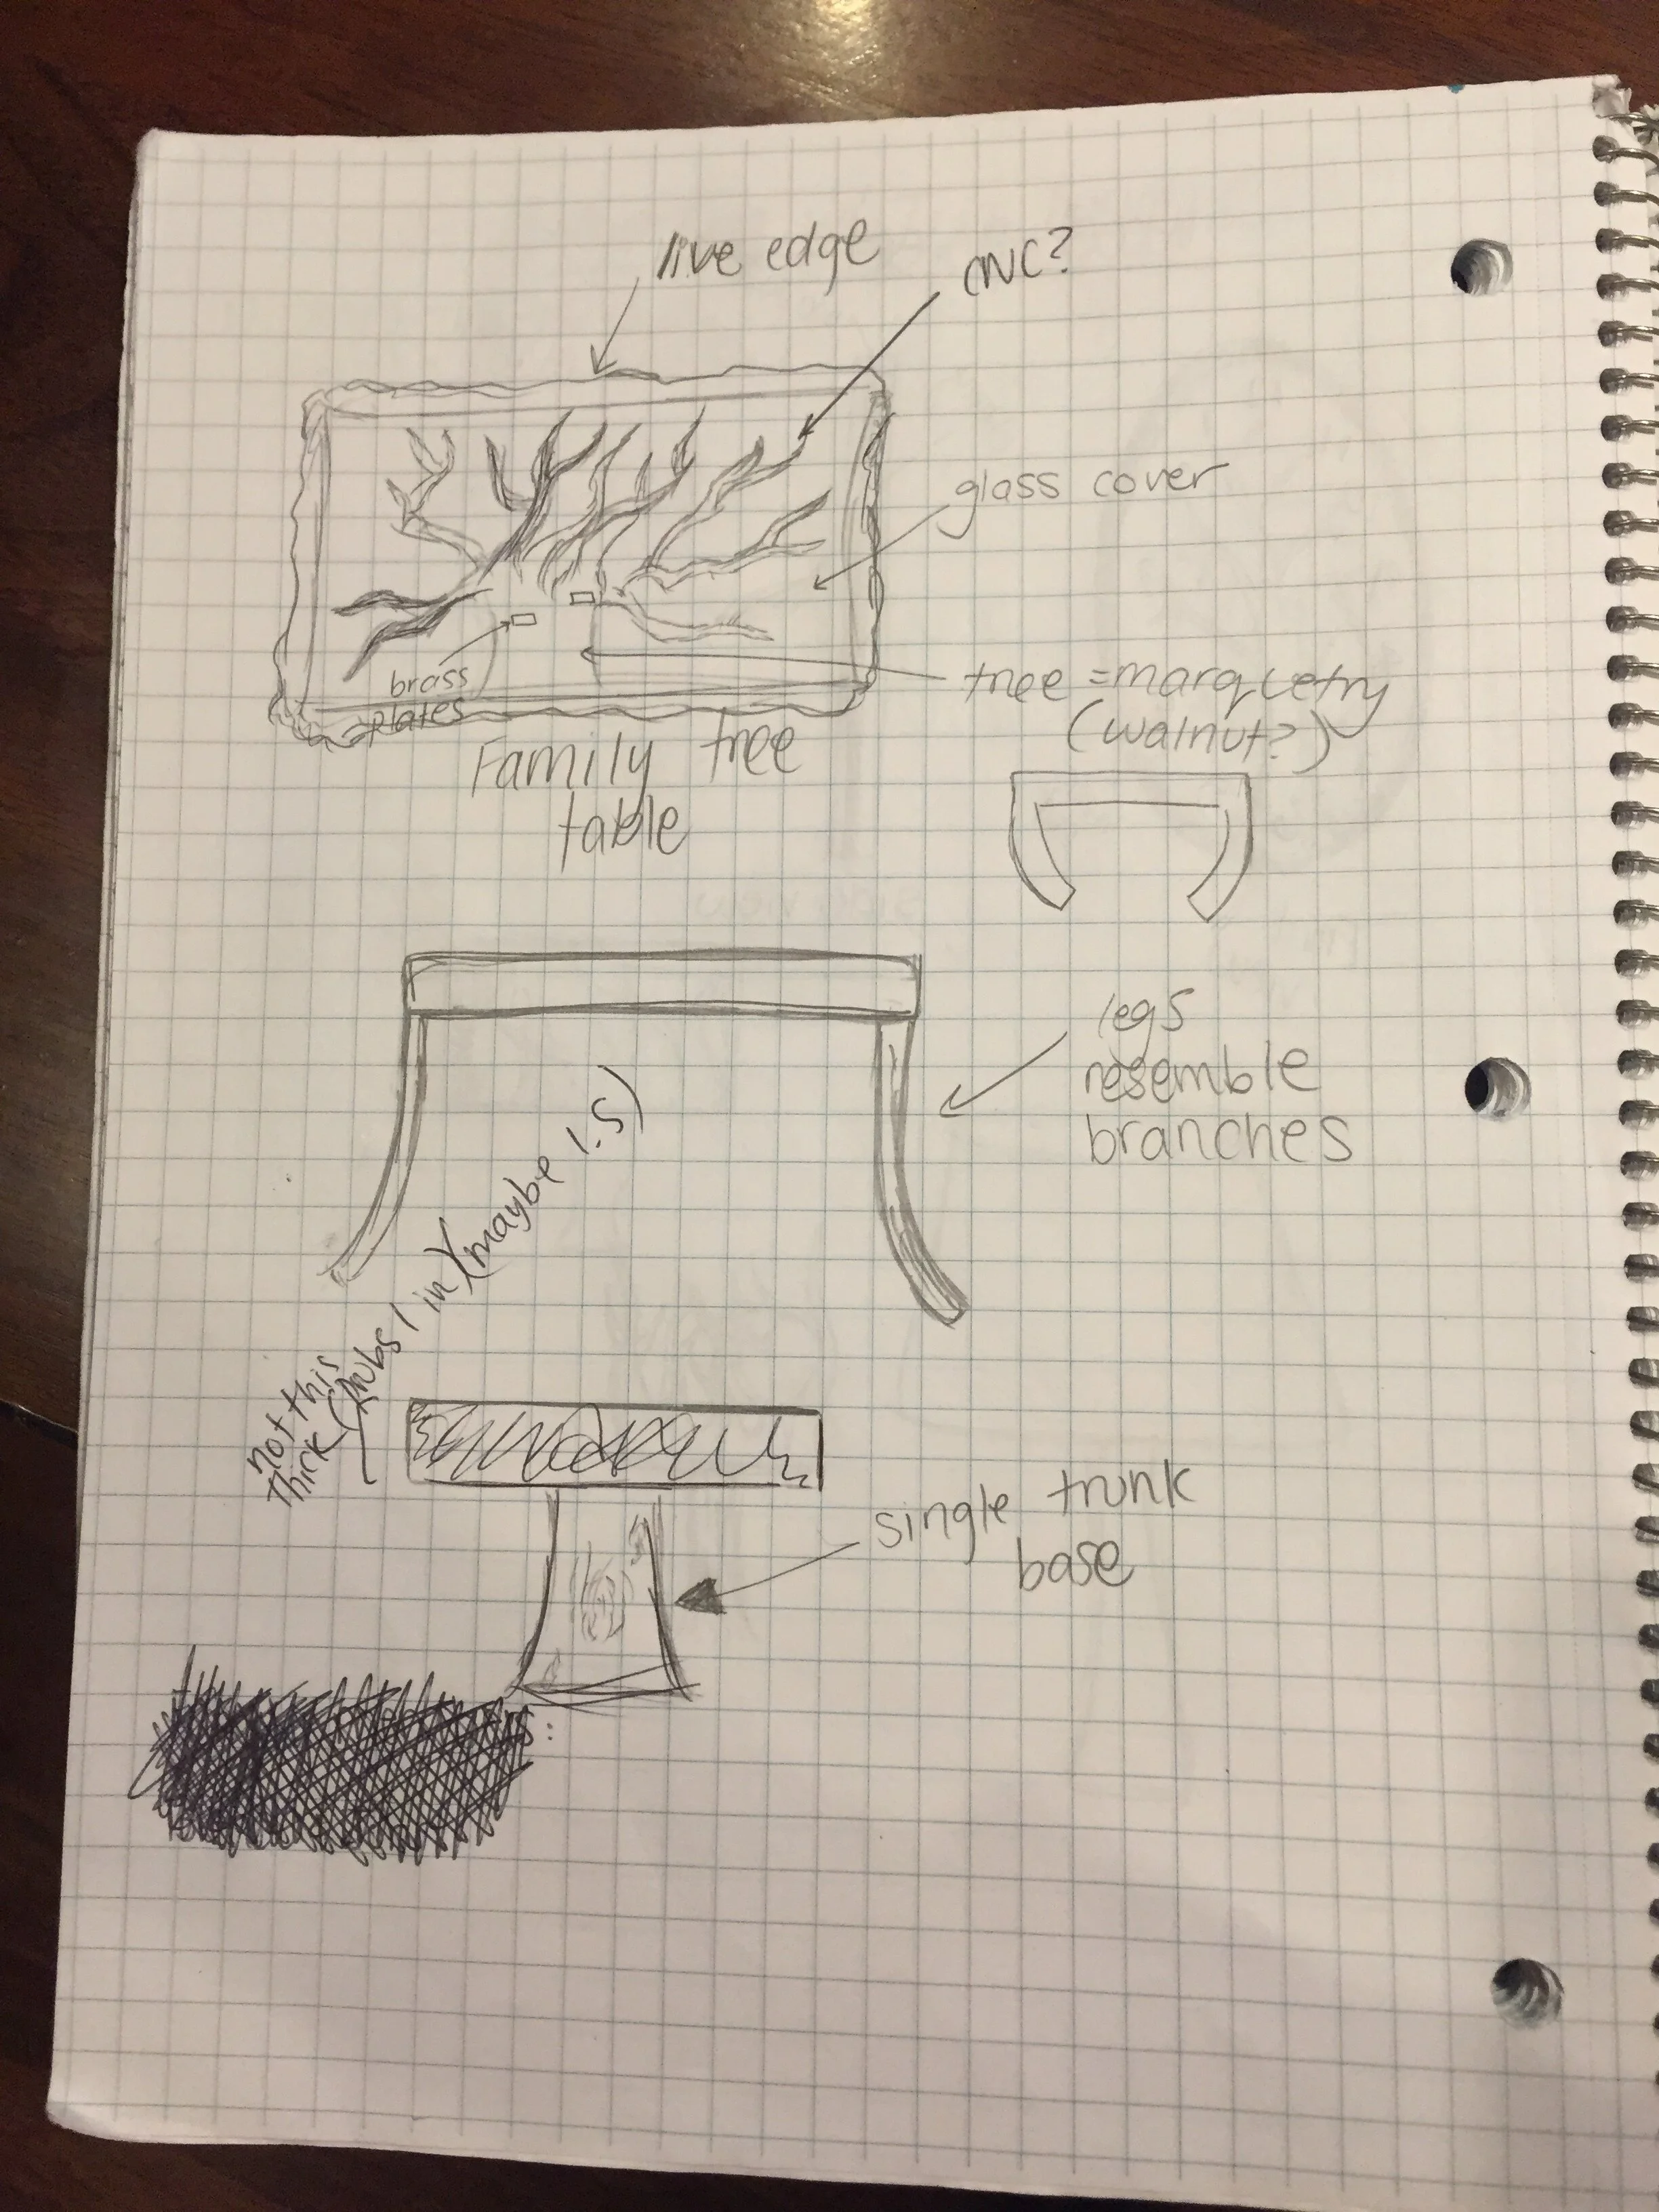
A couple different options for the foundation of the table
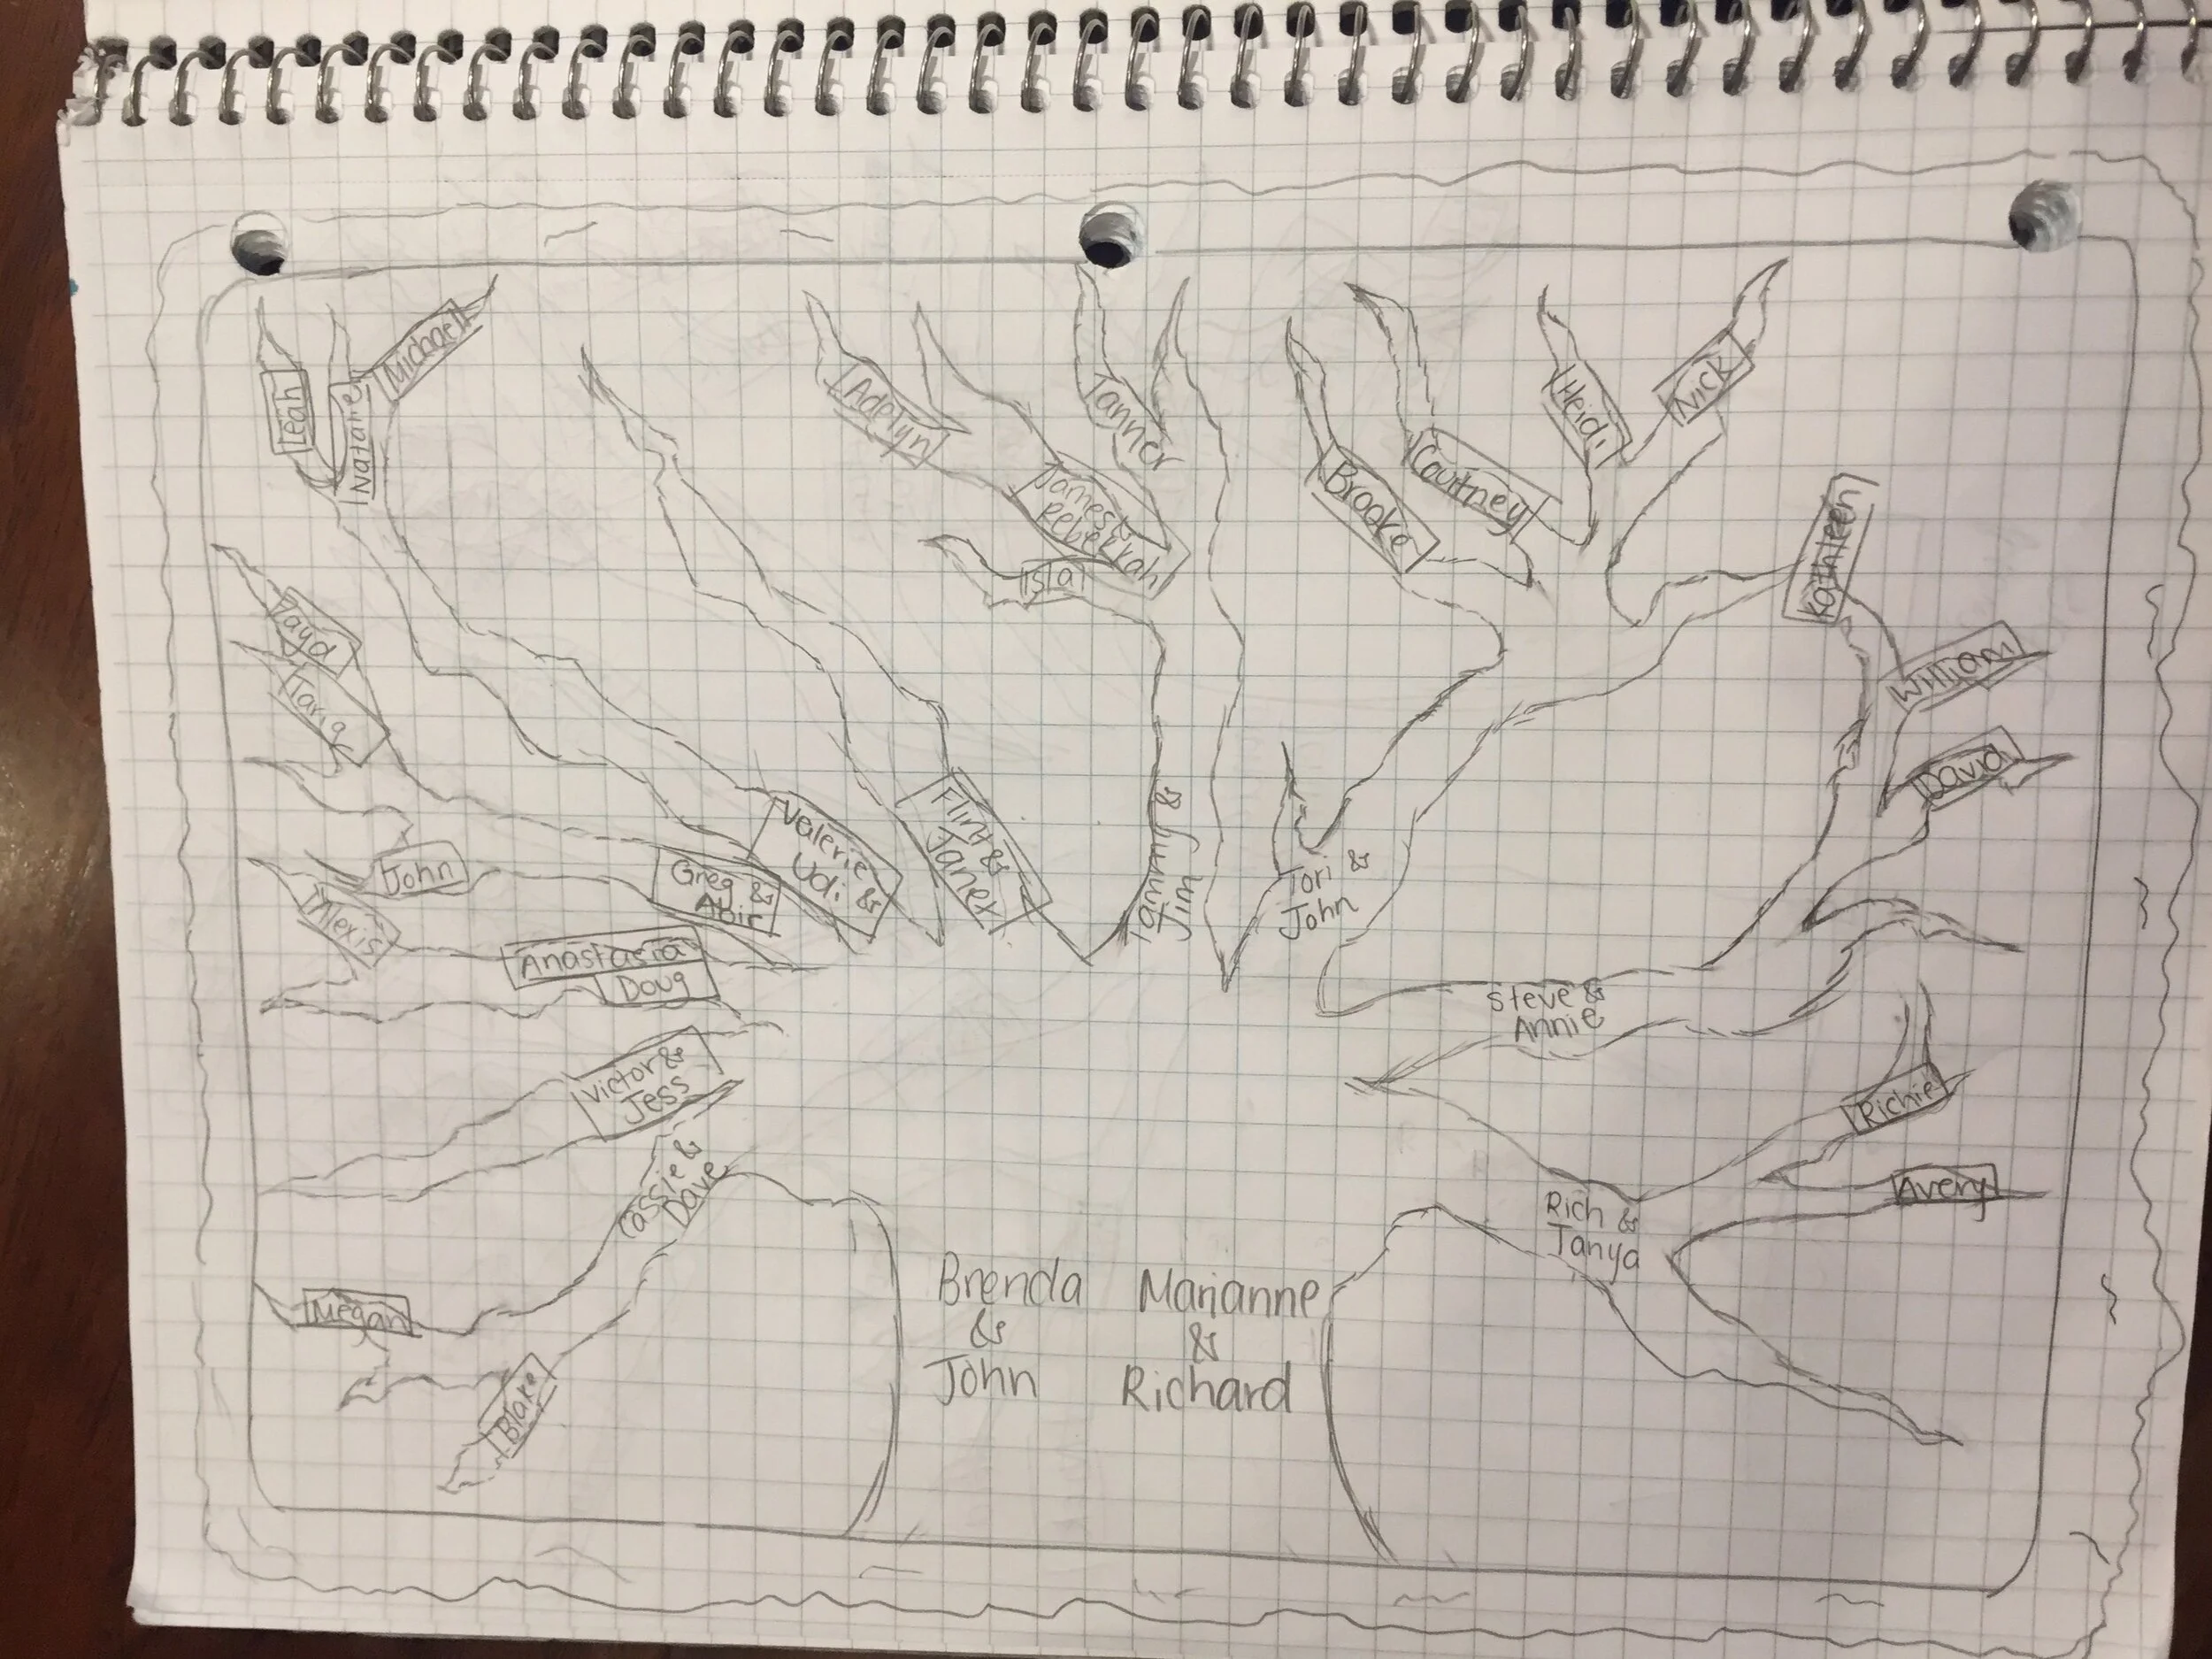
My initial sketch idea for the family tree—with the trunk being the basis of the family (grandparents on both sides) and everyone branching out of the main trunk
Once I had decided that I wanted the table top to resemble my family tree (with labels of some sort for each family member), I moved on to design the foundation of the table. I had a lot of room for creativity at this point, so I sketched a few different versions of tables with varying leg, tabletop, and center shaft styles. My ultimate goal was to make the table look as organic as possible, so I played with the idea of using live edge (the bark part of the tree for added decoration), resin, glass, one leg as the center “trunk,” four legs for added stability, etc.
Paper Prototypes
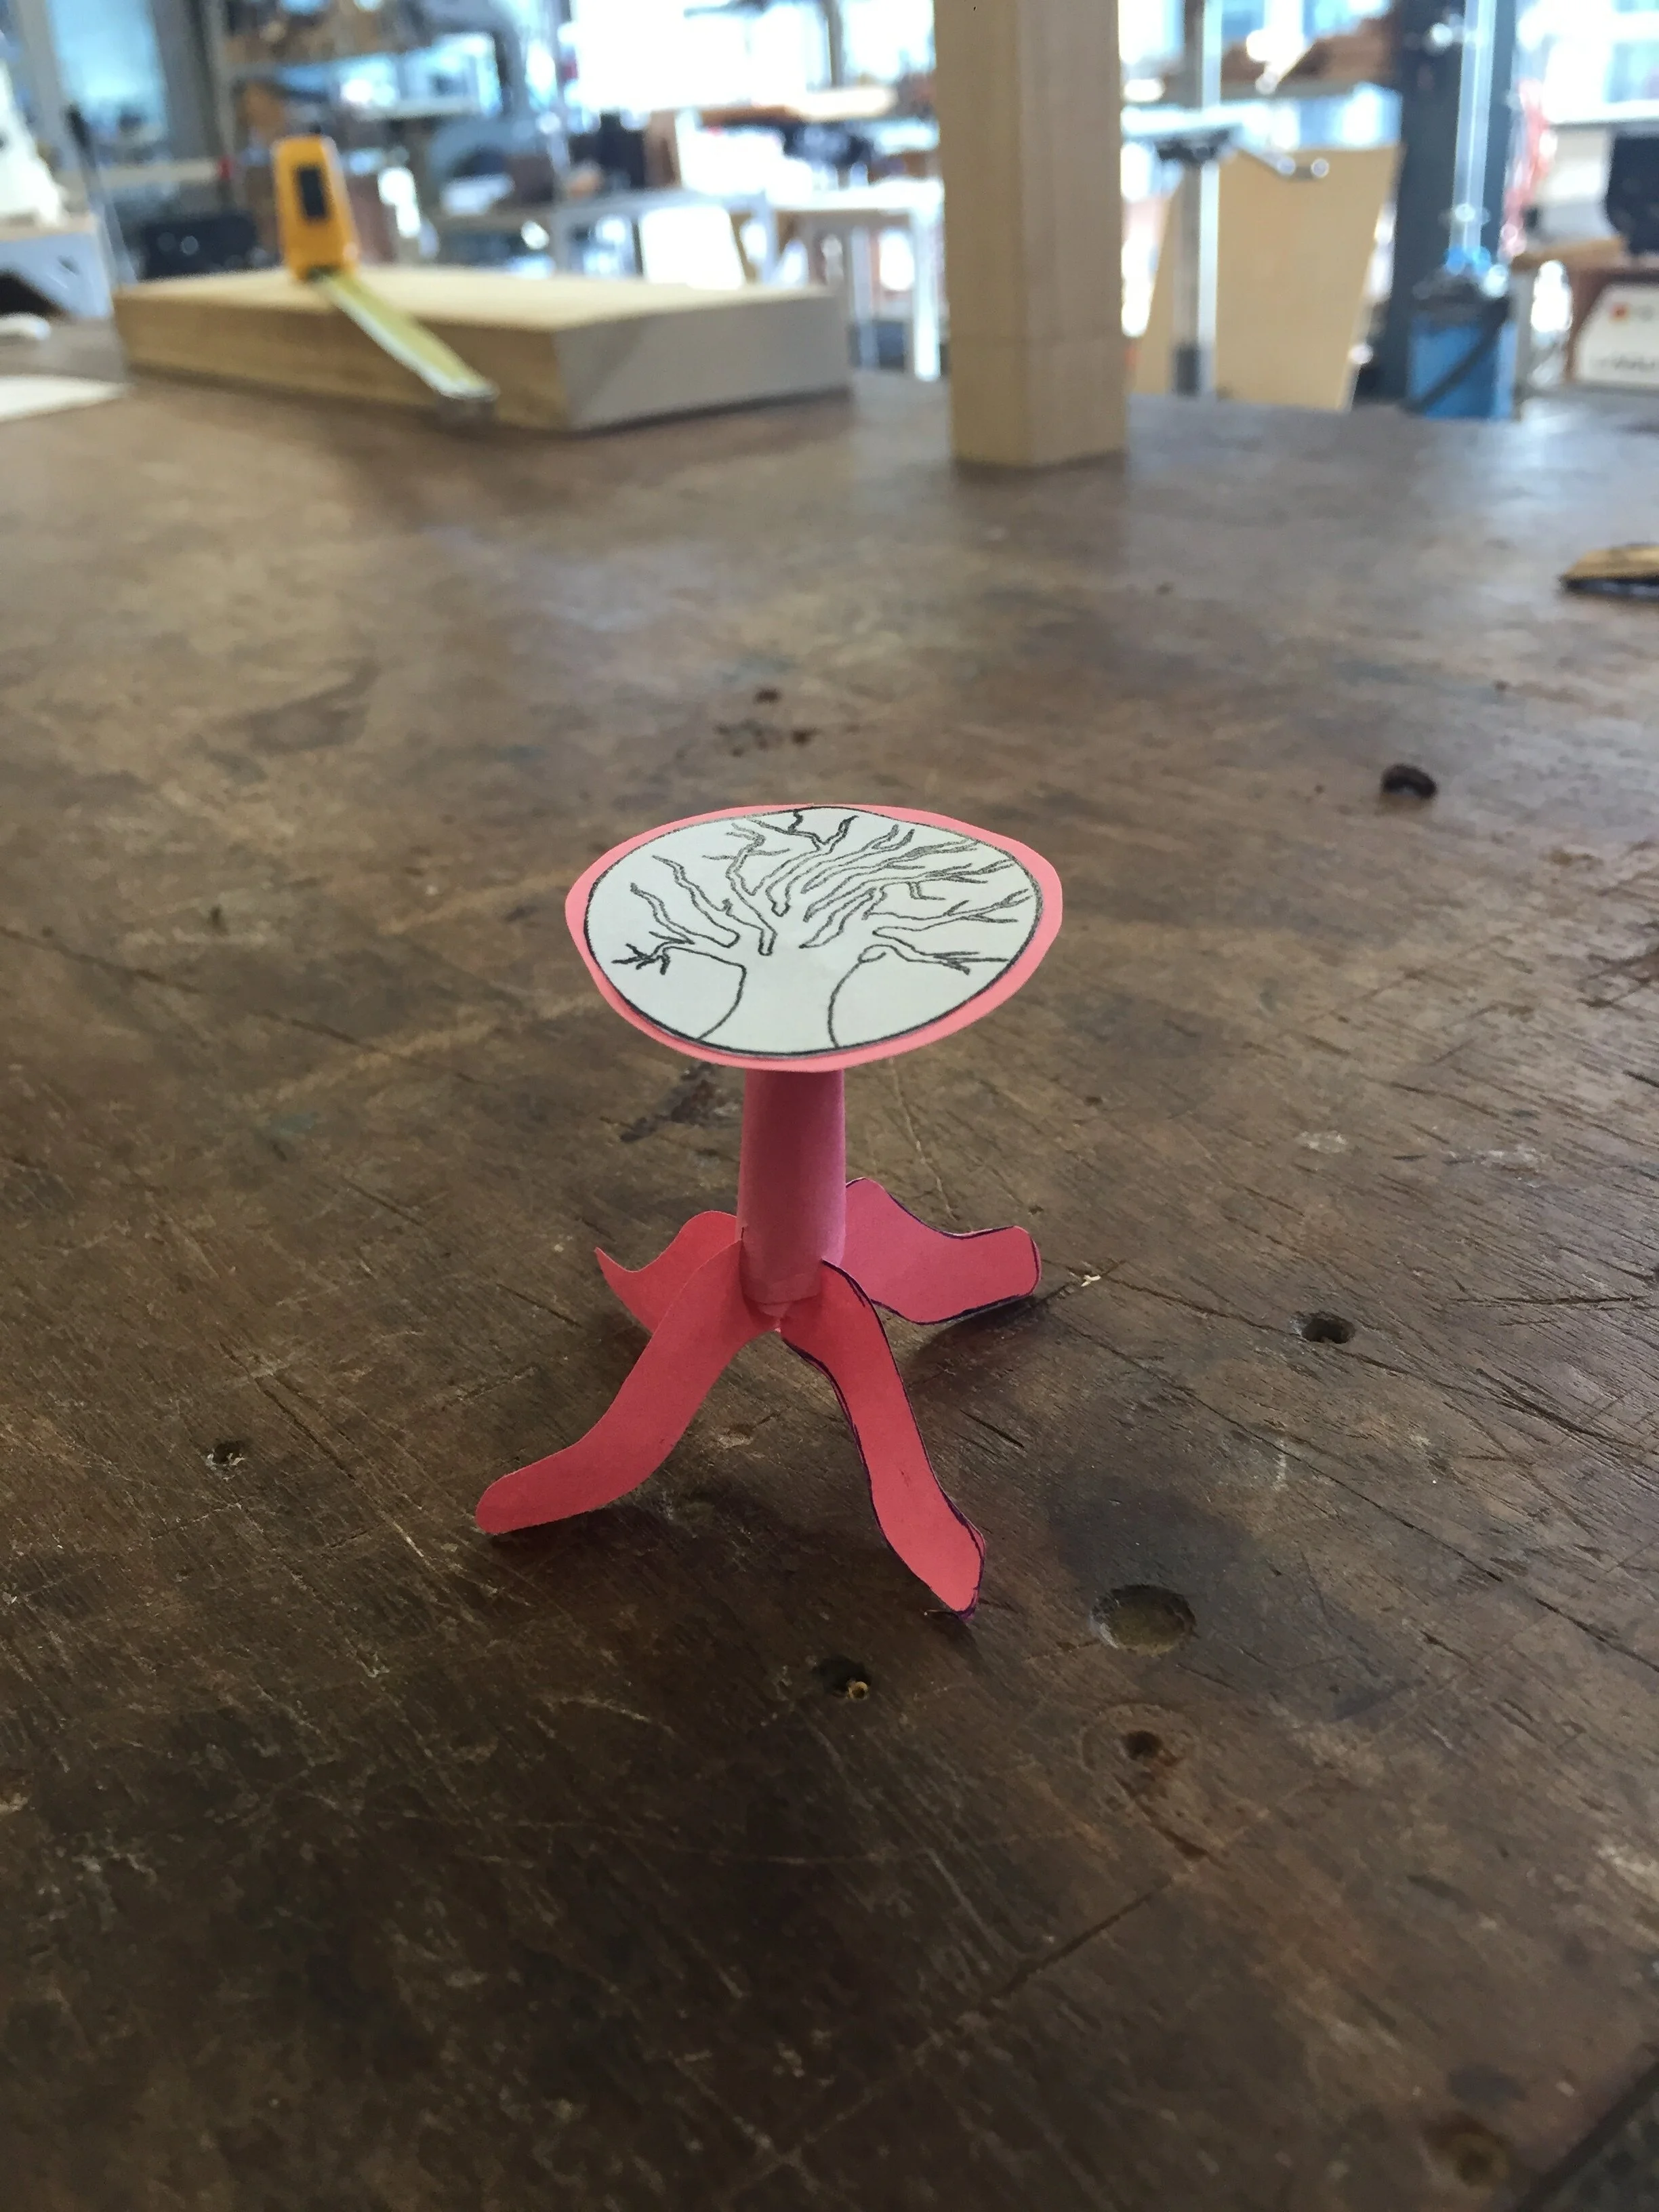
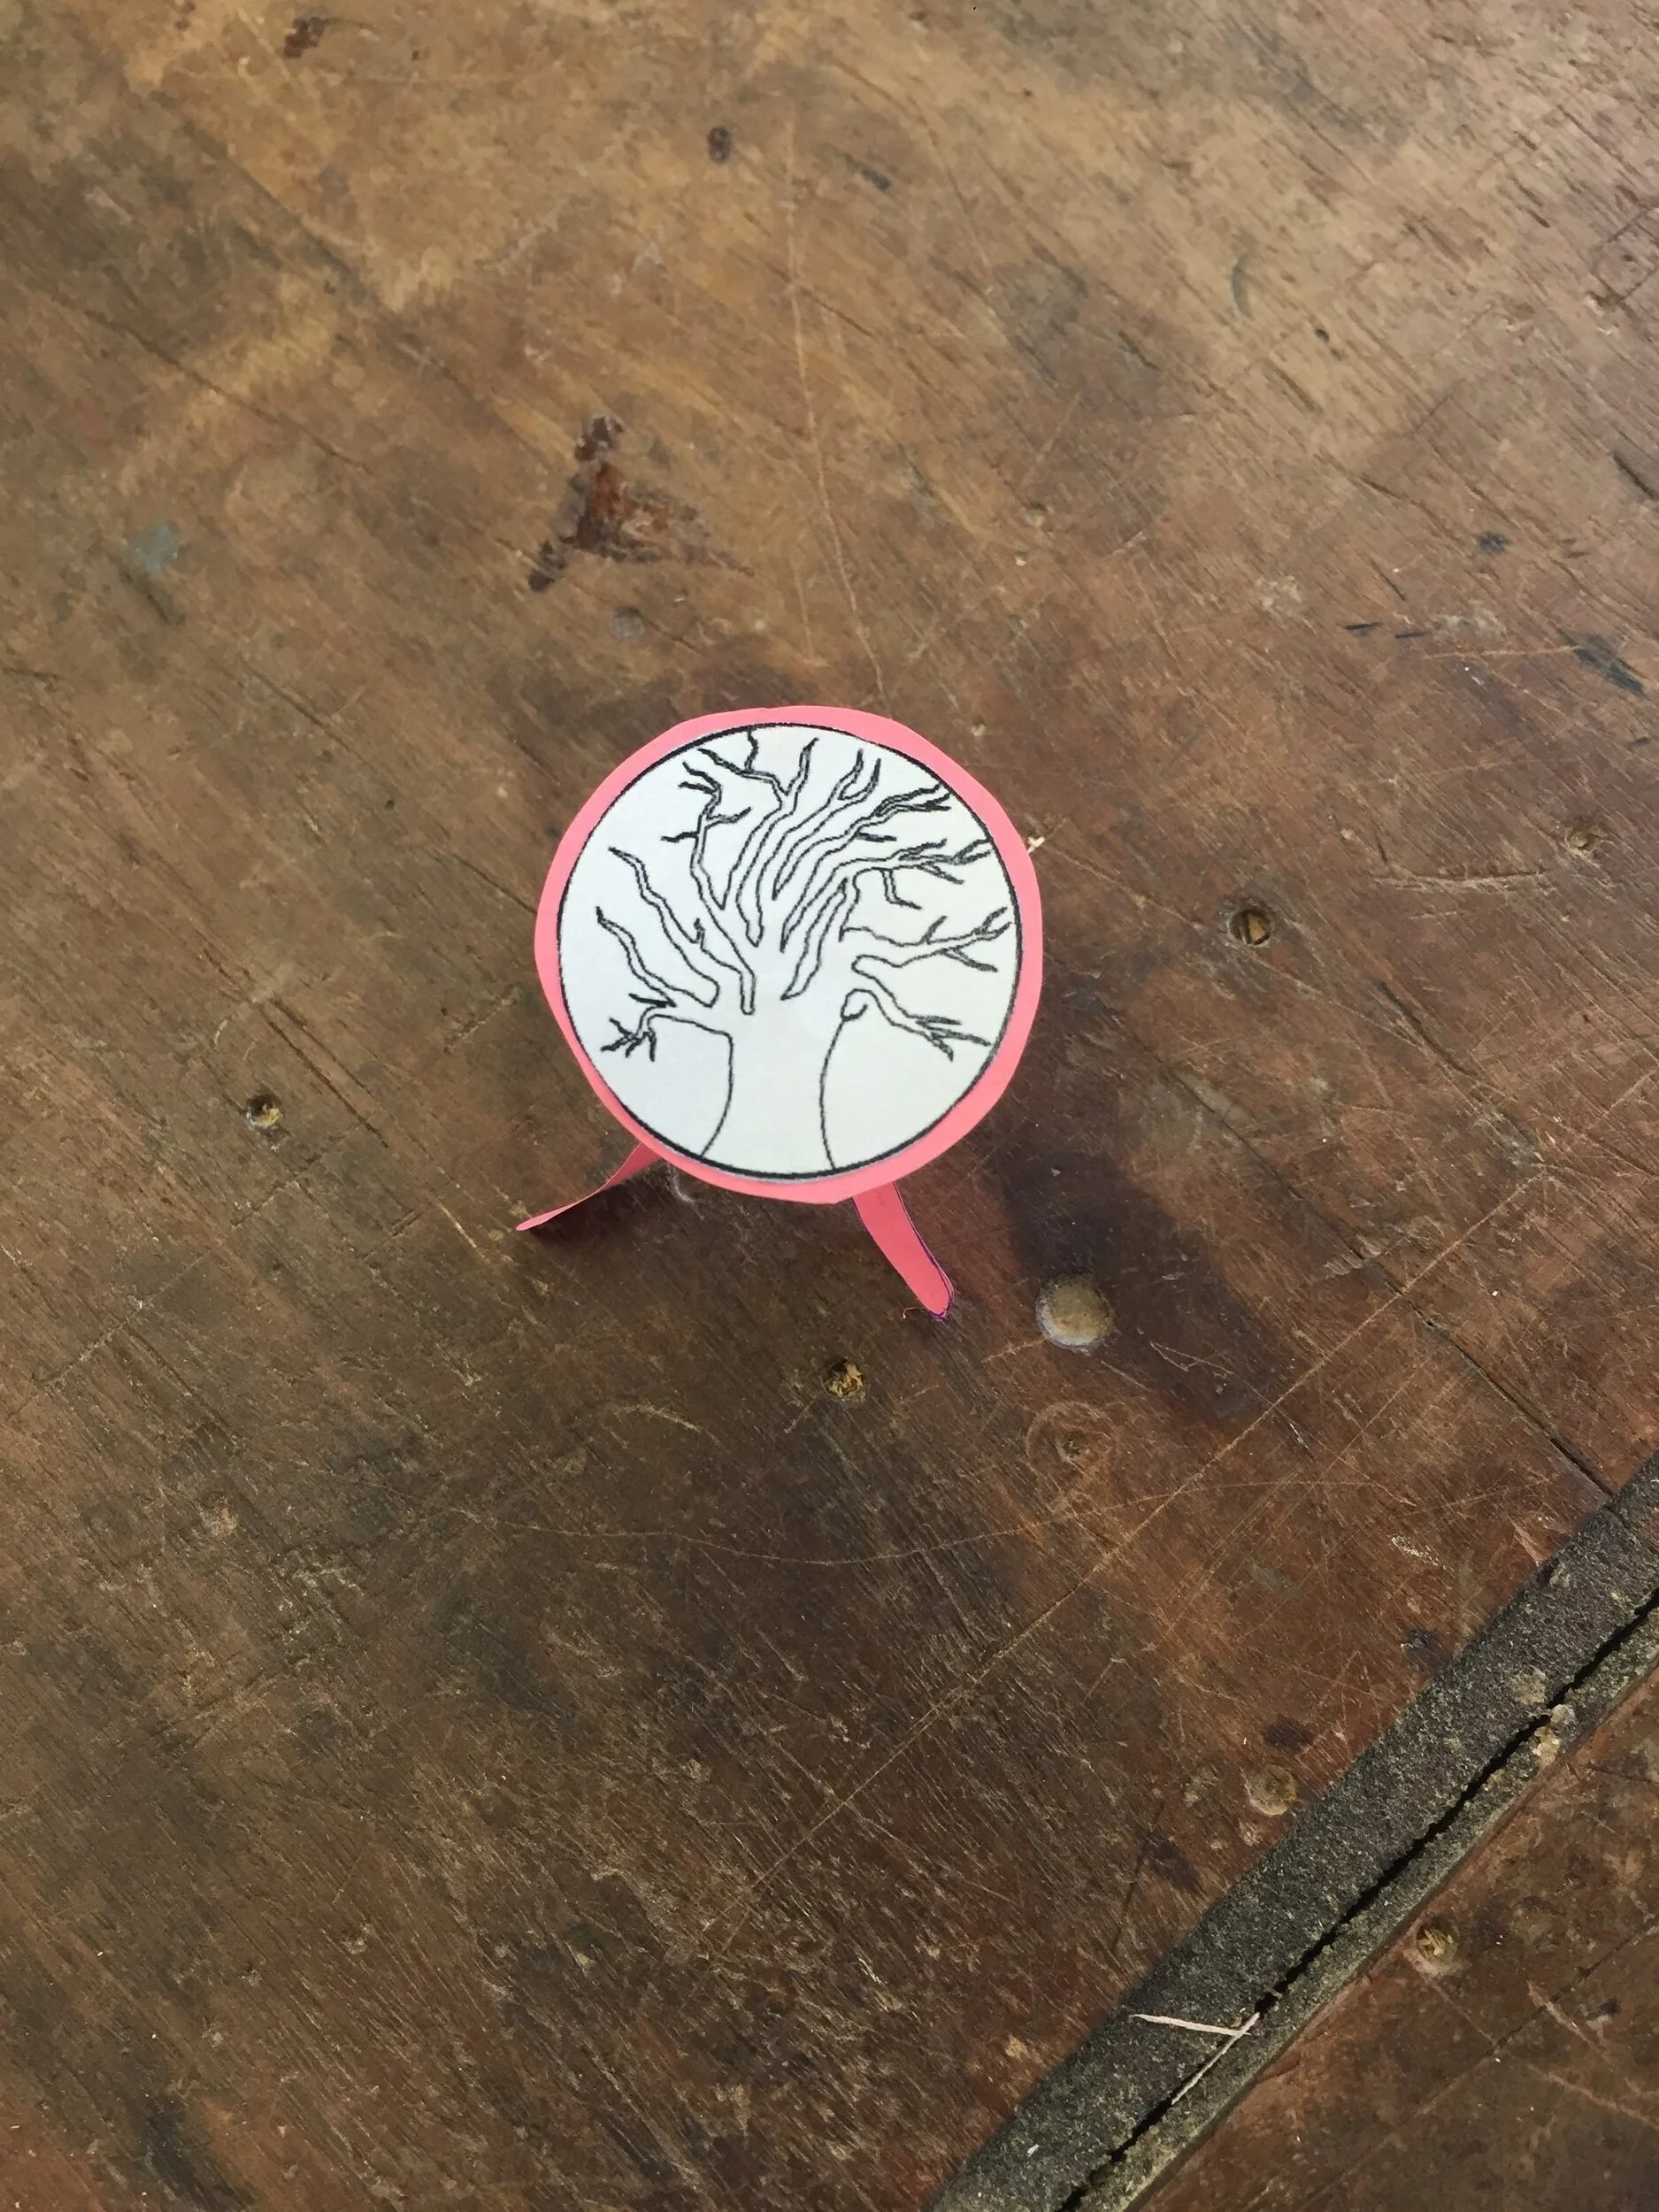
My next task was to build a small paper prototype of my final table design. I ultimately decided on a round table top, because I felt it catered best to my tree design and would look more natural and elegant as a side table. My plan was to engrave the tree along with my family member’s names on a piece of lighter wood (like poplar or cherry) and overlay the negative cutout of the tree on a piece of darker wood (like walnut or ebony). I then planned to fill the space with a clear resin of some sort, so the surfaces were flushed. In terms of the table shaft and legs, my thought was that by doing one slender shaft connected to four interwoven legs, the legs would look like they were branching out of the tabletop, which satisfied my desire for the table to look organic. Once I had a good conceptual idea of what I wanted the table to physically look like, I moved on to fabricating each respective part.
Building the Tabletop
Unsurprisingly, the tabletop was the most challenging part of the entire project. From the initial CAD design to the finished product, the tabletop took me three full weeks alone.
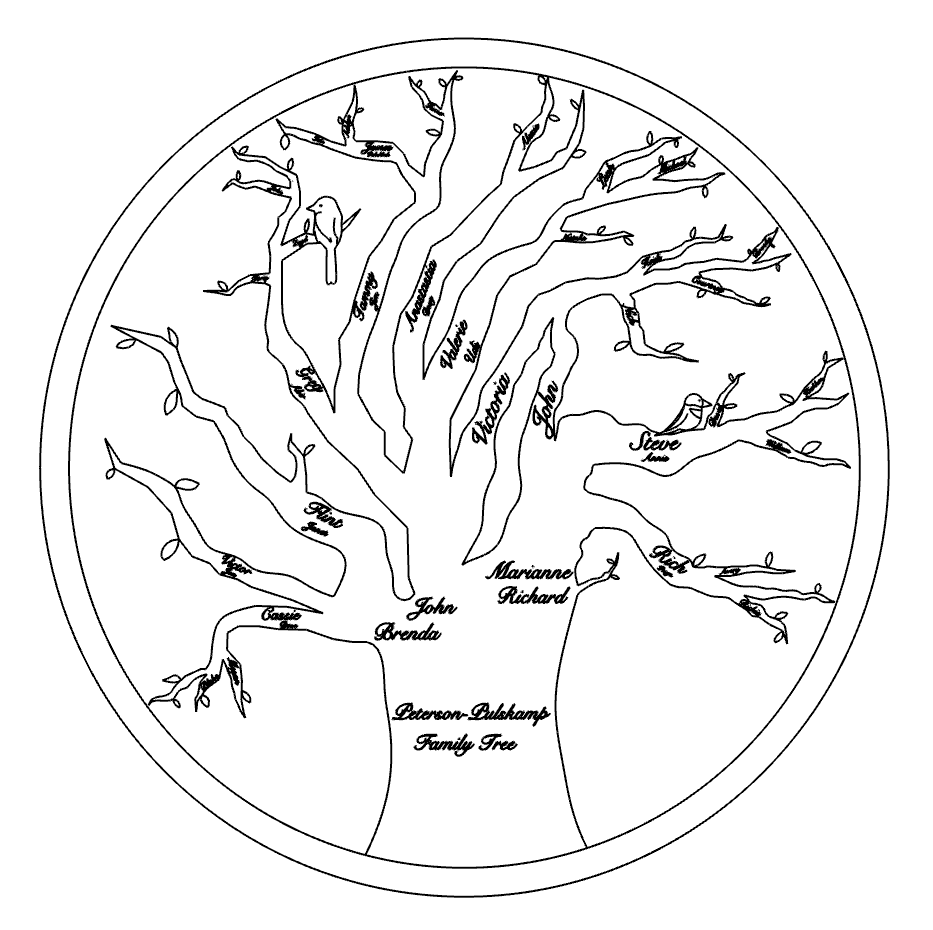
Building the Tree Design
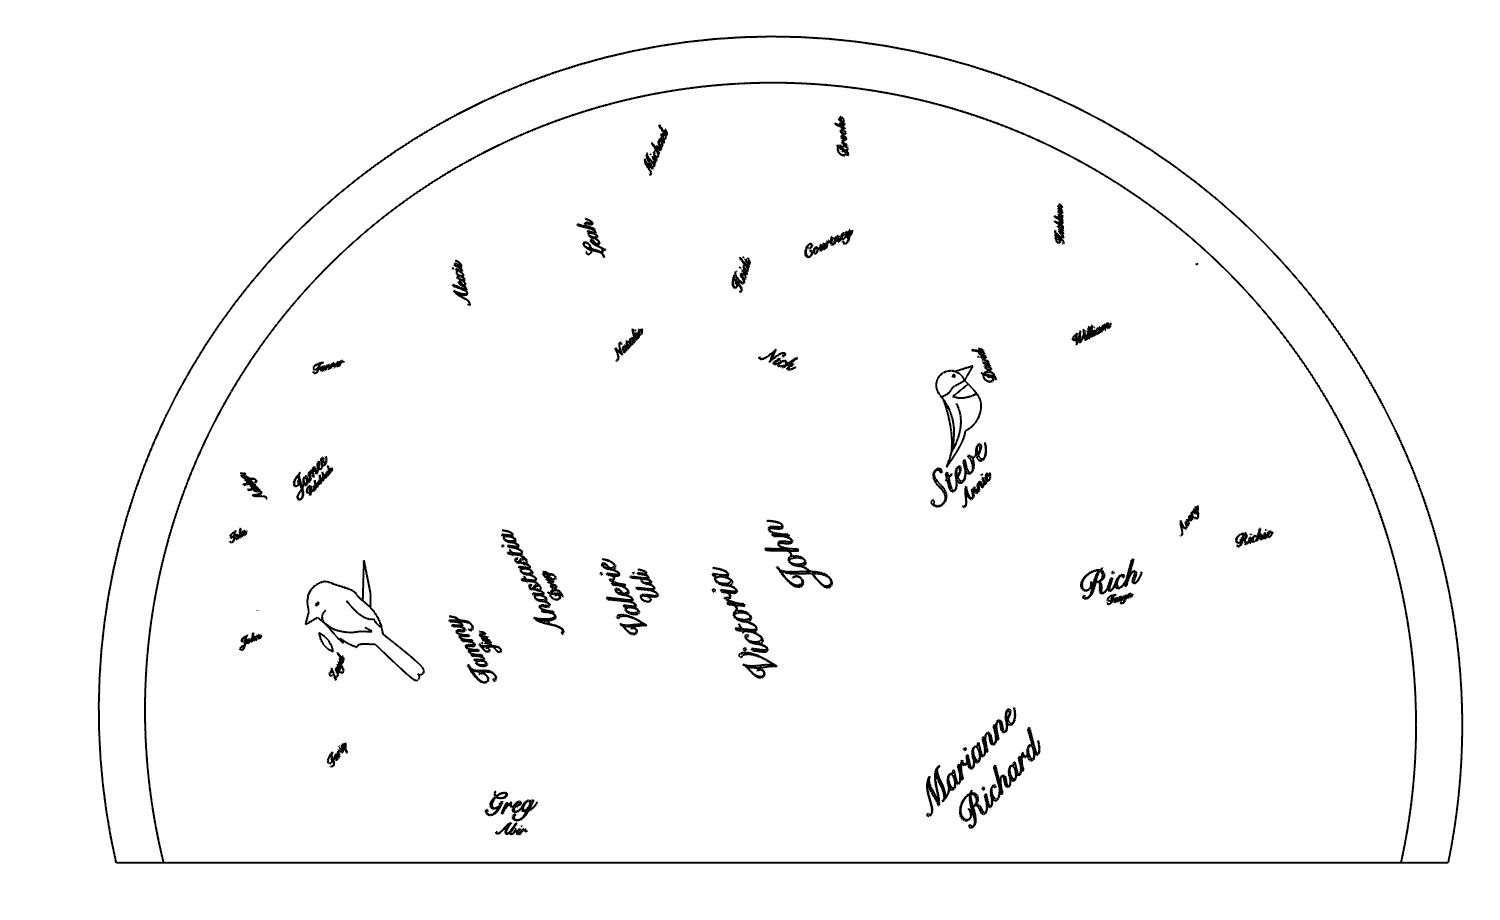
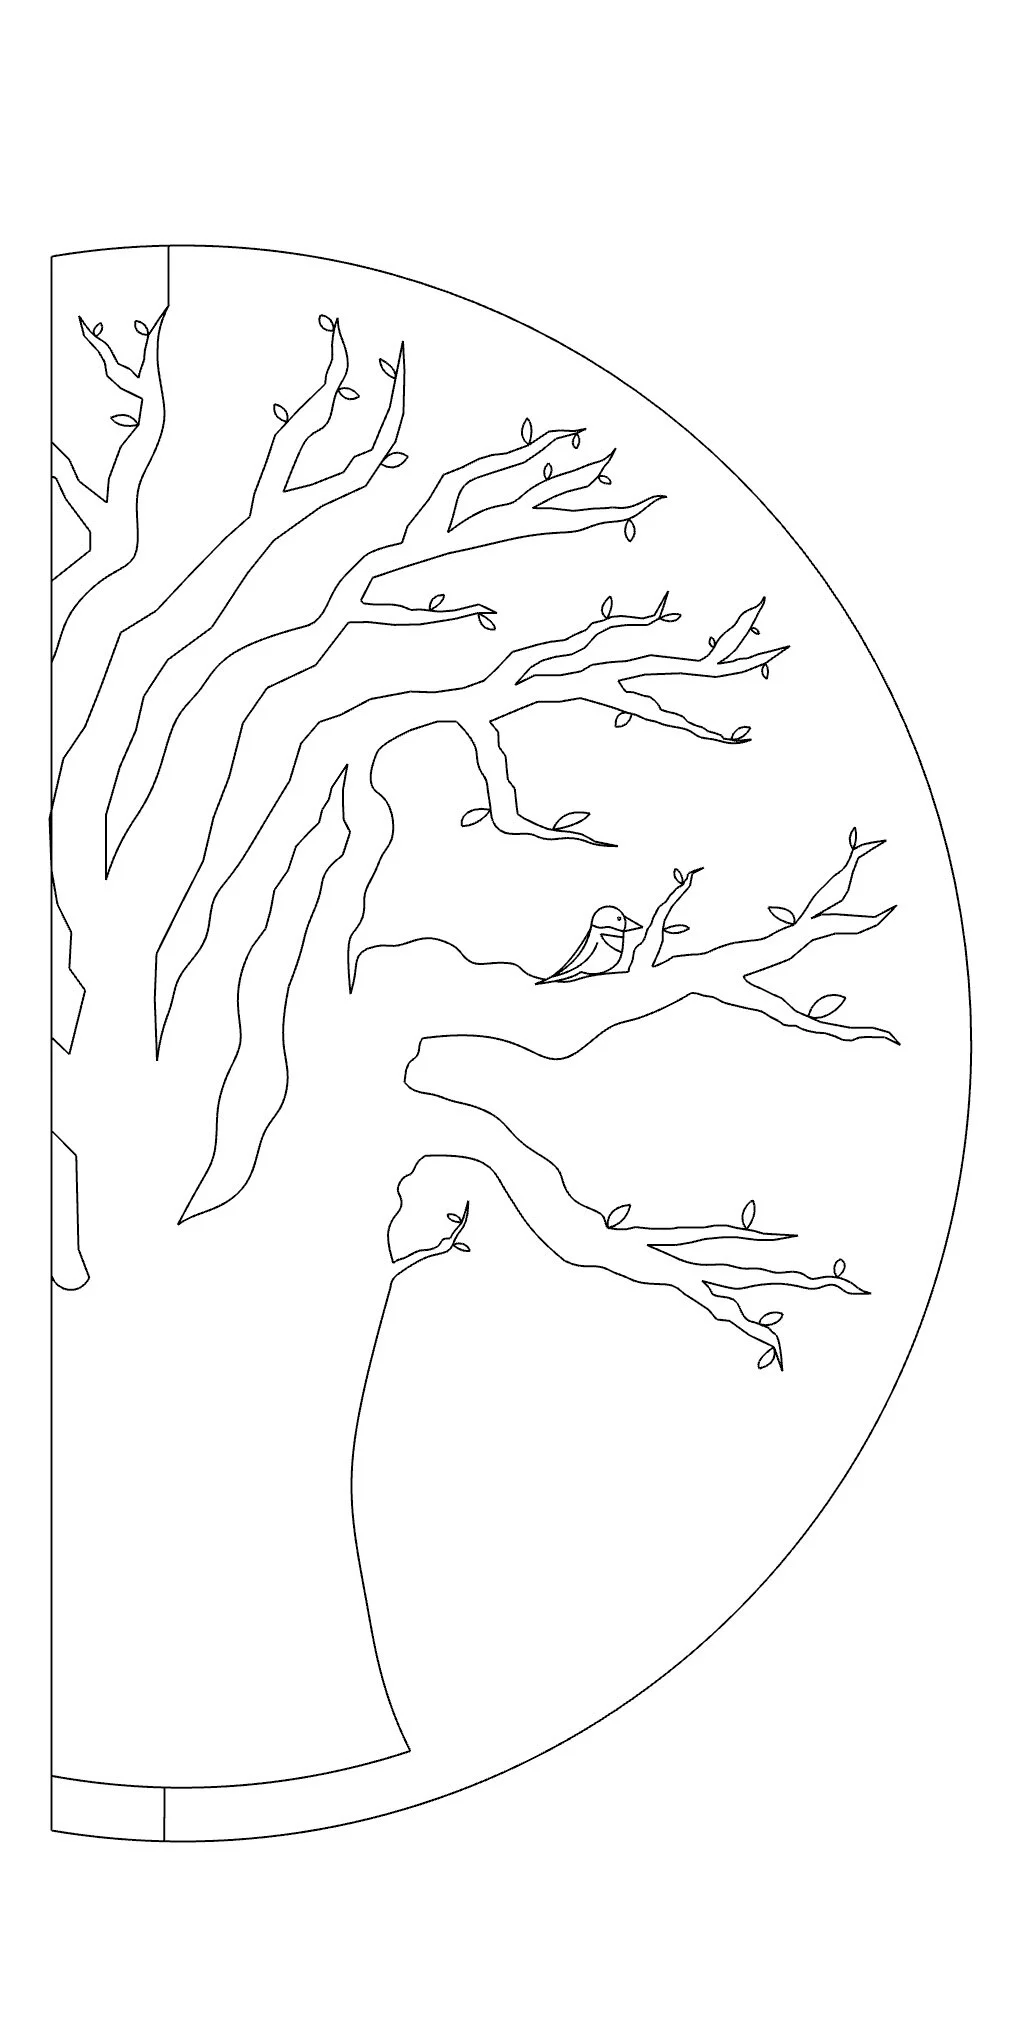
I decided the best way to design the tree tabletop was in a 3D CAD program called Rhinoceros. I was able to make organic lines and curvatures to create the outline of the tree (with leaves and birds for added realism) as well as text to add the name of each of my extended family members, which was …. a lot. It took lots of formatting, reformatting, and more formatting, but I had finally created a tree design that I was proud of and excited to create.
Laser Cutting the Prototype
Before I laser cut the final piece of wood, I practiced on some medium density fiberboard (MDF)—an engineered wood product made by breaking down hardwood or softwood residuals into wood fibers. It’s used for practice because it’s cheap, thin, easy to buy in bulk, but still made out of wood so I could get a good idea of what my final design was going to look like.
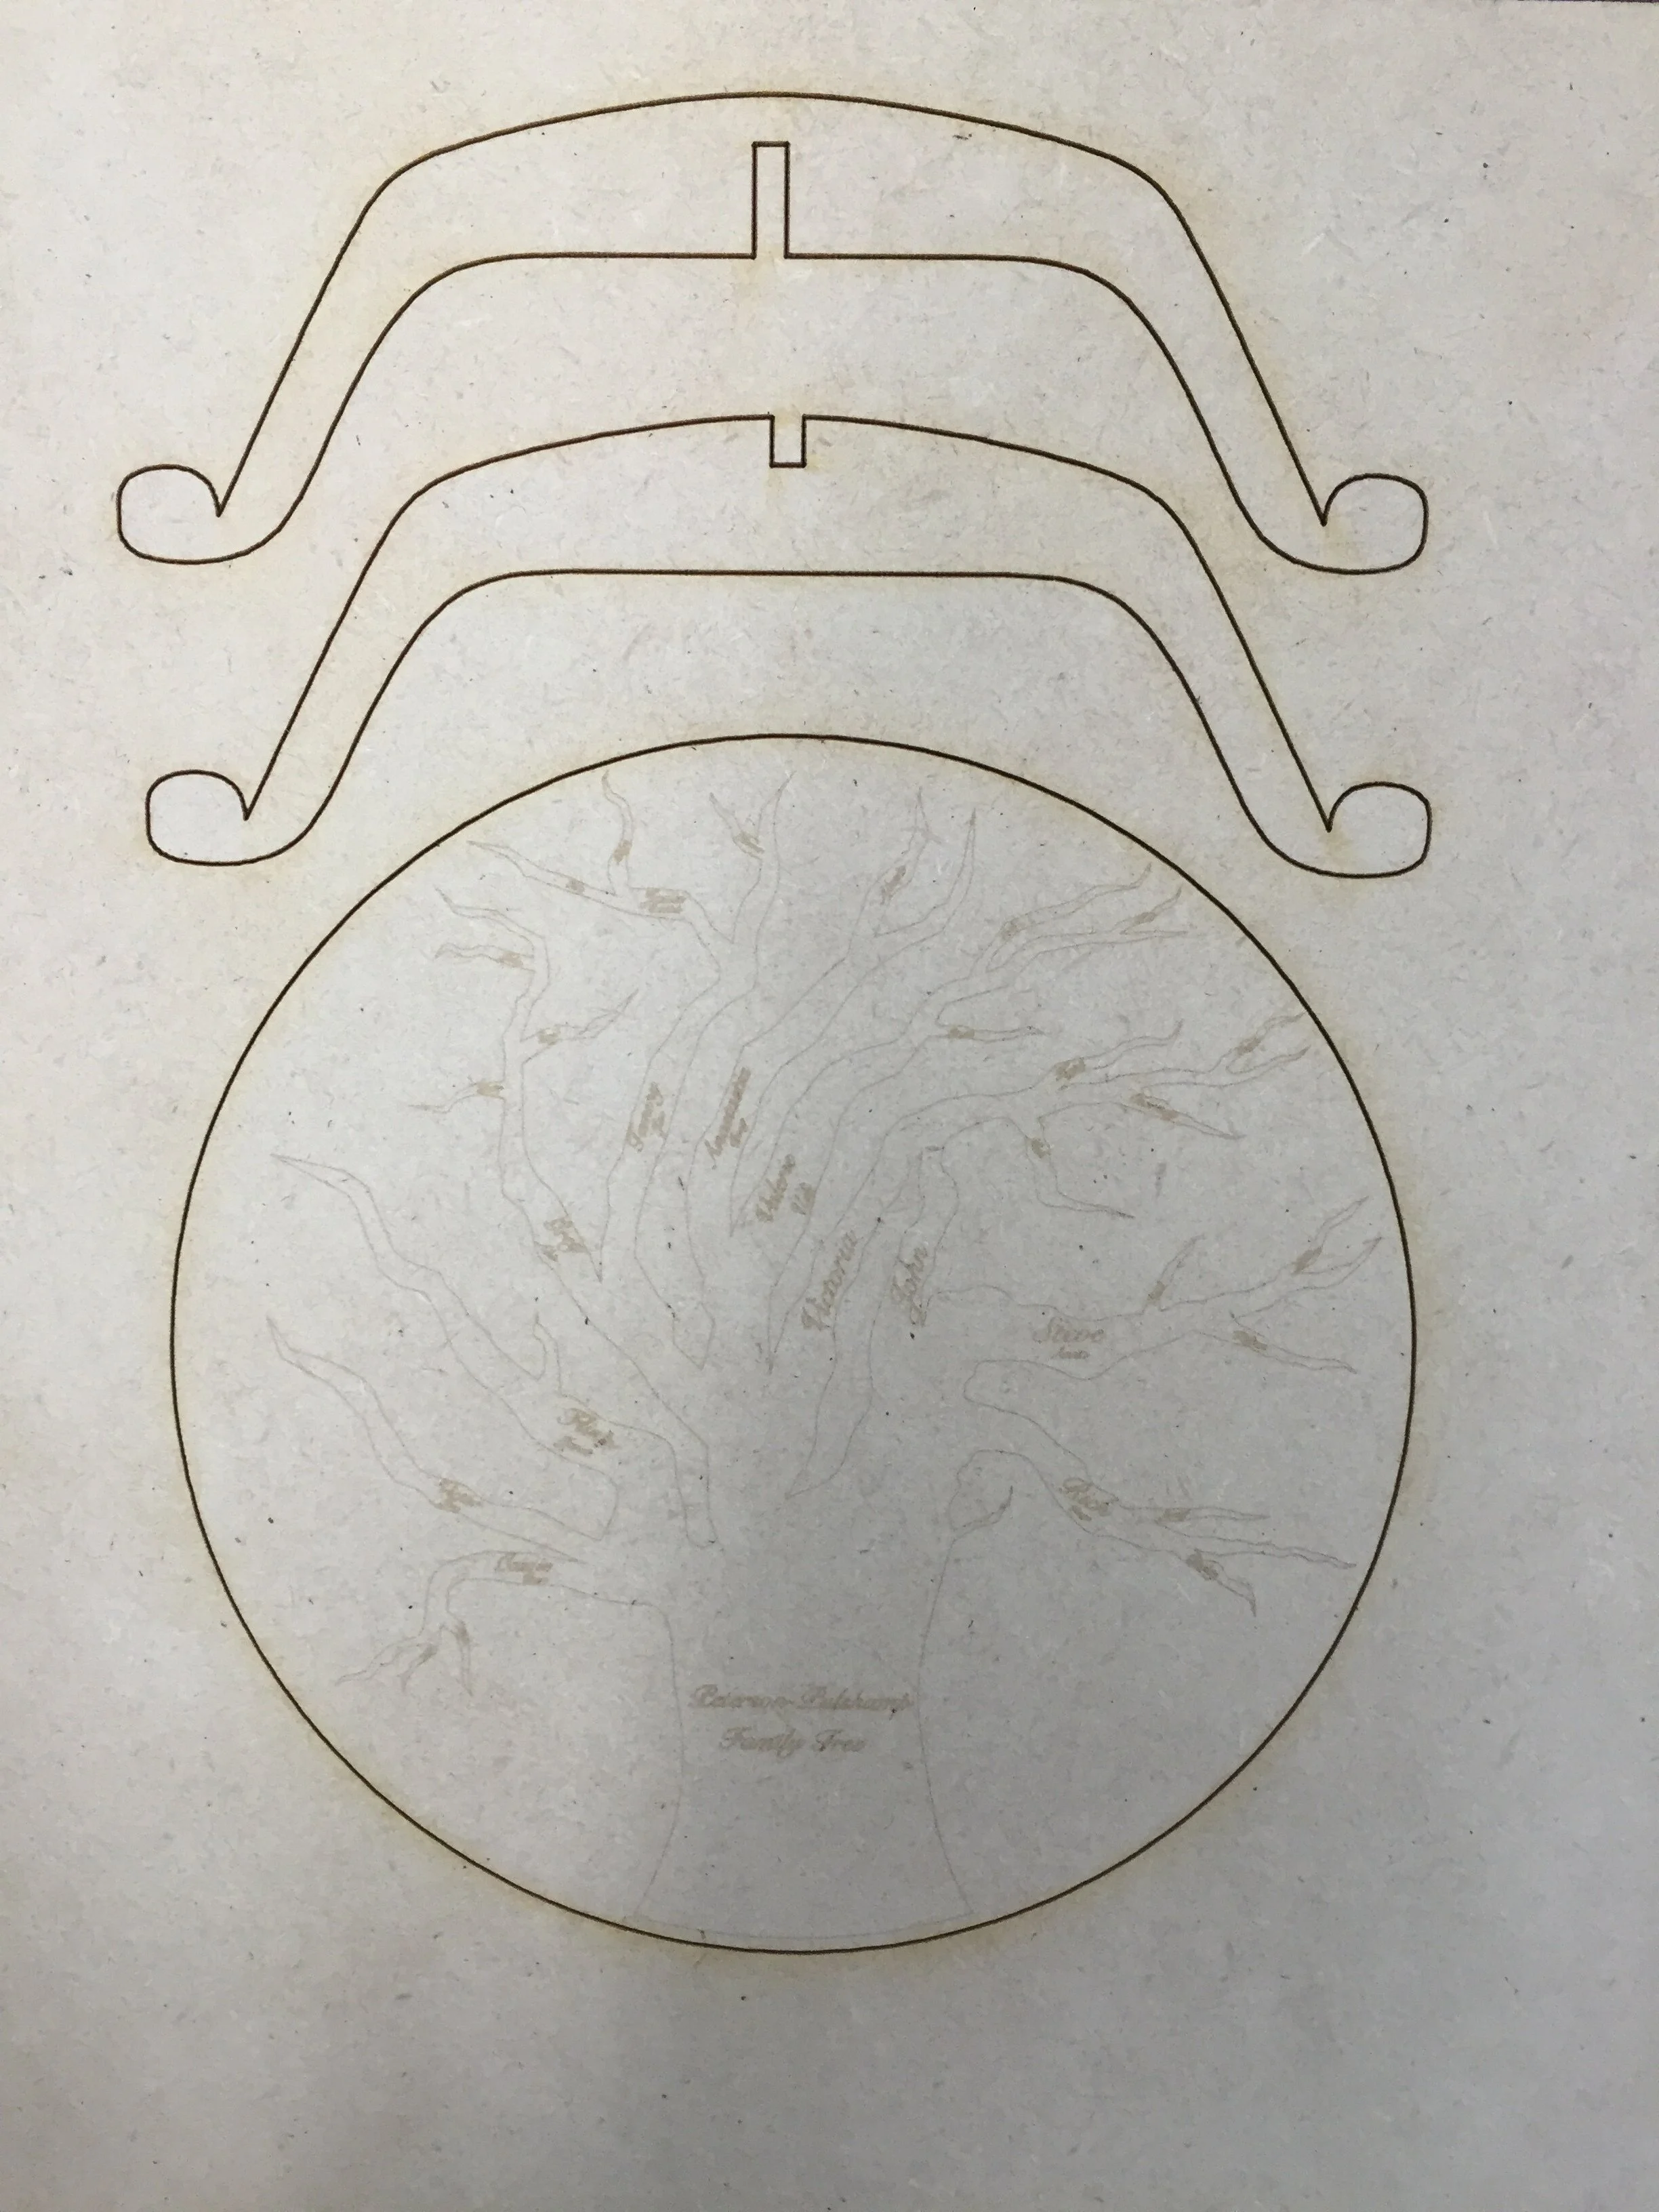
Miniature prototype of leg shape and table top with engraved tree and names
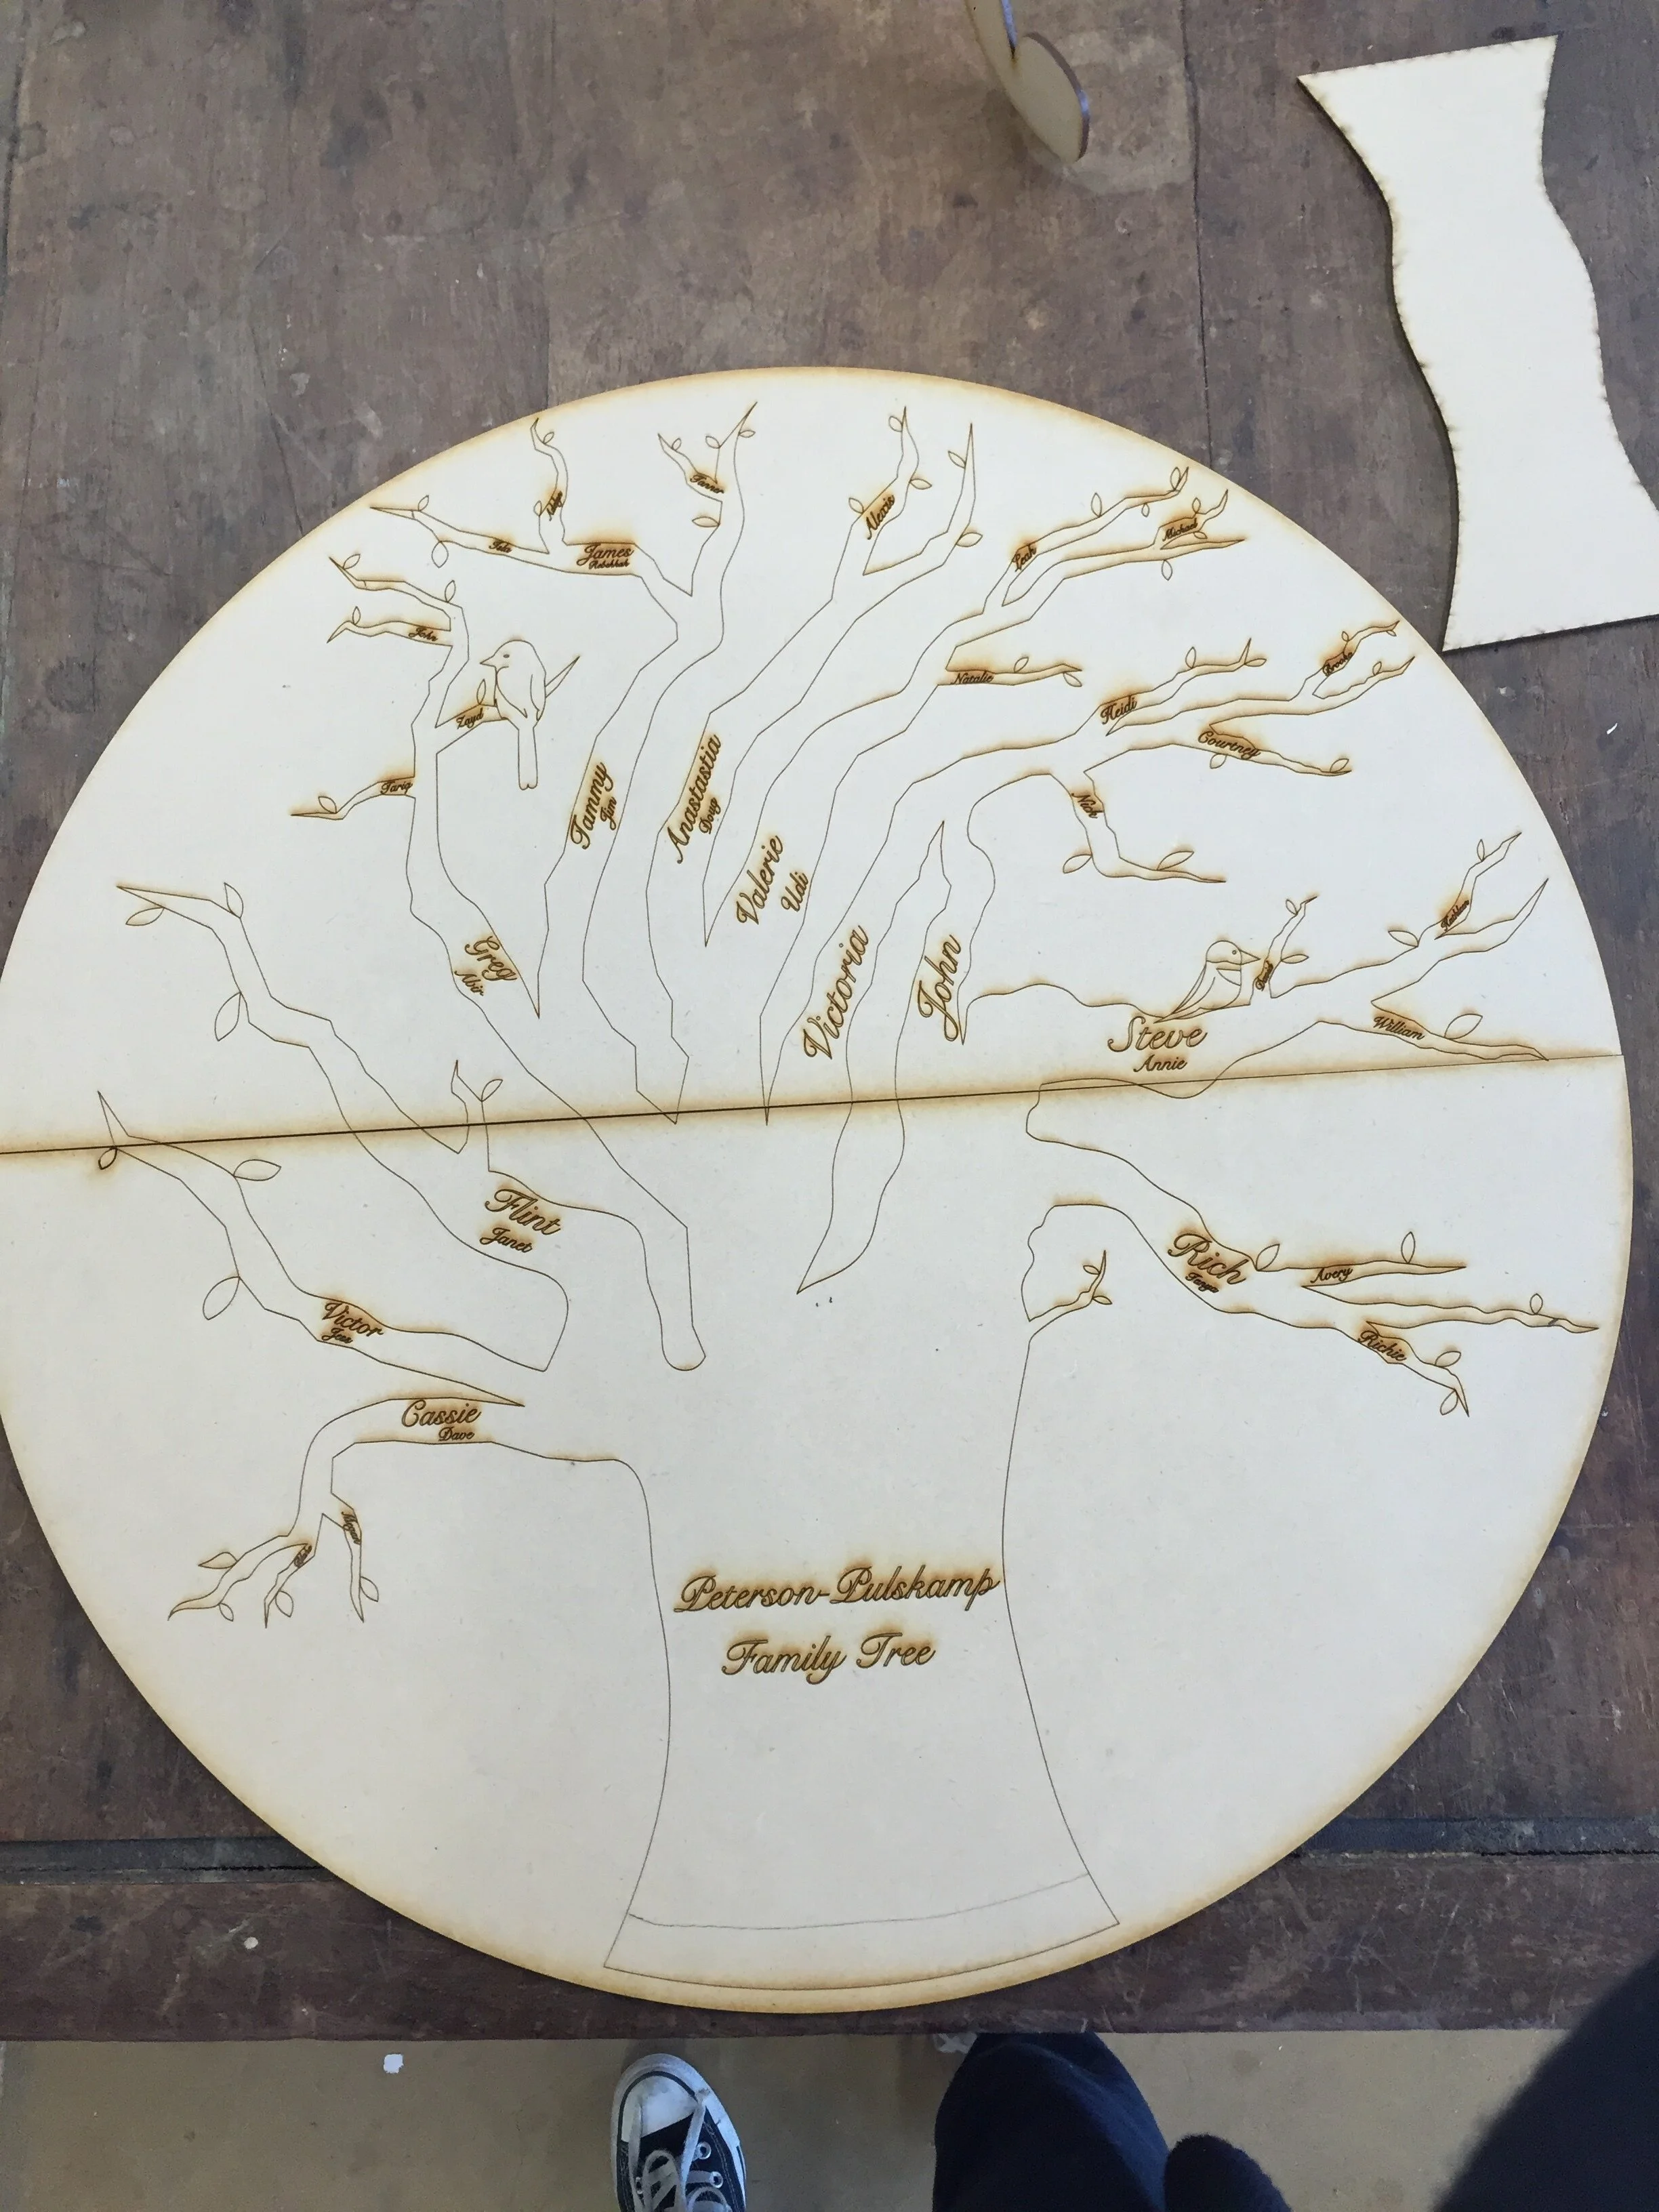
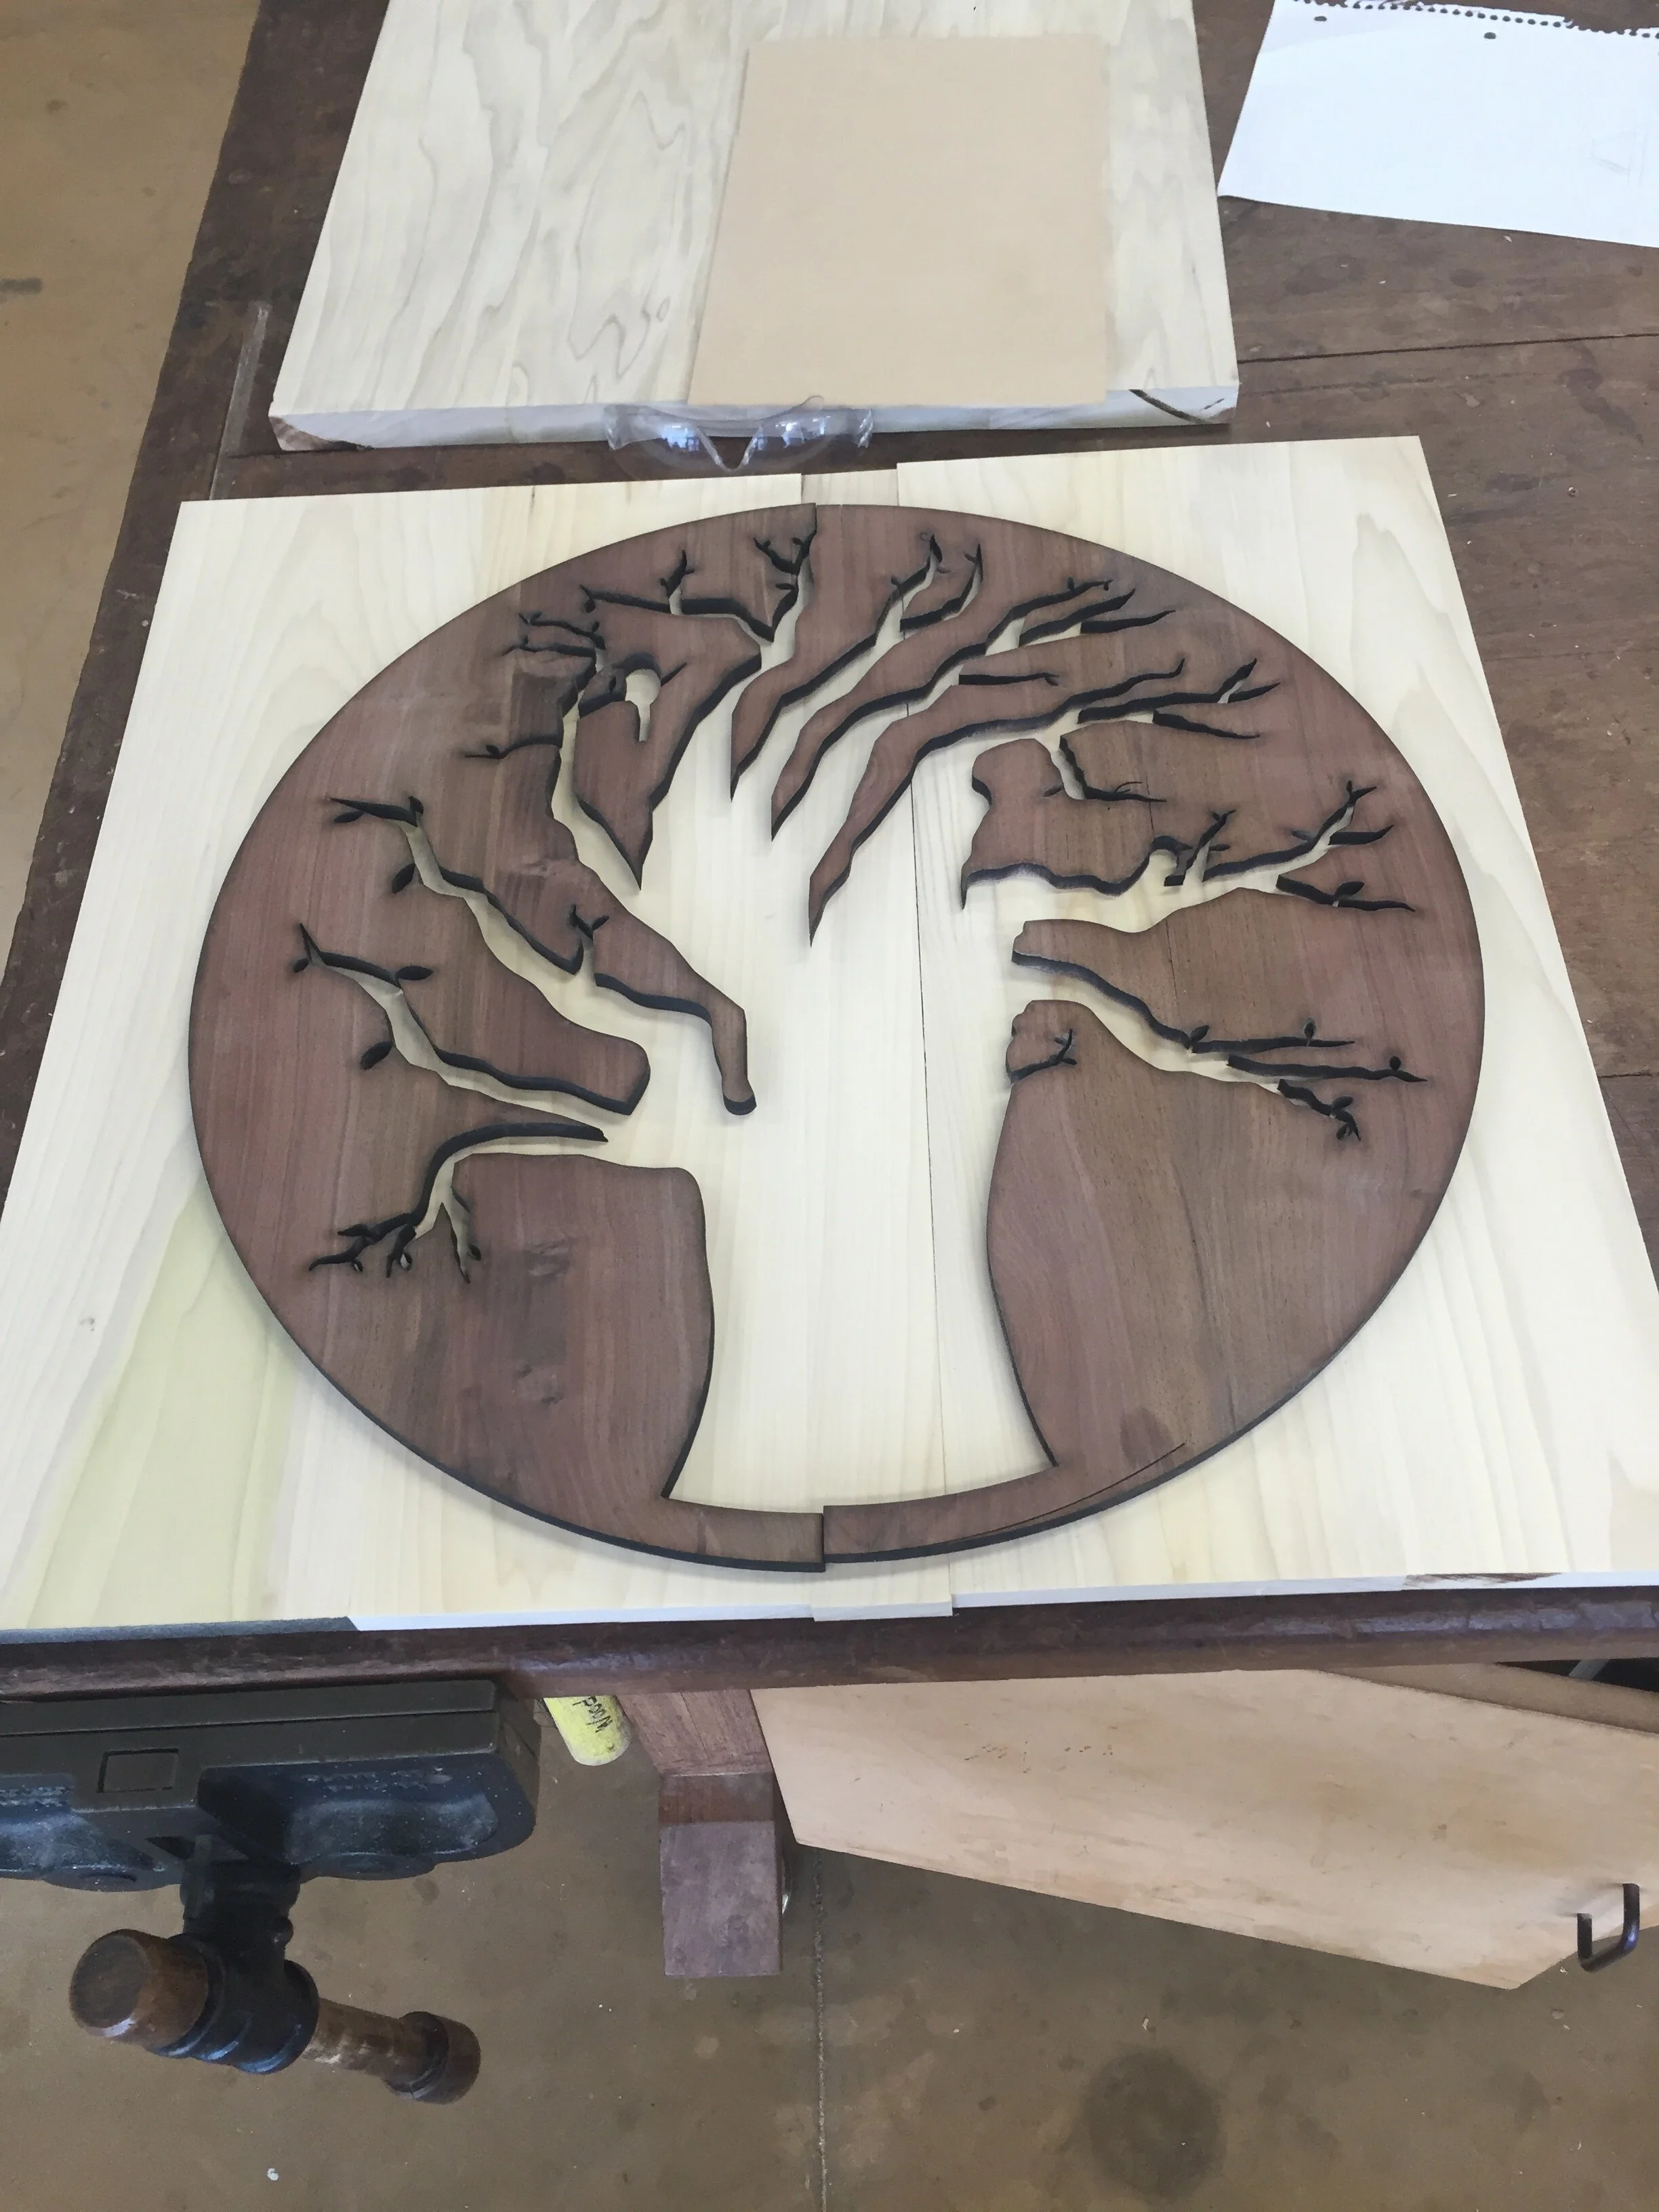
Full size prototype of table top with engraved tree and names (split in two halves)
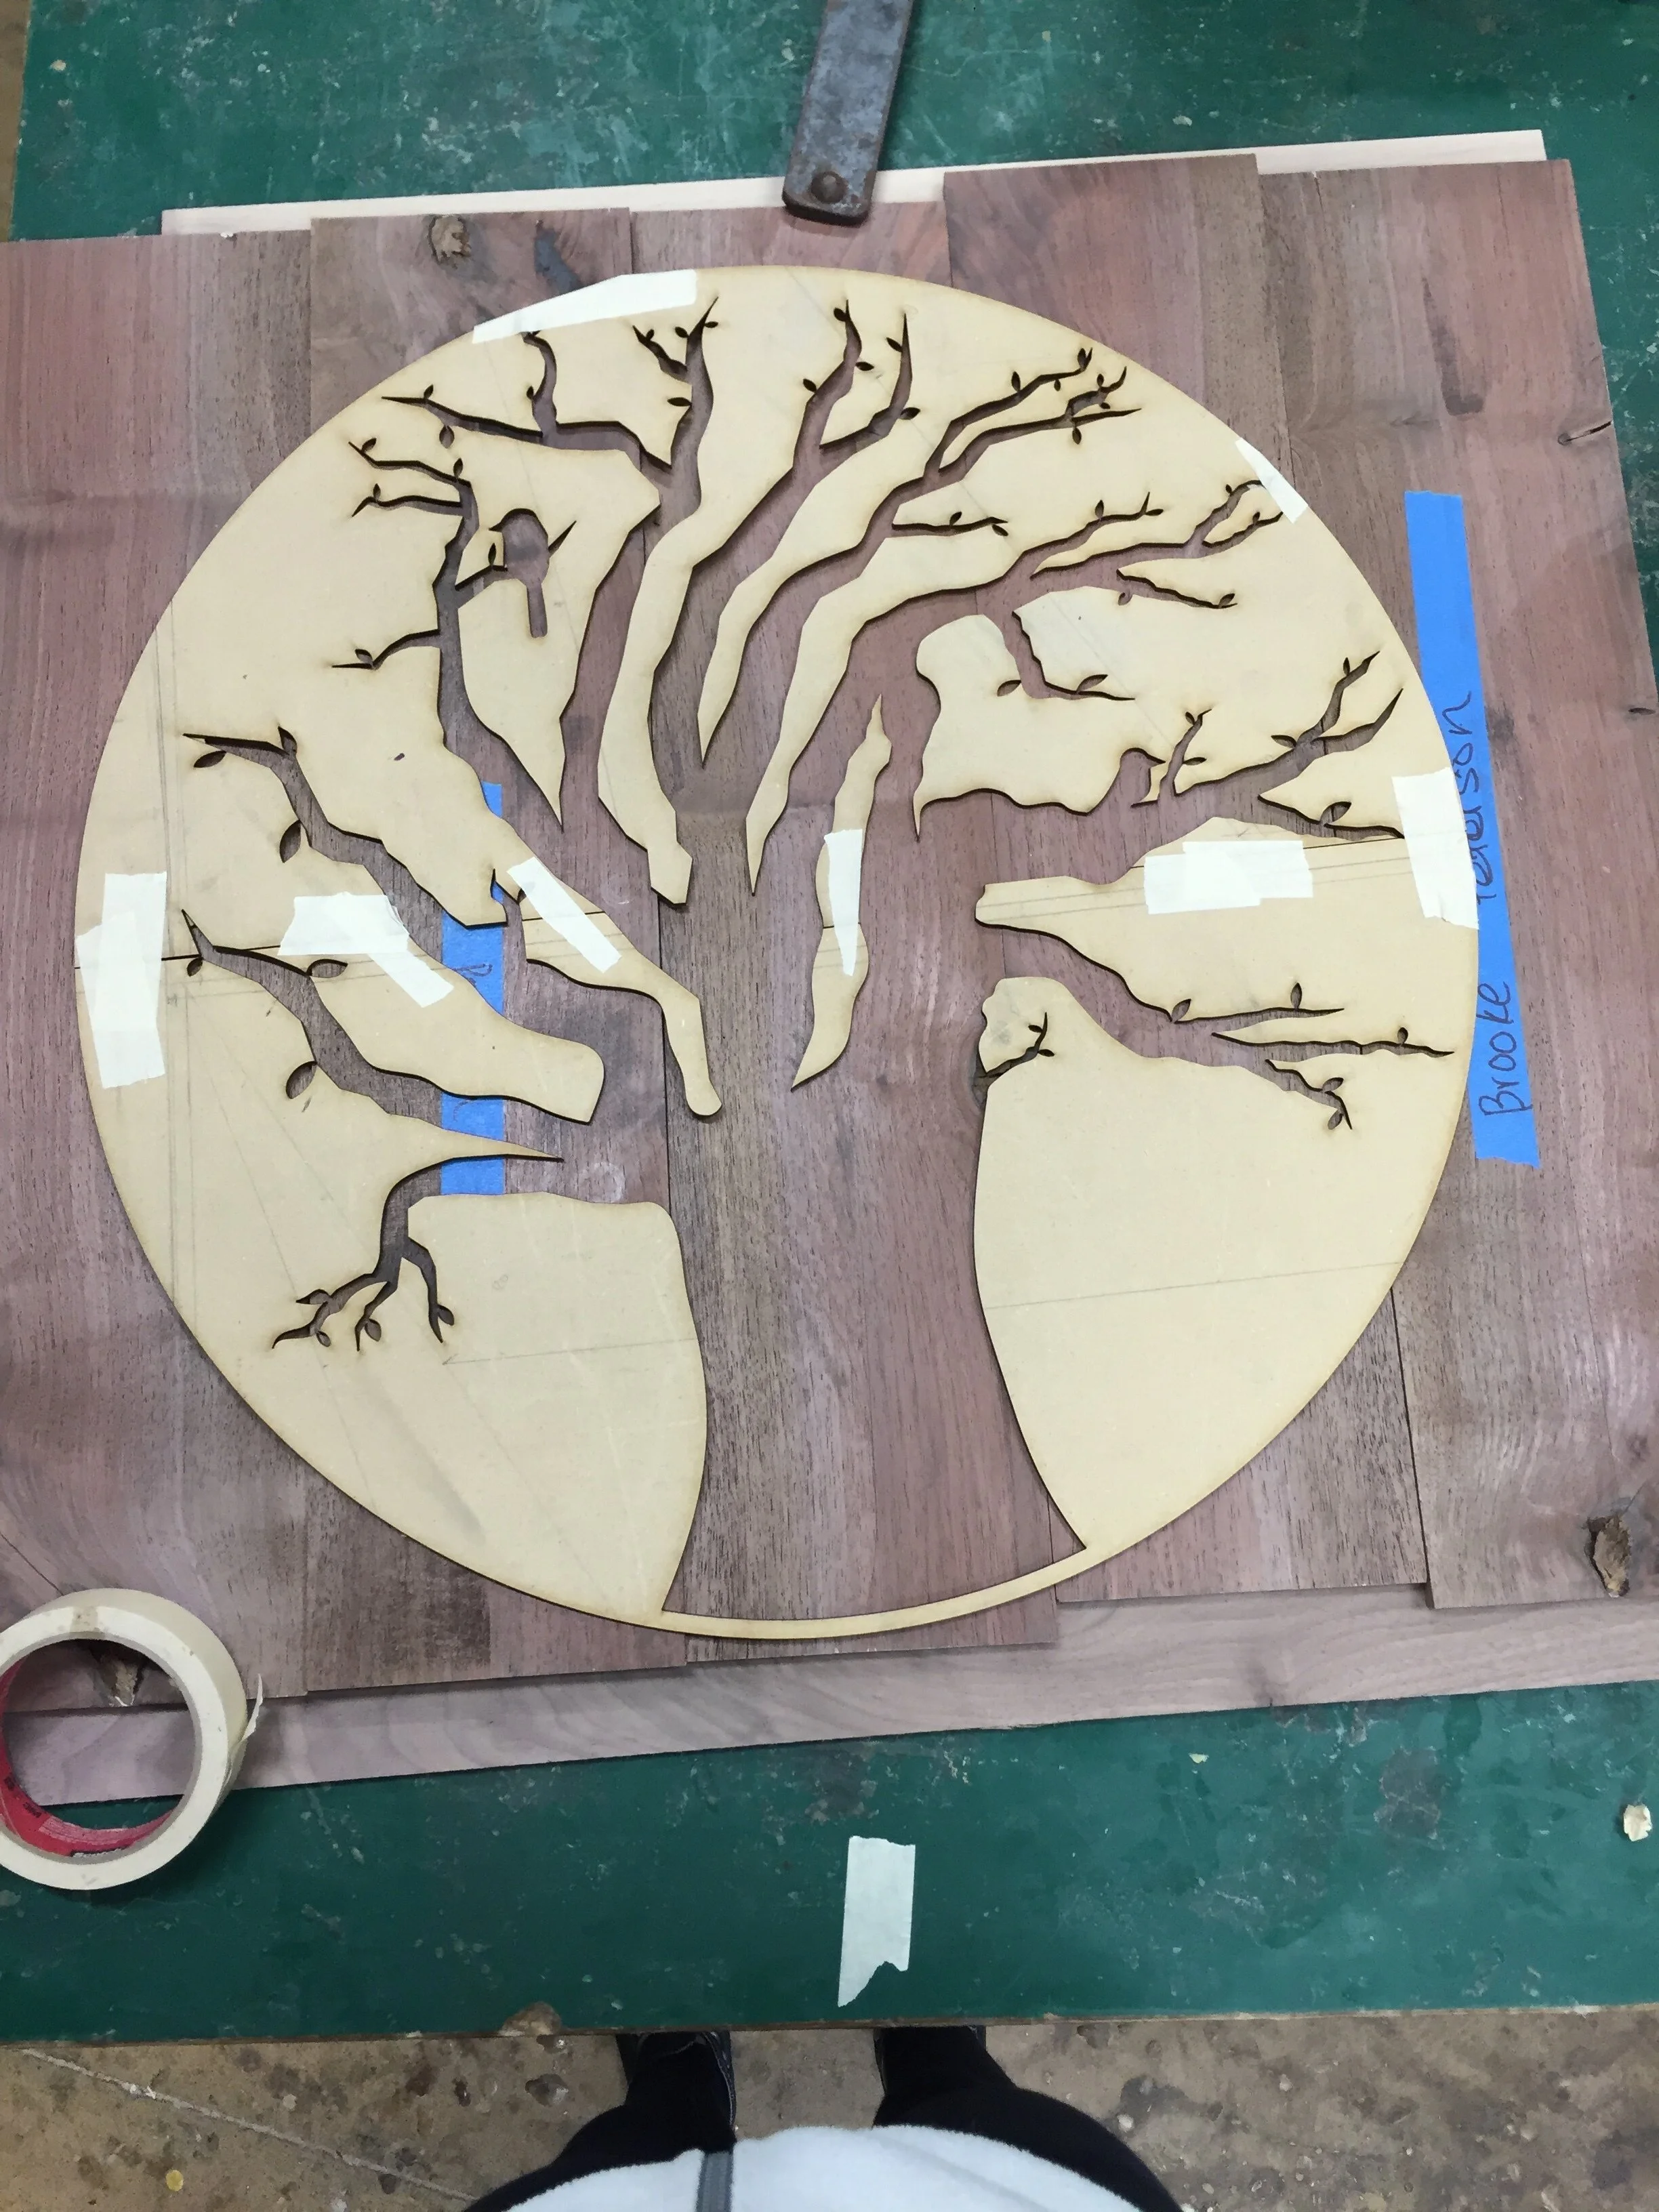
Full size prototype of table top negative overlay (split in two halves)
Challenge #1: Tabletop Too Large for Laser Cutter
Two of the most important reasons to test designs on MDF before going straight to real wood is because a) I was able to see if I actually liked my design in full size and b) I was able to catch tons of errors that could’ve possibly ruined my project.
For example, when I attempted to prototype my tabletop on MDF, I quickly realized that the dimensions that I had set for my tabletop made it far too large to fit in the laser cutter, and I had planned on using the laser cutter for my entire design. This obviously threw a wrench in my plans, because I either had to figure out a new way to engrave my design, shrink the size of my table, or laser cut my tabletop in multiple parts. I ultimately decided on the last option, because I liked the size of my tabletop and I would not be able to obtain as precise of an engraving with any other tool.
I started to brainstorm the most optimal ways in which I could split my tabletop so that it would fit inside the laser cutter. If I split it through the middle, I would have a conspicuous line running right through the middle of my tabletop, which, after testing it in the prototype above, I deemed unattractive. Instead, with insight from my teacher, I opted for a more discrete option; I noticed that if I split the tabletop at a diagonal, I could have the majority of my engravings (top right) be on a large piece of wood, and the engravings on the bottom left be on a smaller piece of wood, which would ultimately make the split line less visible.
Upper half of the engraved tabletop
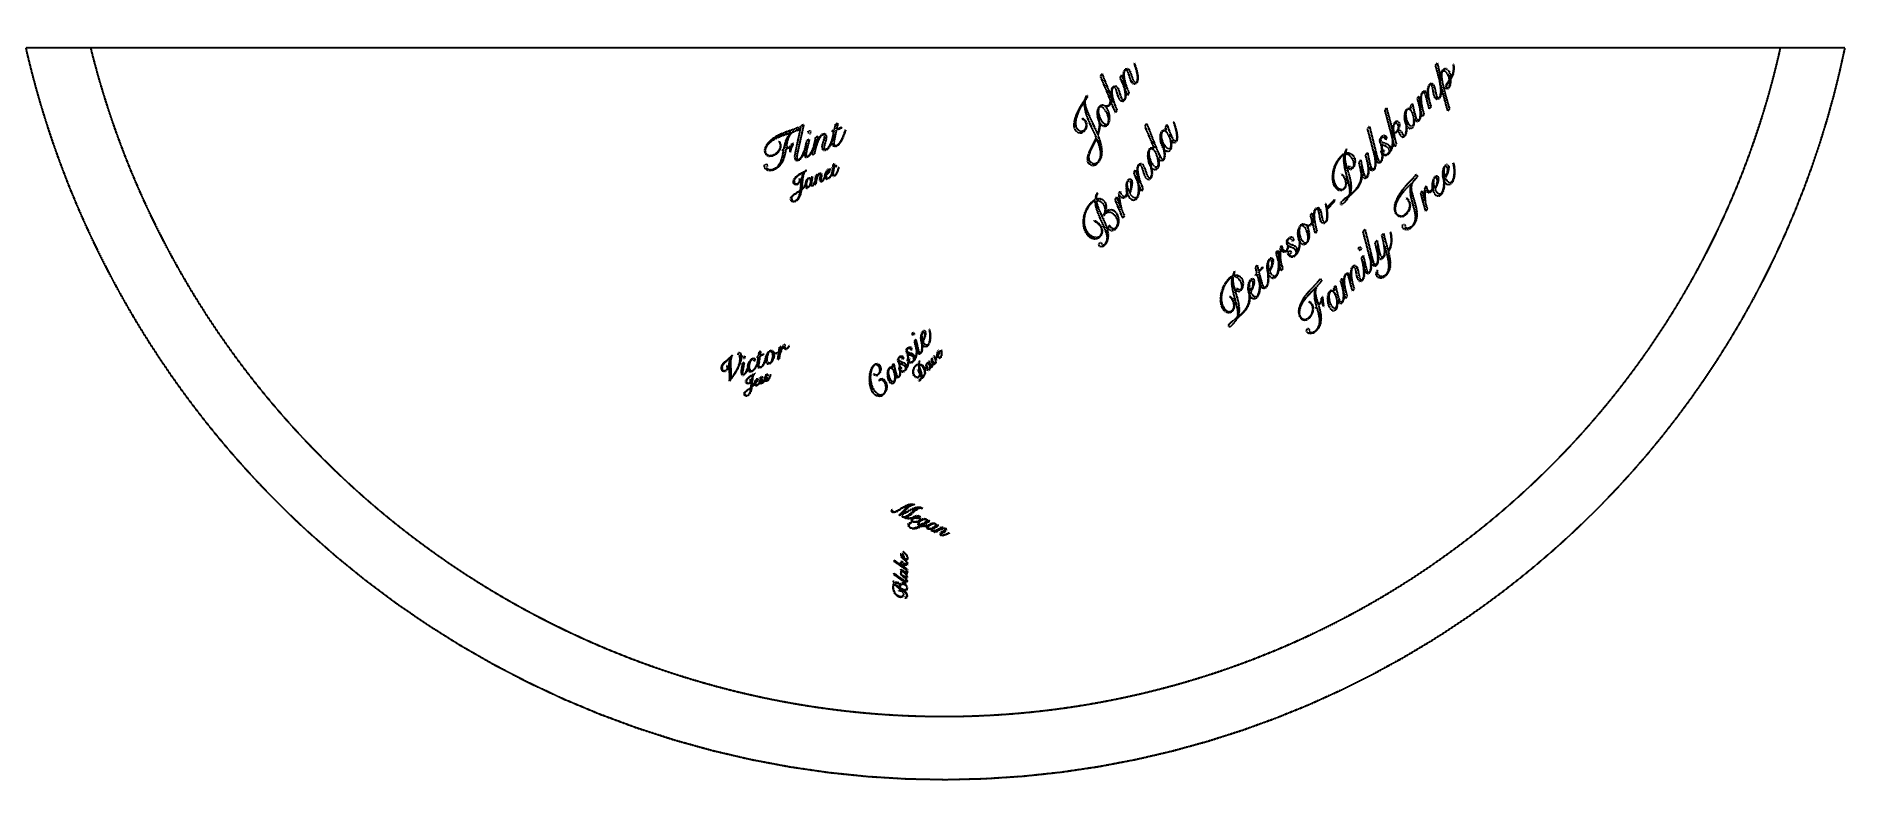
Bottom half of the engraved table top
You’ll notice that the tree outline is missing from the above images, and that’s because my plan from the beginning was to make the tree outline out of negative space from a darker wood and overlay it on top of the name engravings—and that’s what I got to work on next.

I ran into the same challenge with my negative cutout as I did with my engravings: the laser cutter was simply not large enough to fit an entire whole piece of wood the size of my tabletop. However, this time was much easier since I realized I could do a vertical cut that would allow me to adhere the two sides together with very minimal invasiveness of the tree. As pictured above, I specifically detailed what each side of the cut would look like. Once I had amended finalized my CAD drawings, I was ready to get started on the physical tabletop.
Building the Physical Tabletop
As I mentioned above, I decided that the best way for me to achieve my overlay wood idea was to engrave the names and birds into a lighter wood (I decided on poplar for its light color and smooth consistency) and then adhere a negative cutout of the tree in a darker wood (I decided on walnut for its dark color and inexpensive price compared to ebony).
Challenge #2: Tabletop Too Large for One Piece of Walnut Wood
After deciding on my materials, I was informed that a single piece of walnut to cover the entire width of my table would be far too expensive, and that I should instead make my own large piece out of a bunch of smaller width pieces. With proper instruction, I set off to create the slab of wood that would later become my tabletop. This was extremely challenging because in order to create a piece of wood as large as my tabletop, I needed to mimic the way plywood is made. In other words, I needed to cut equally-sized pieces of walnut, lay them down next to each other, glue them, and then perform the same process with planks going in the opposite direction. This alternation of the grain is called cross-graining and has several important benefits: it reduces the tendency of wood to split when nailed at the edges; it reduces expansion and shrinkage, providing improved dimensional stability; and it makes the strength of the panel consistent across all directions.
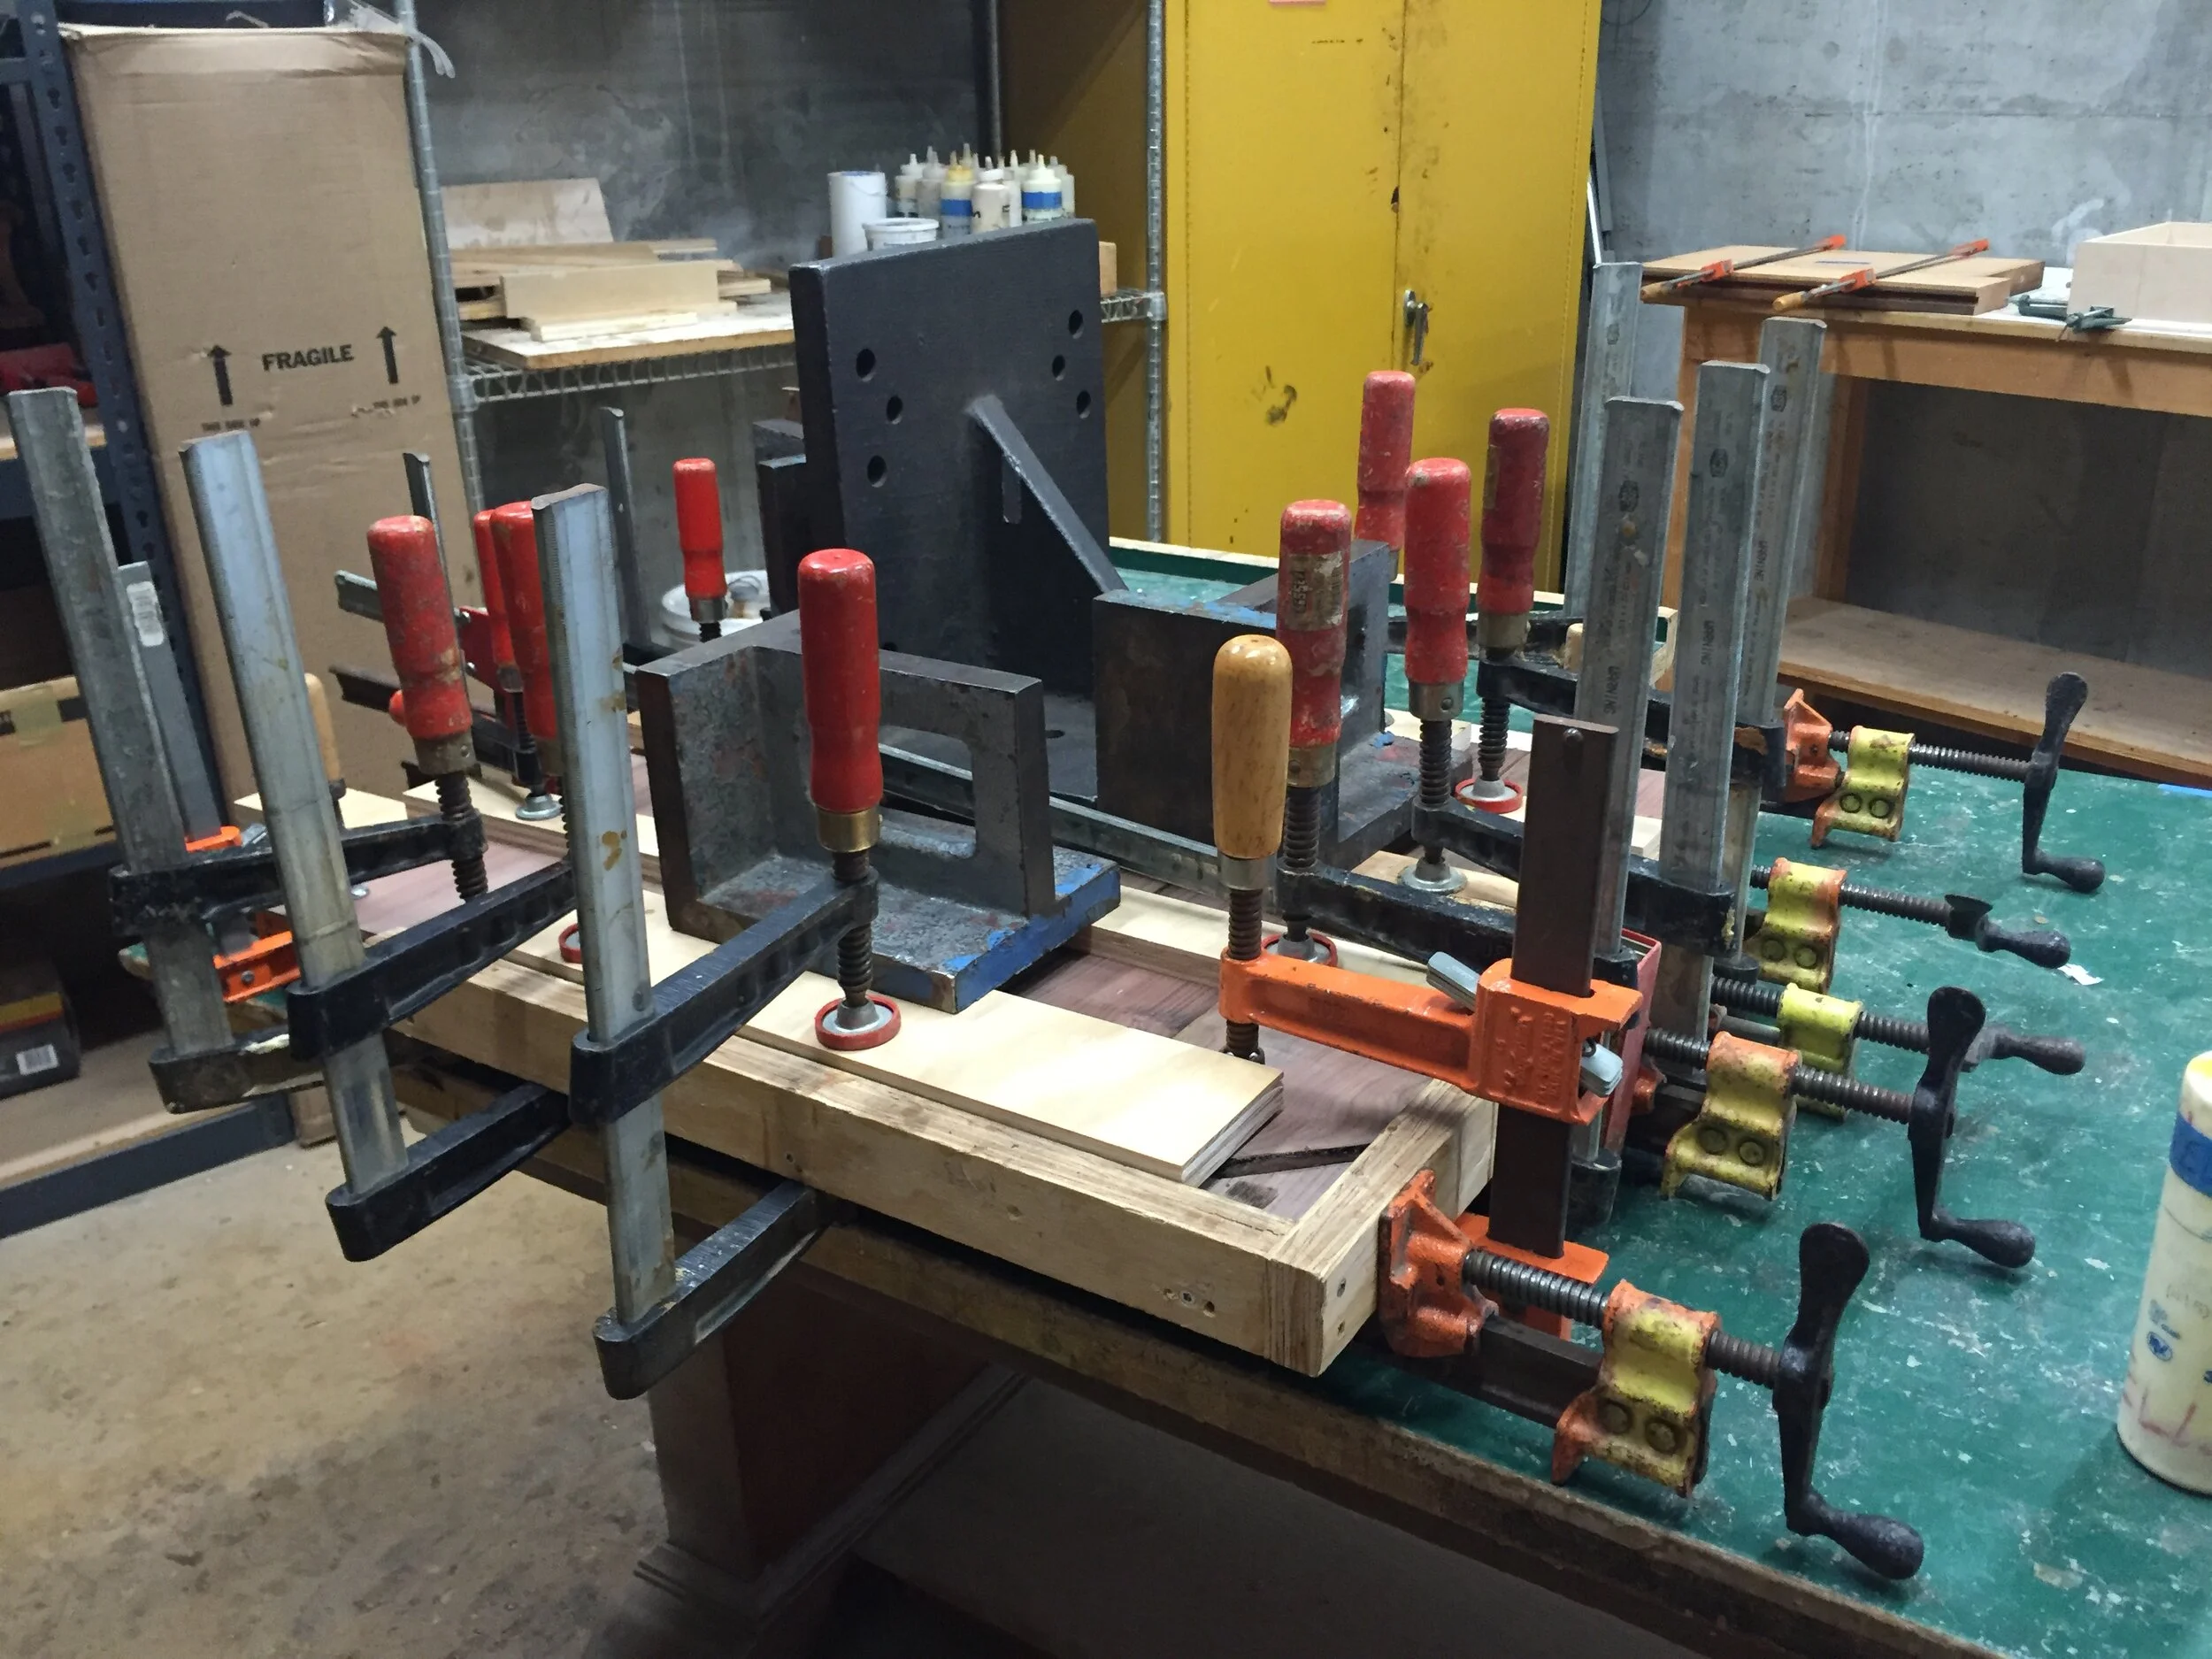
Glueing process of making my walnut “plywood” (side view)
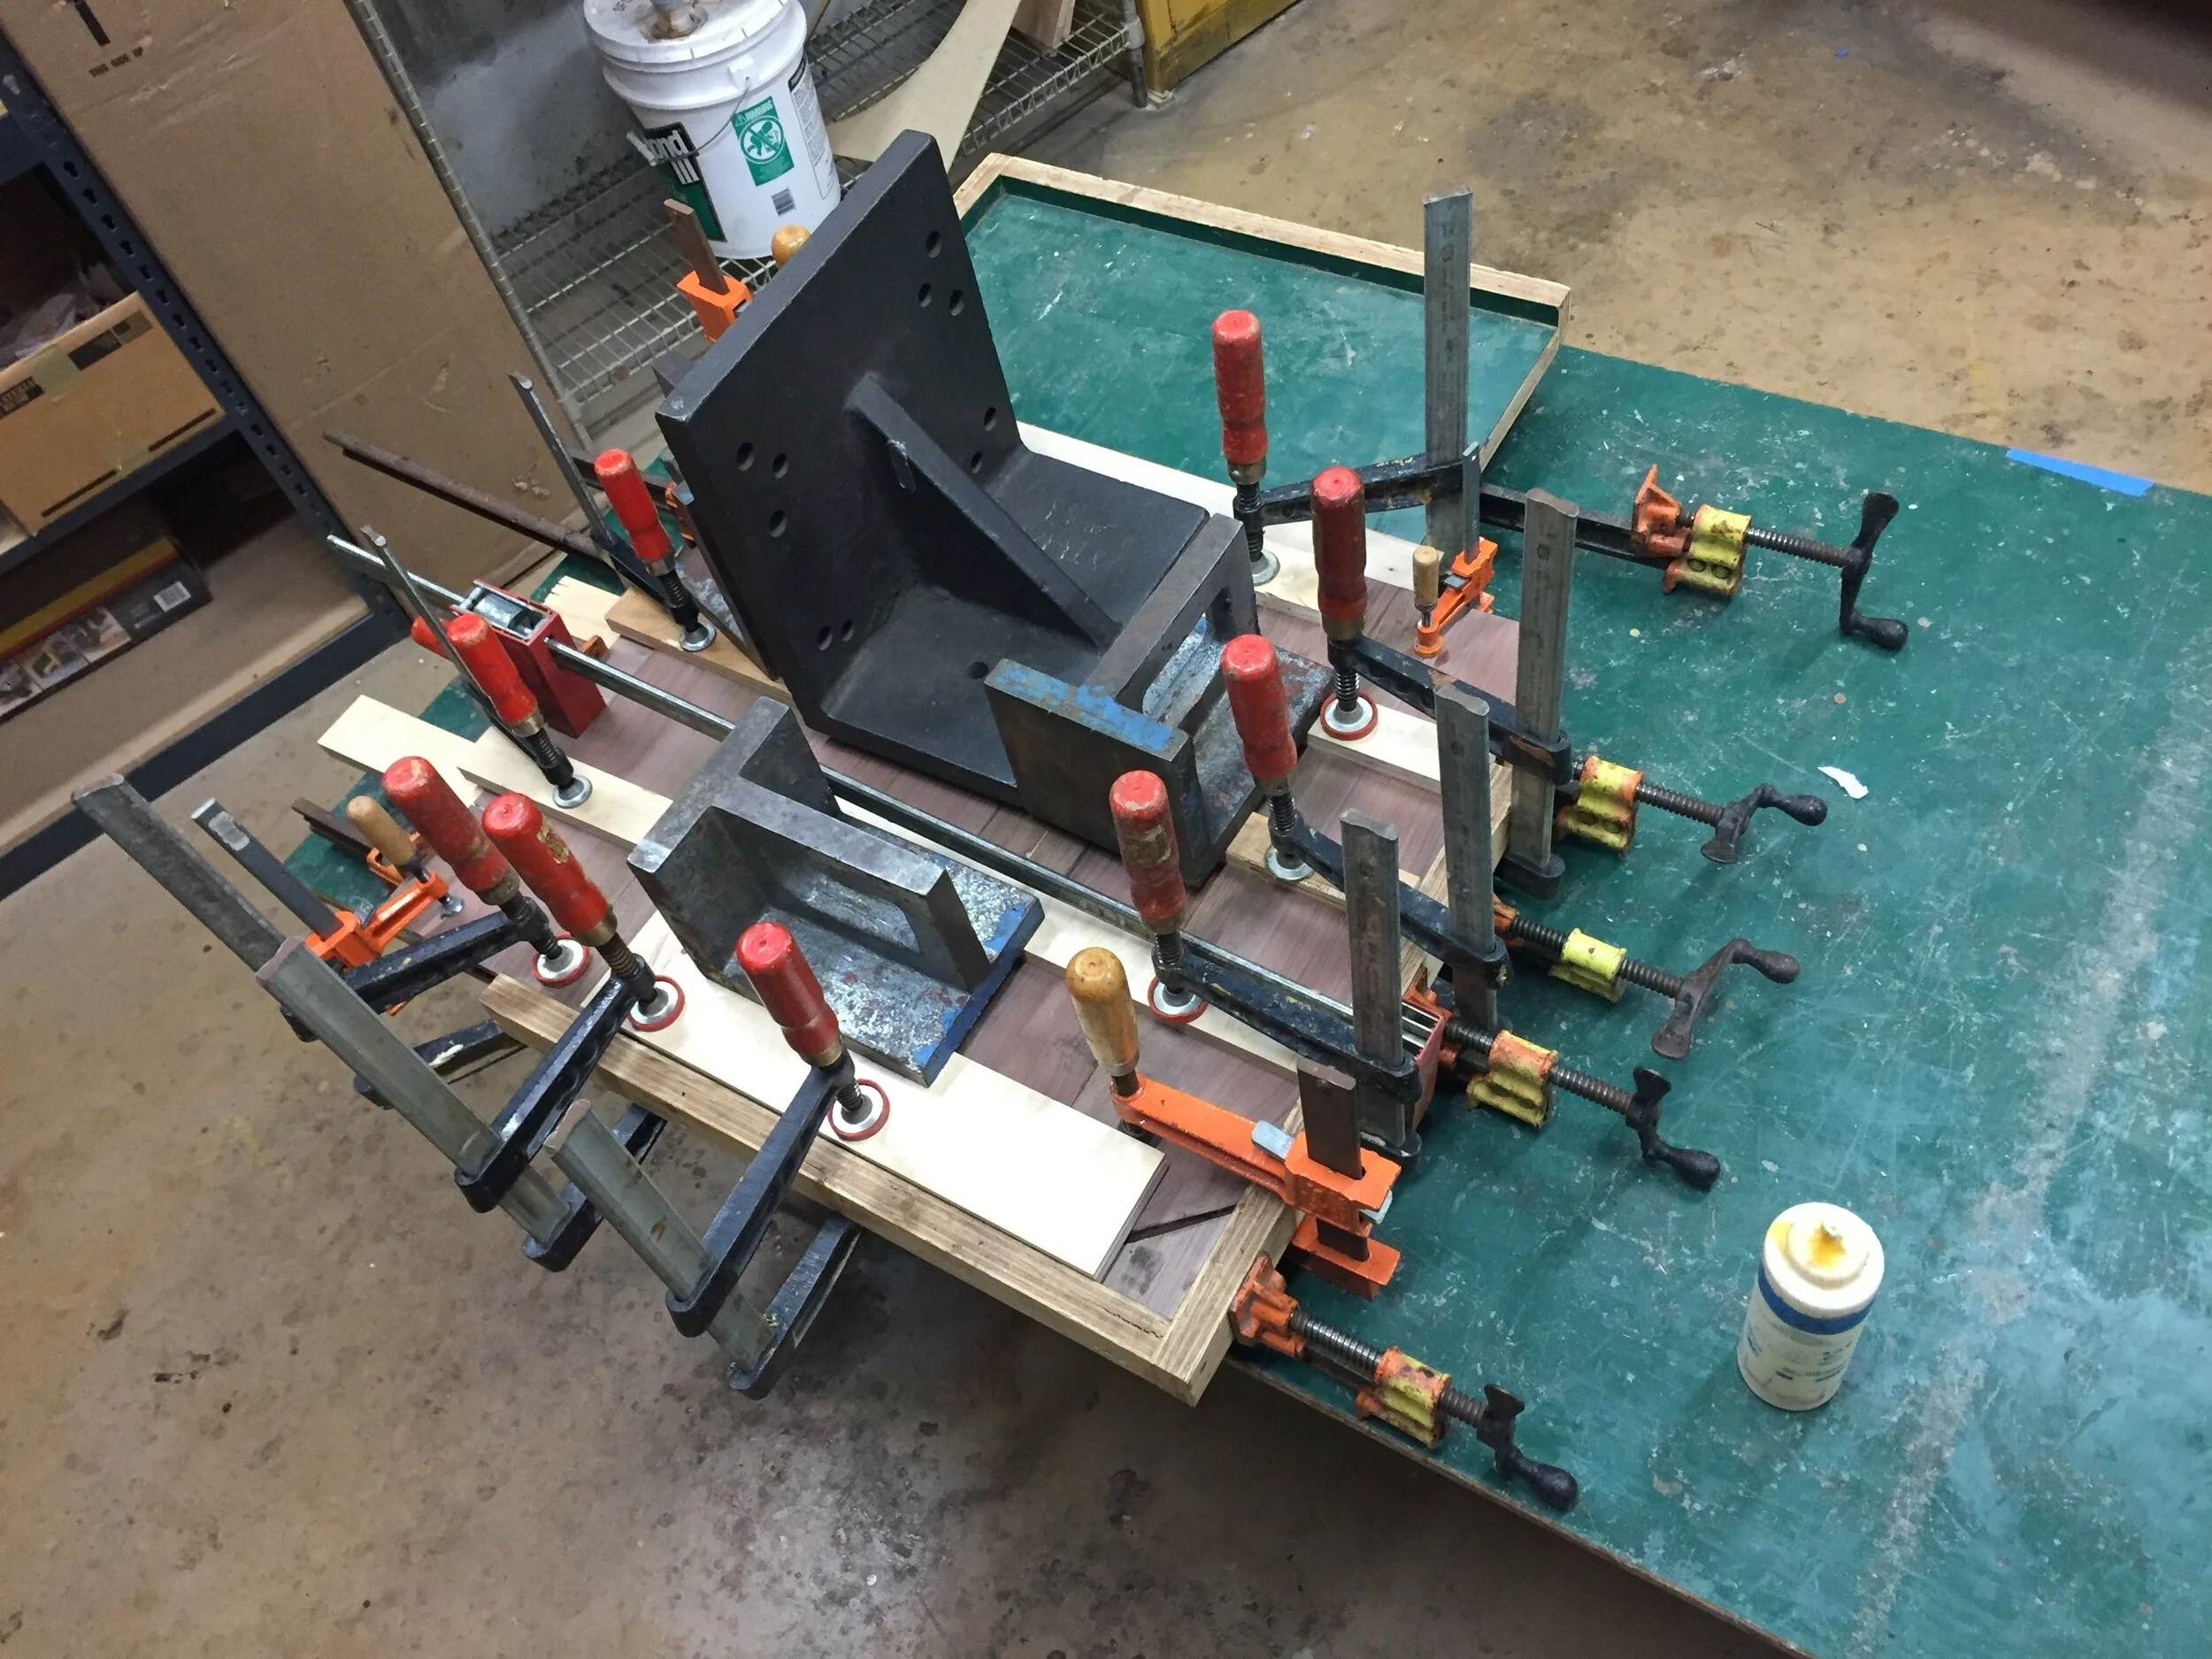
Glueing process of making my walnut “plywood” (top view)
Testing Laser Cutter Settings
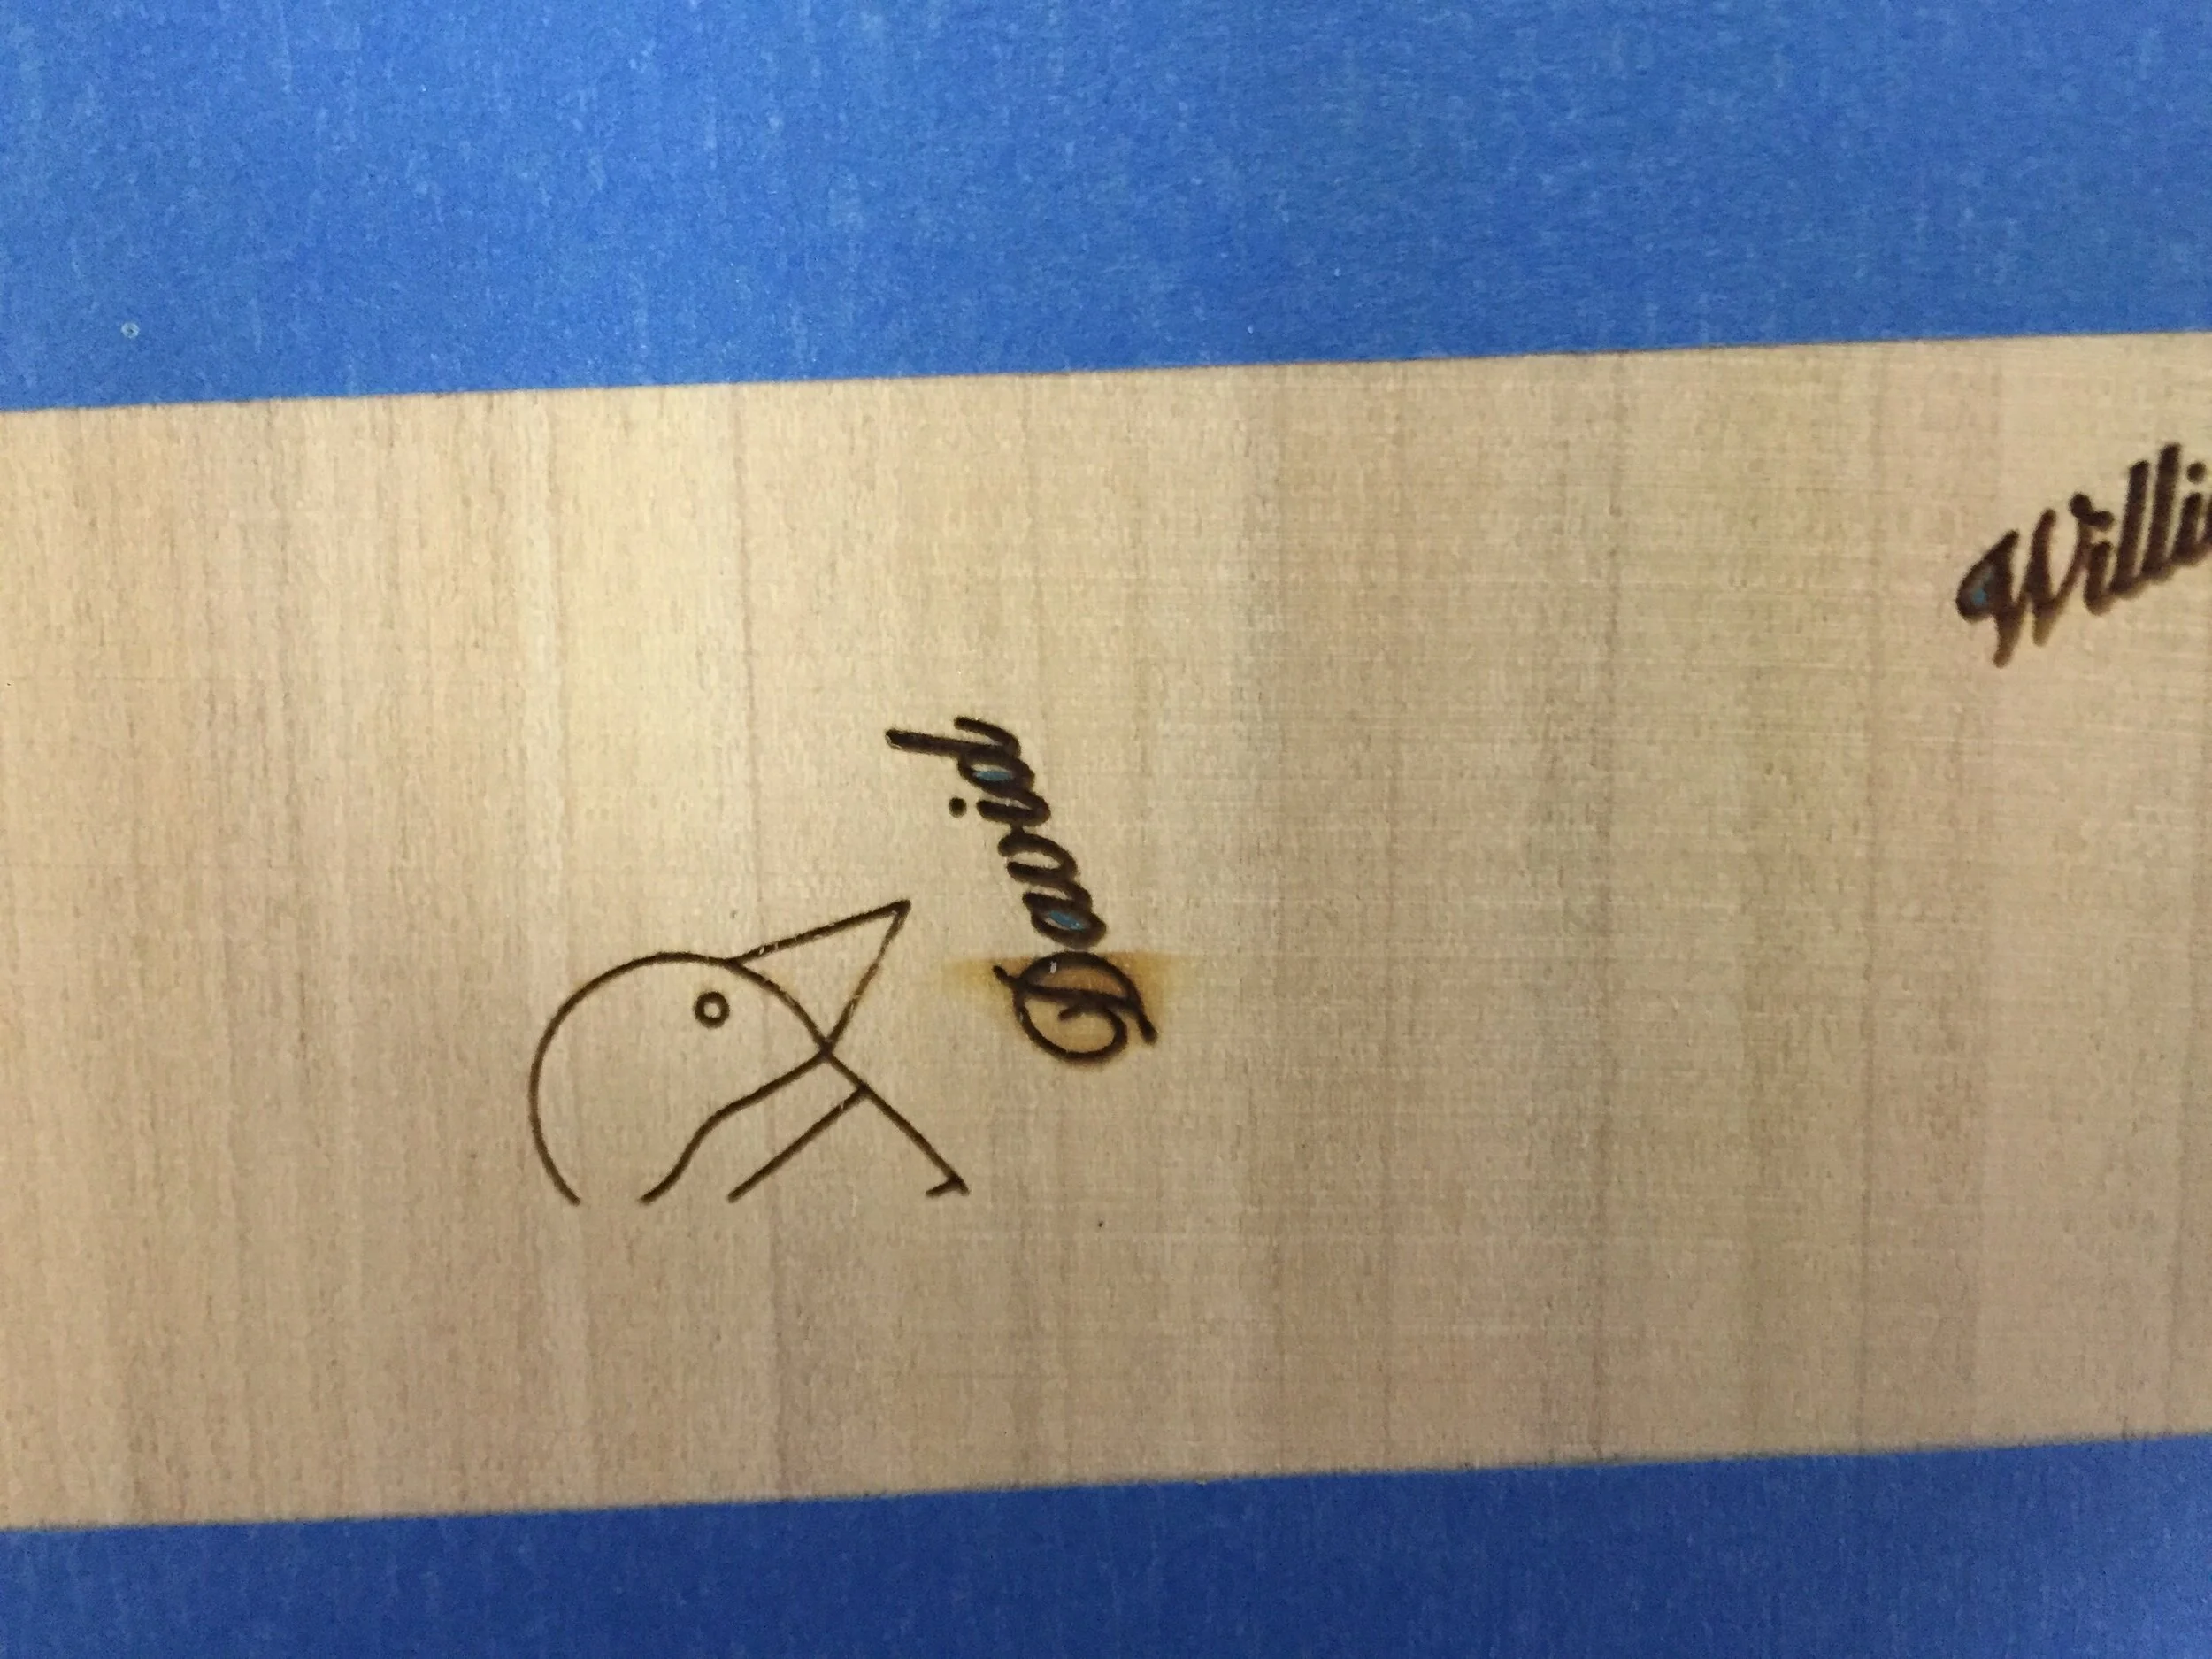
Once I had fully glued my wood, I was ready to prepare the laser cutter. However, just like every other wood machine, the laser cutter has different settings set for different jobs; I needed to figure out the speed and depth that would fully cut my wood, without burning it. I decided to practice on a small piece of poplar for my name engravings and a small piece of walnut for my negative cutout. As you can see below, the different laser cutter speeds made a huge difference on the final engraving: the one on the left looks burnt and a bit cramped, whereas the one on the right looks thinner, crisper and far more legible. The right setting is the one I ended up going with.
Two different laser cutter speeds—left slower and right faster
I did the same test on the walnut wood shown to the right. As you can see, the one on the left (with a laser speed of 22) appeared burnt whereas the one on the right (laser speed of 30) appeared cleaner. I opted for the right setting on the walnut, though this did ultimately matter a little less considering walnut is a dark wood by nature and poplar is much lighter and thus, dark engravings appear more obvious.
Close up of the faster speed
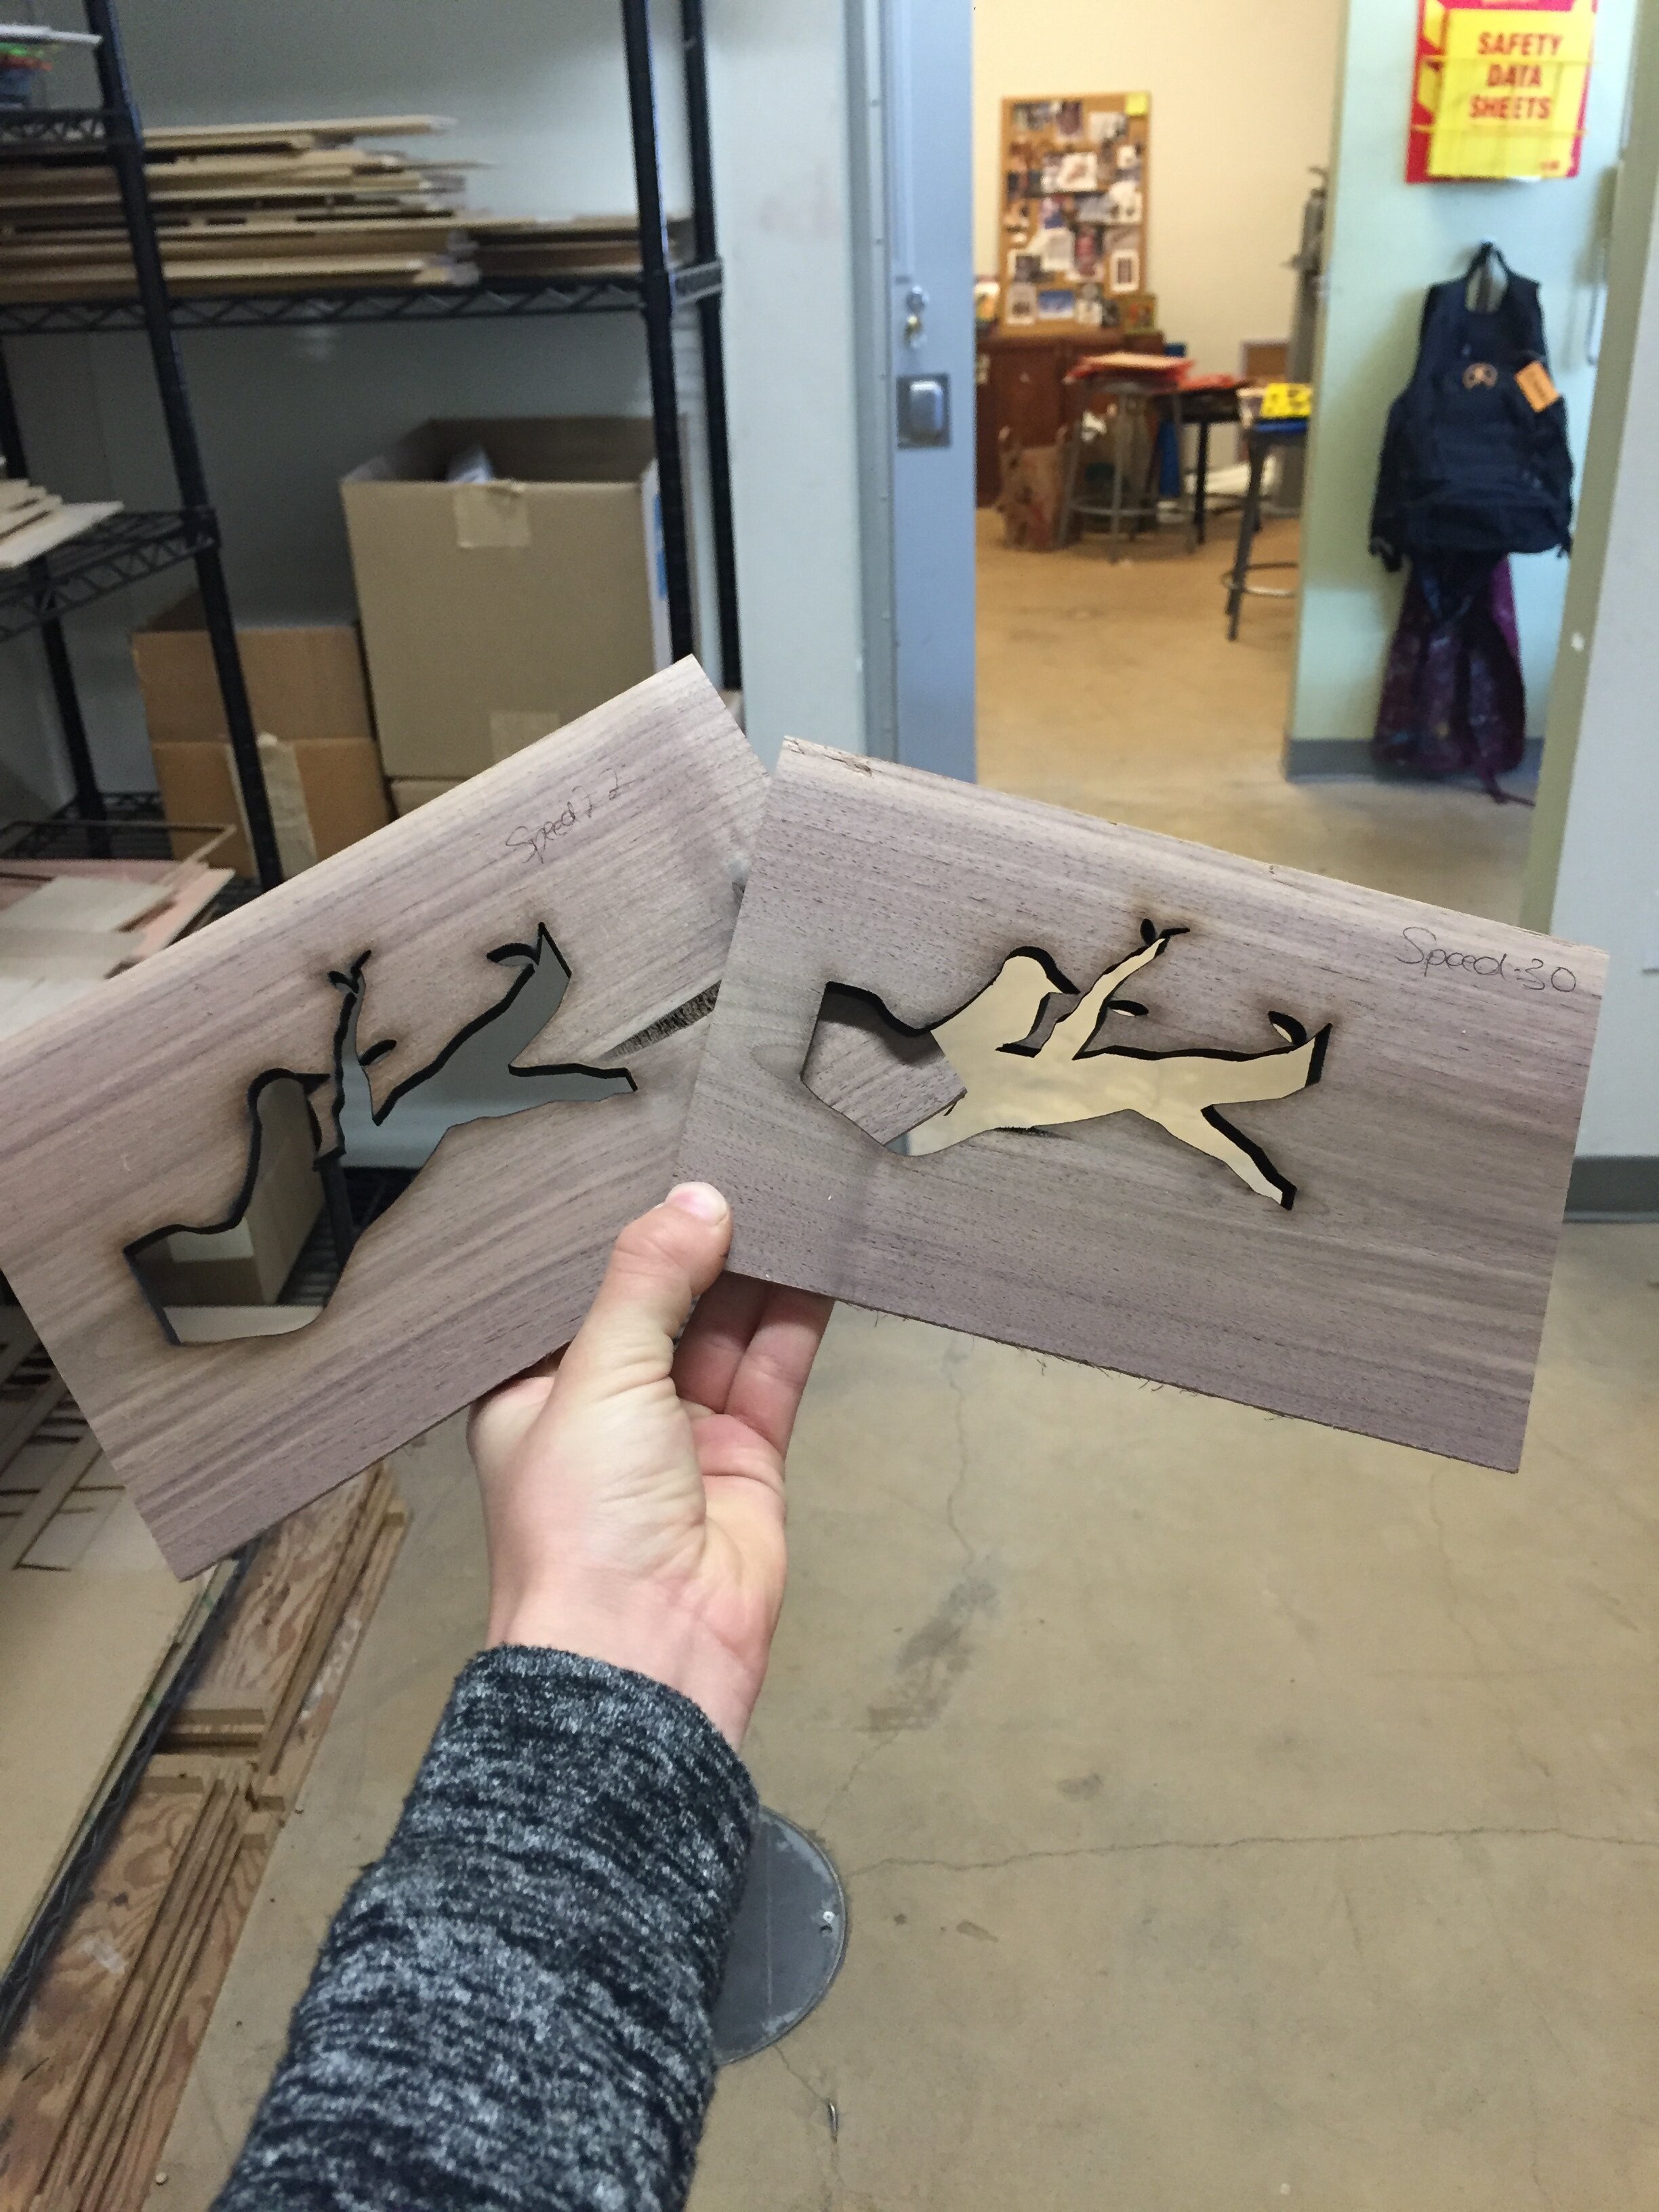
Two different laser cutter speeds—left slower and right faster
Laser Cutting Walnut Overlay
Once I finalized my laser cutter settings, I was ready to laser cut my final tabletop.
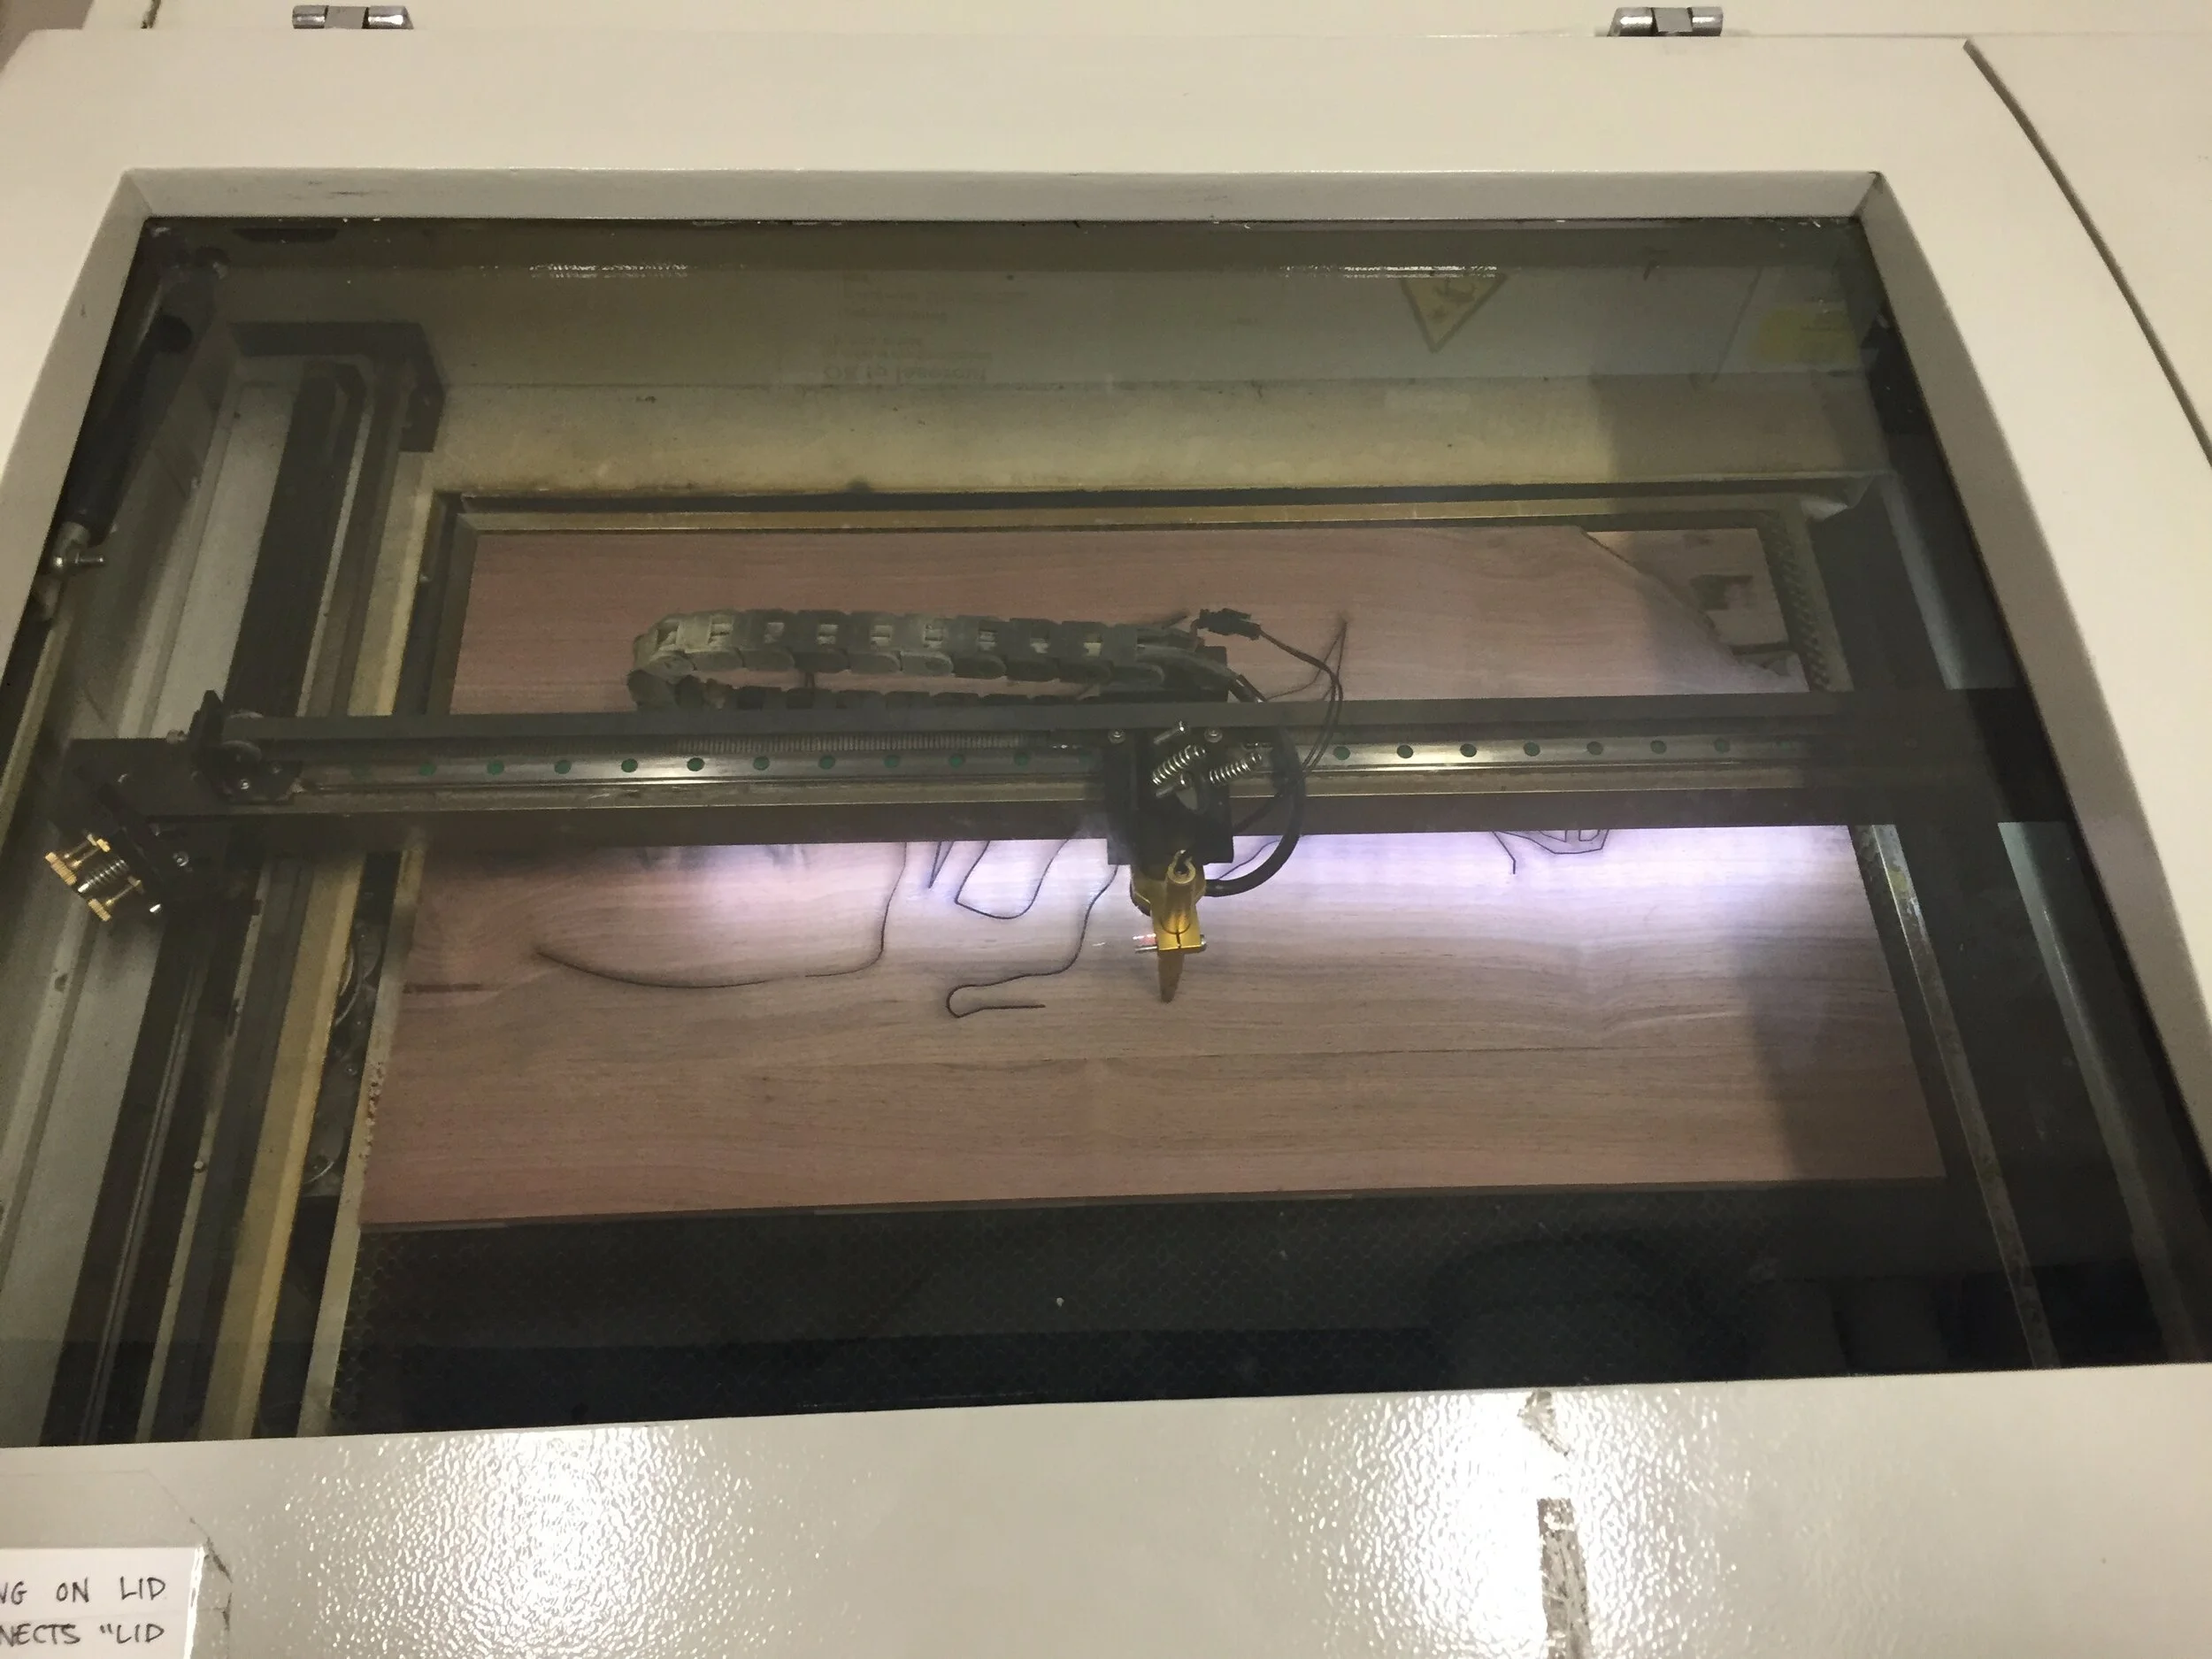
Laser cutter in progress
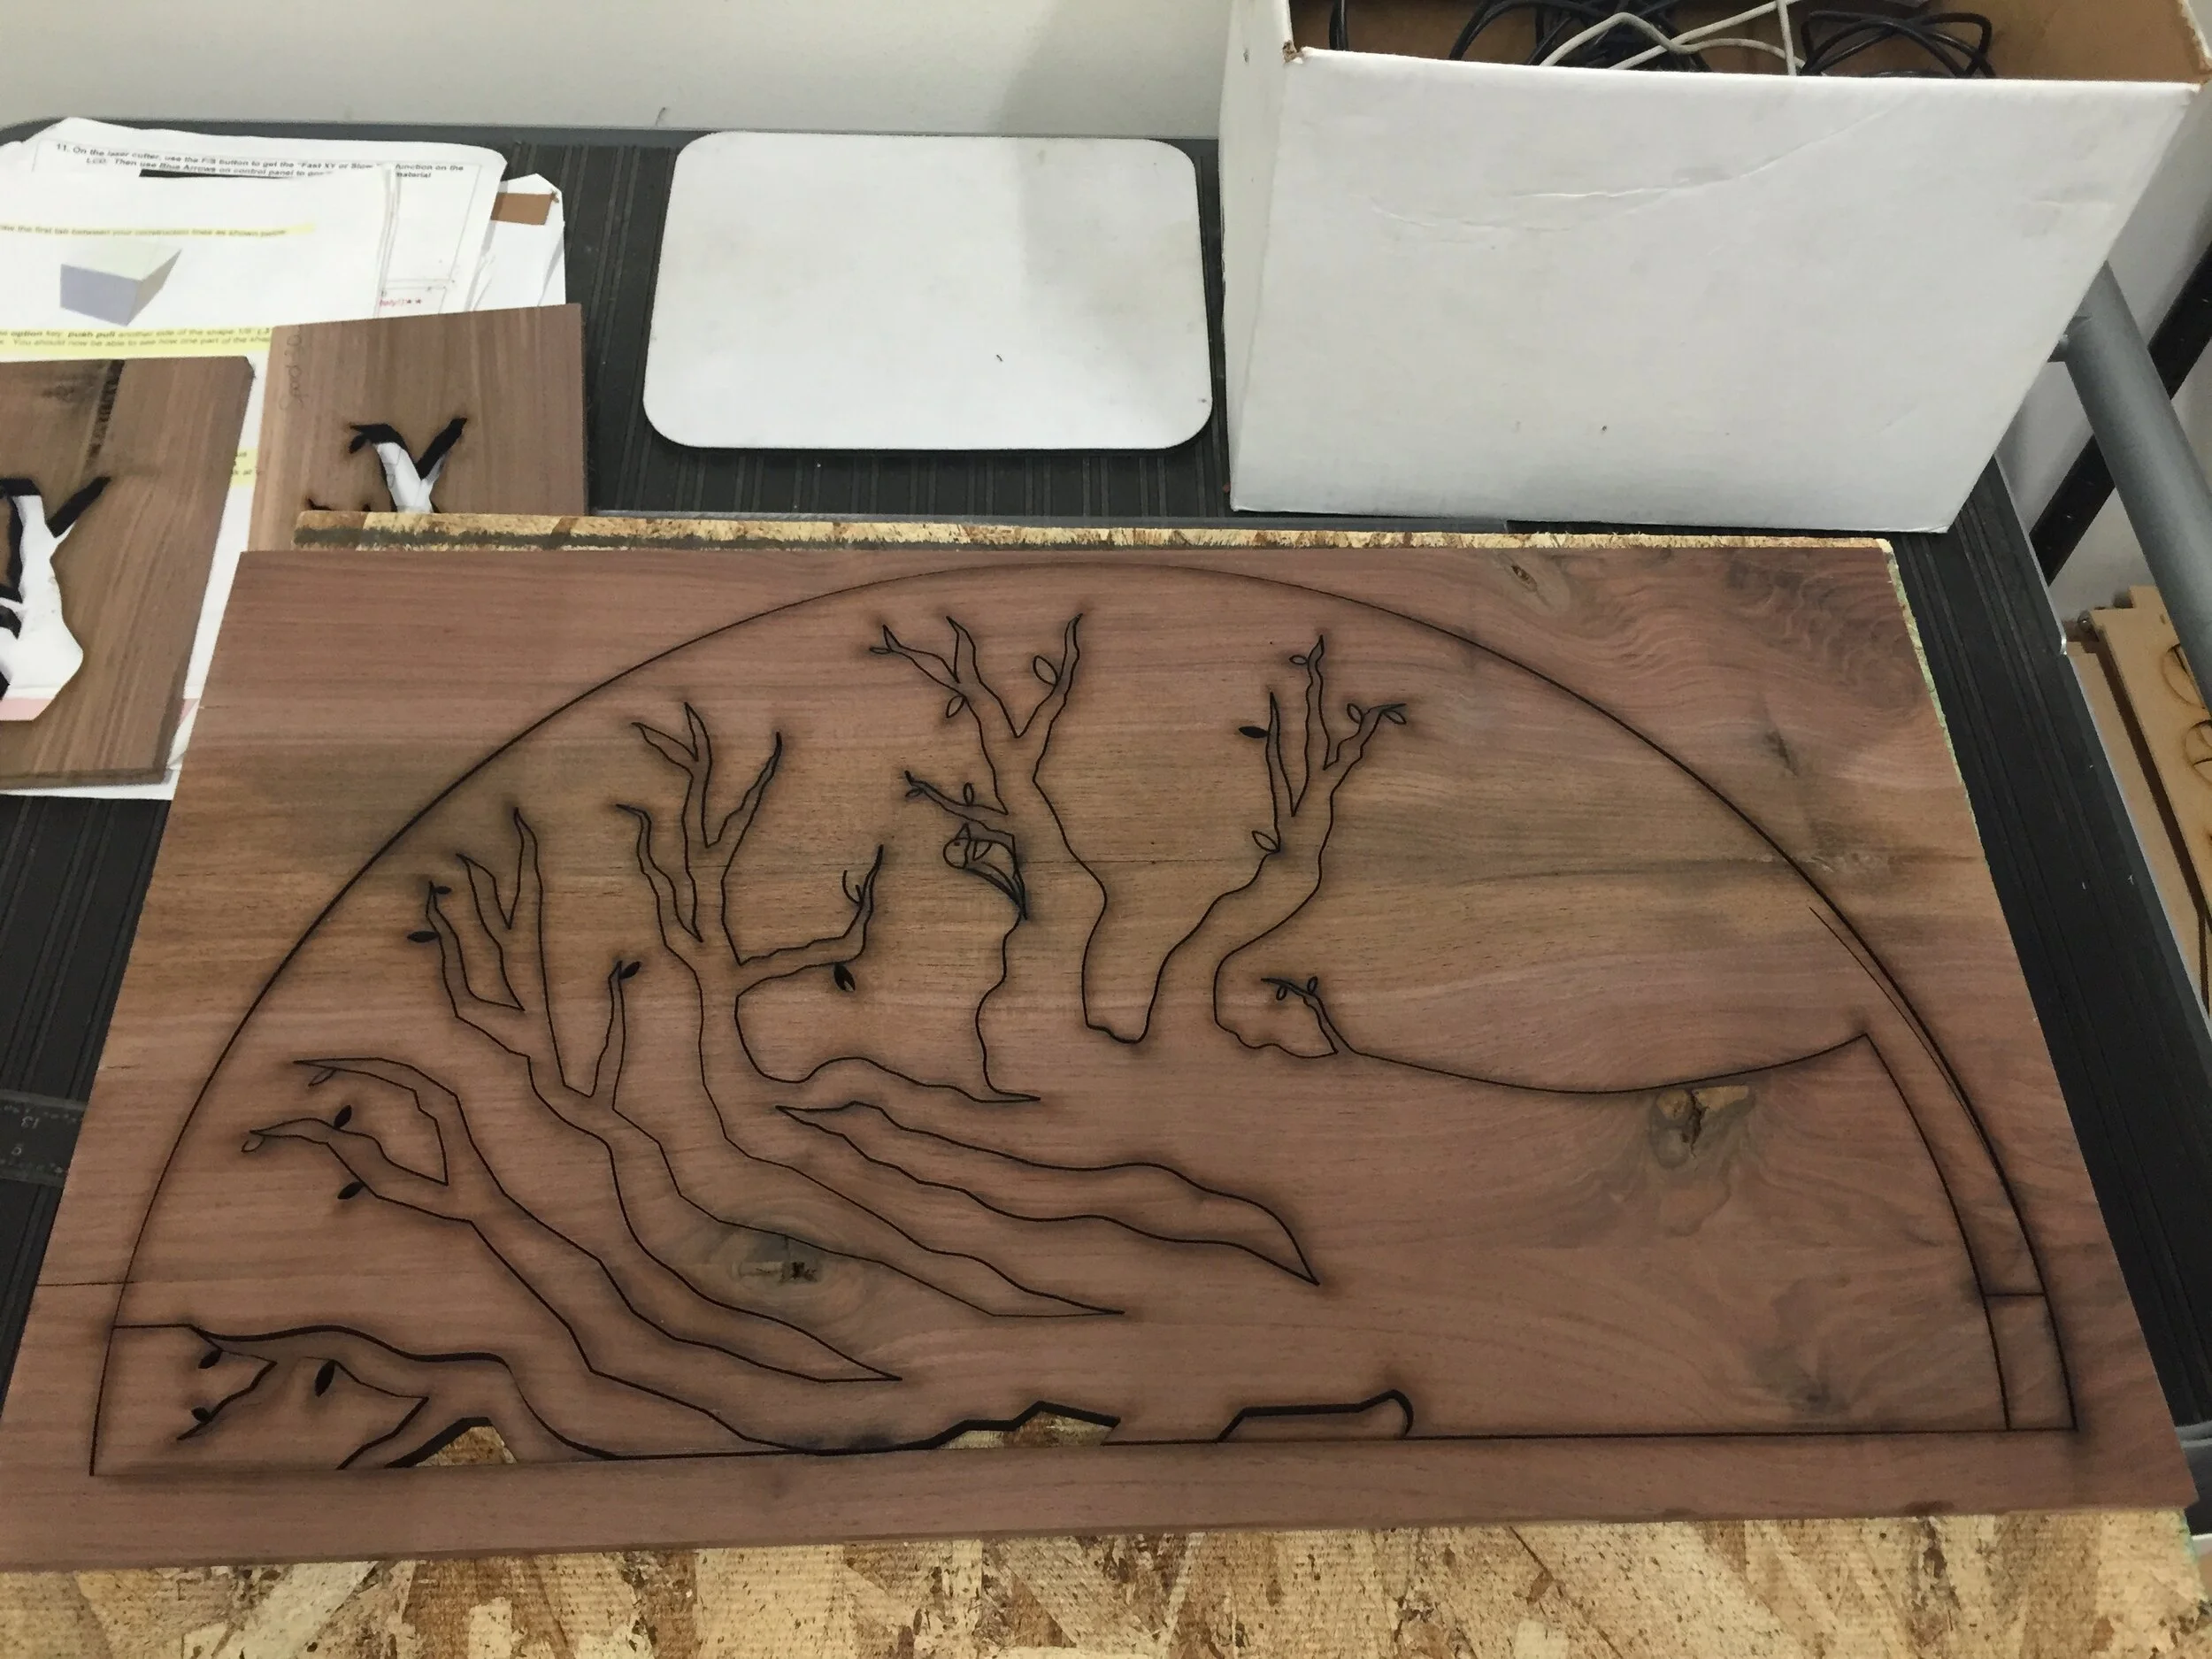
Final laser cut negative overlay (right)
Challenge #3: Wrong Scale for Negative Cutouts
One of the largest (and most devastating) problems I ran into throughout this project was realizing that after I had successfully cut out my entire tree from my handmade walnut wood, I had accidentally cut each half to different scales. As a result, I struggled gluing both pieces together because one half was slightly bigger than the other. In addition, I had to shift every single name on the tree because it was affected by the scale of the overlay. Though this problems seemed overwhelming in the moment, I found workarounds for each of them, and continued on.
Different scaled final pieces—the left half is slightly larger than the right half
Laser Cutting Poplar Underlay
Just as I had done for the walnut overlay, I was ready to engrave the poplar underlay of my final tabletop, which is when I ran into …
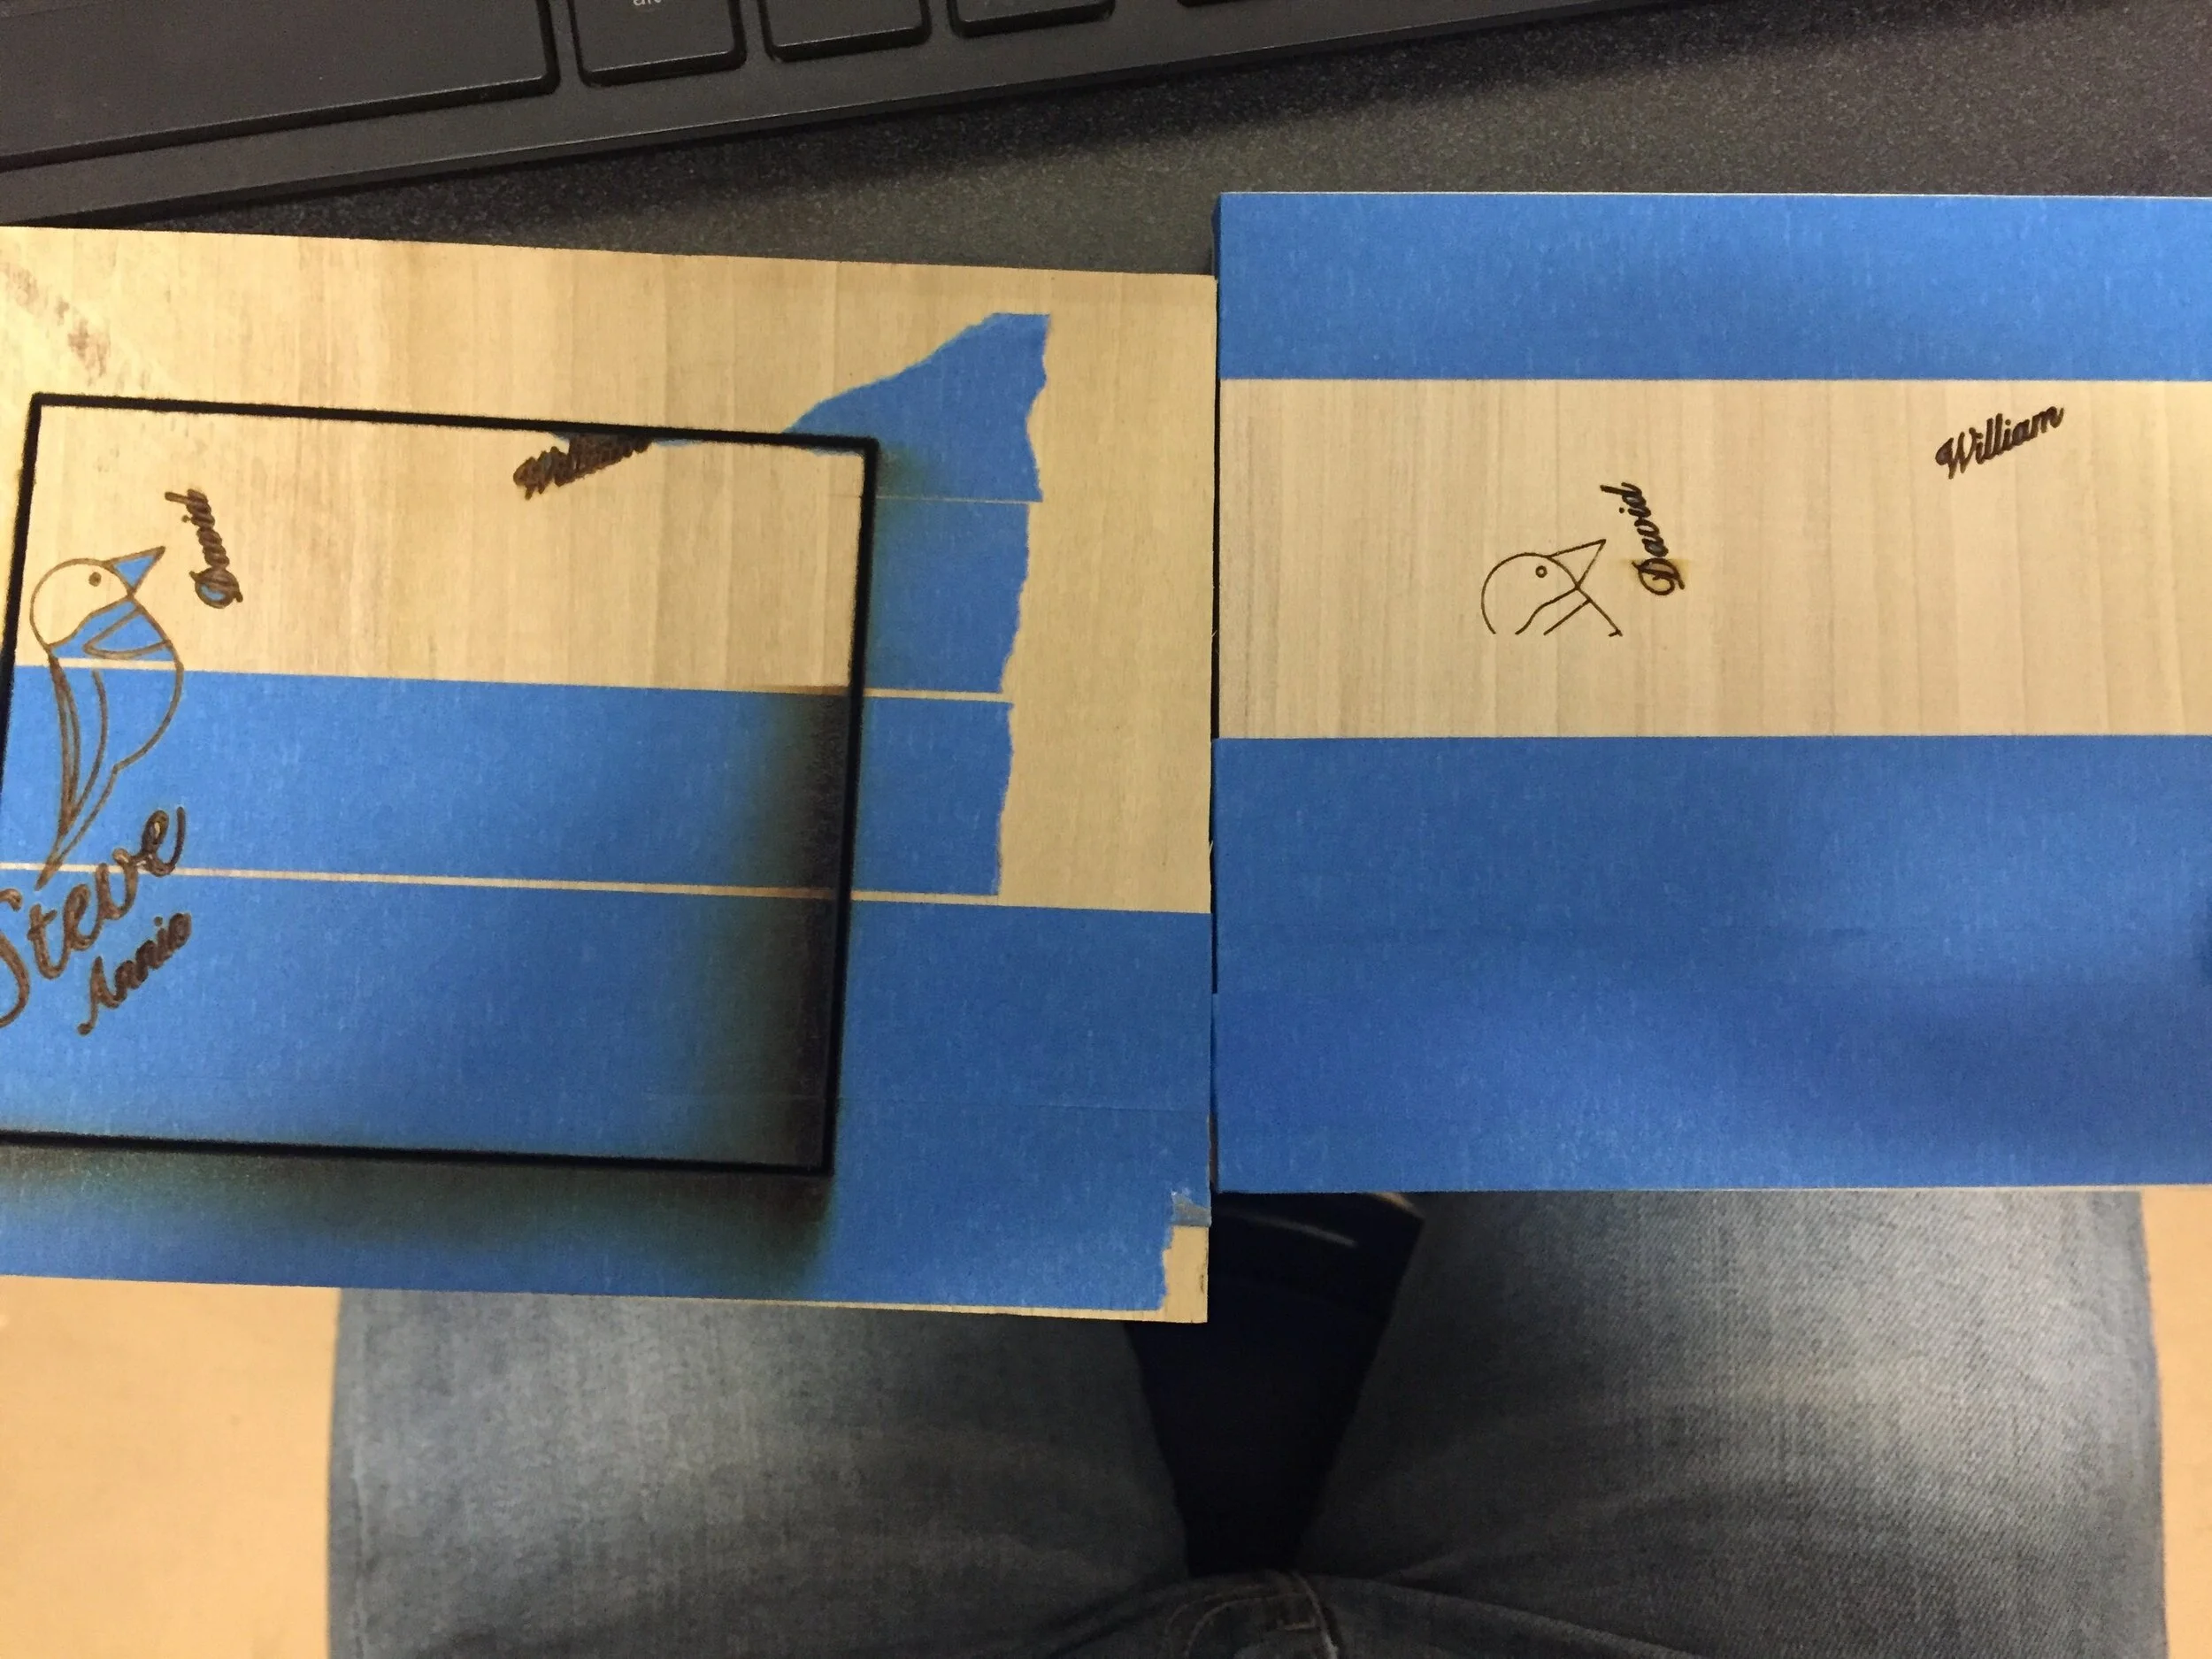
Challenge #4: Discrepancy in Engraving Speeds
Due to the incorrect scaling of the walnut overlay and my consequential reformatting of the engravings, I had a hard time aligning the engraved names and birds with the incorrectly-scaled overlay. This led me to reconfigure the settings of the laser cutter and as a result, one side of the poplar was engraved darker than the other. This discrepancy wasn’t that big of a deal, but it was certainly frustrating considering I had just recovered from the error I made on my walnut.
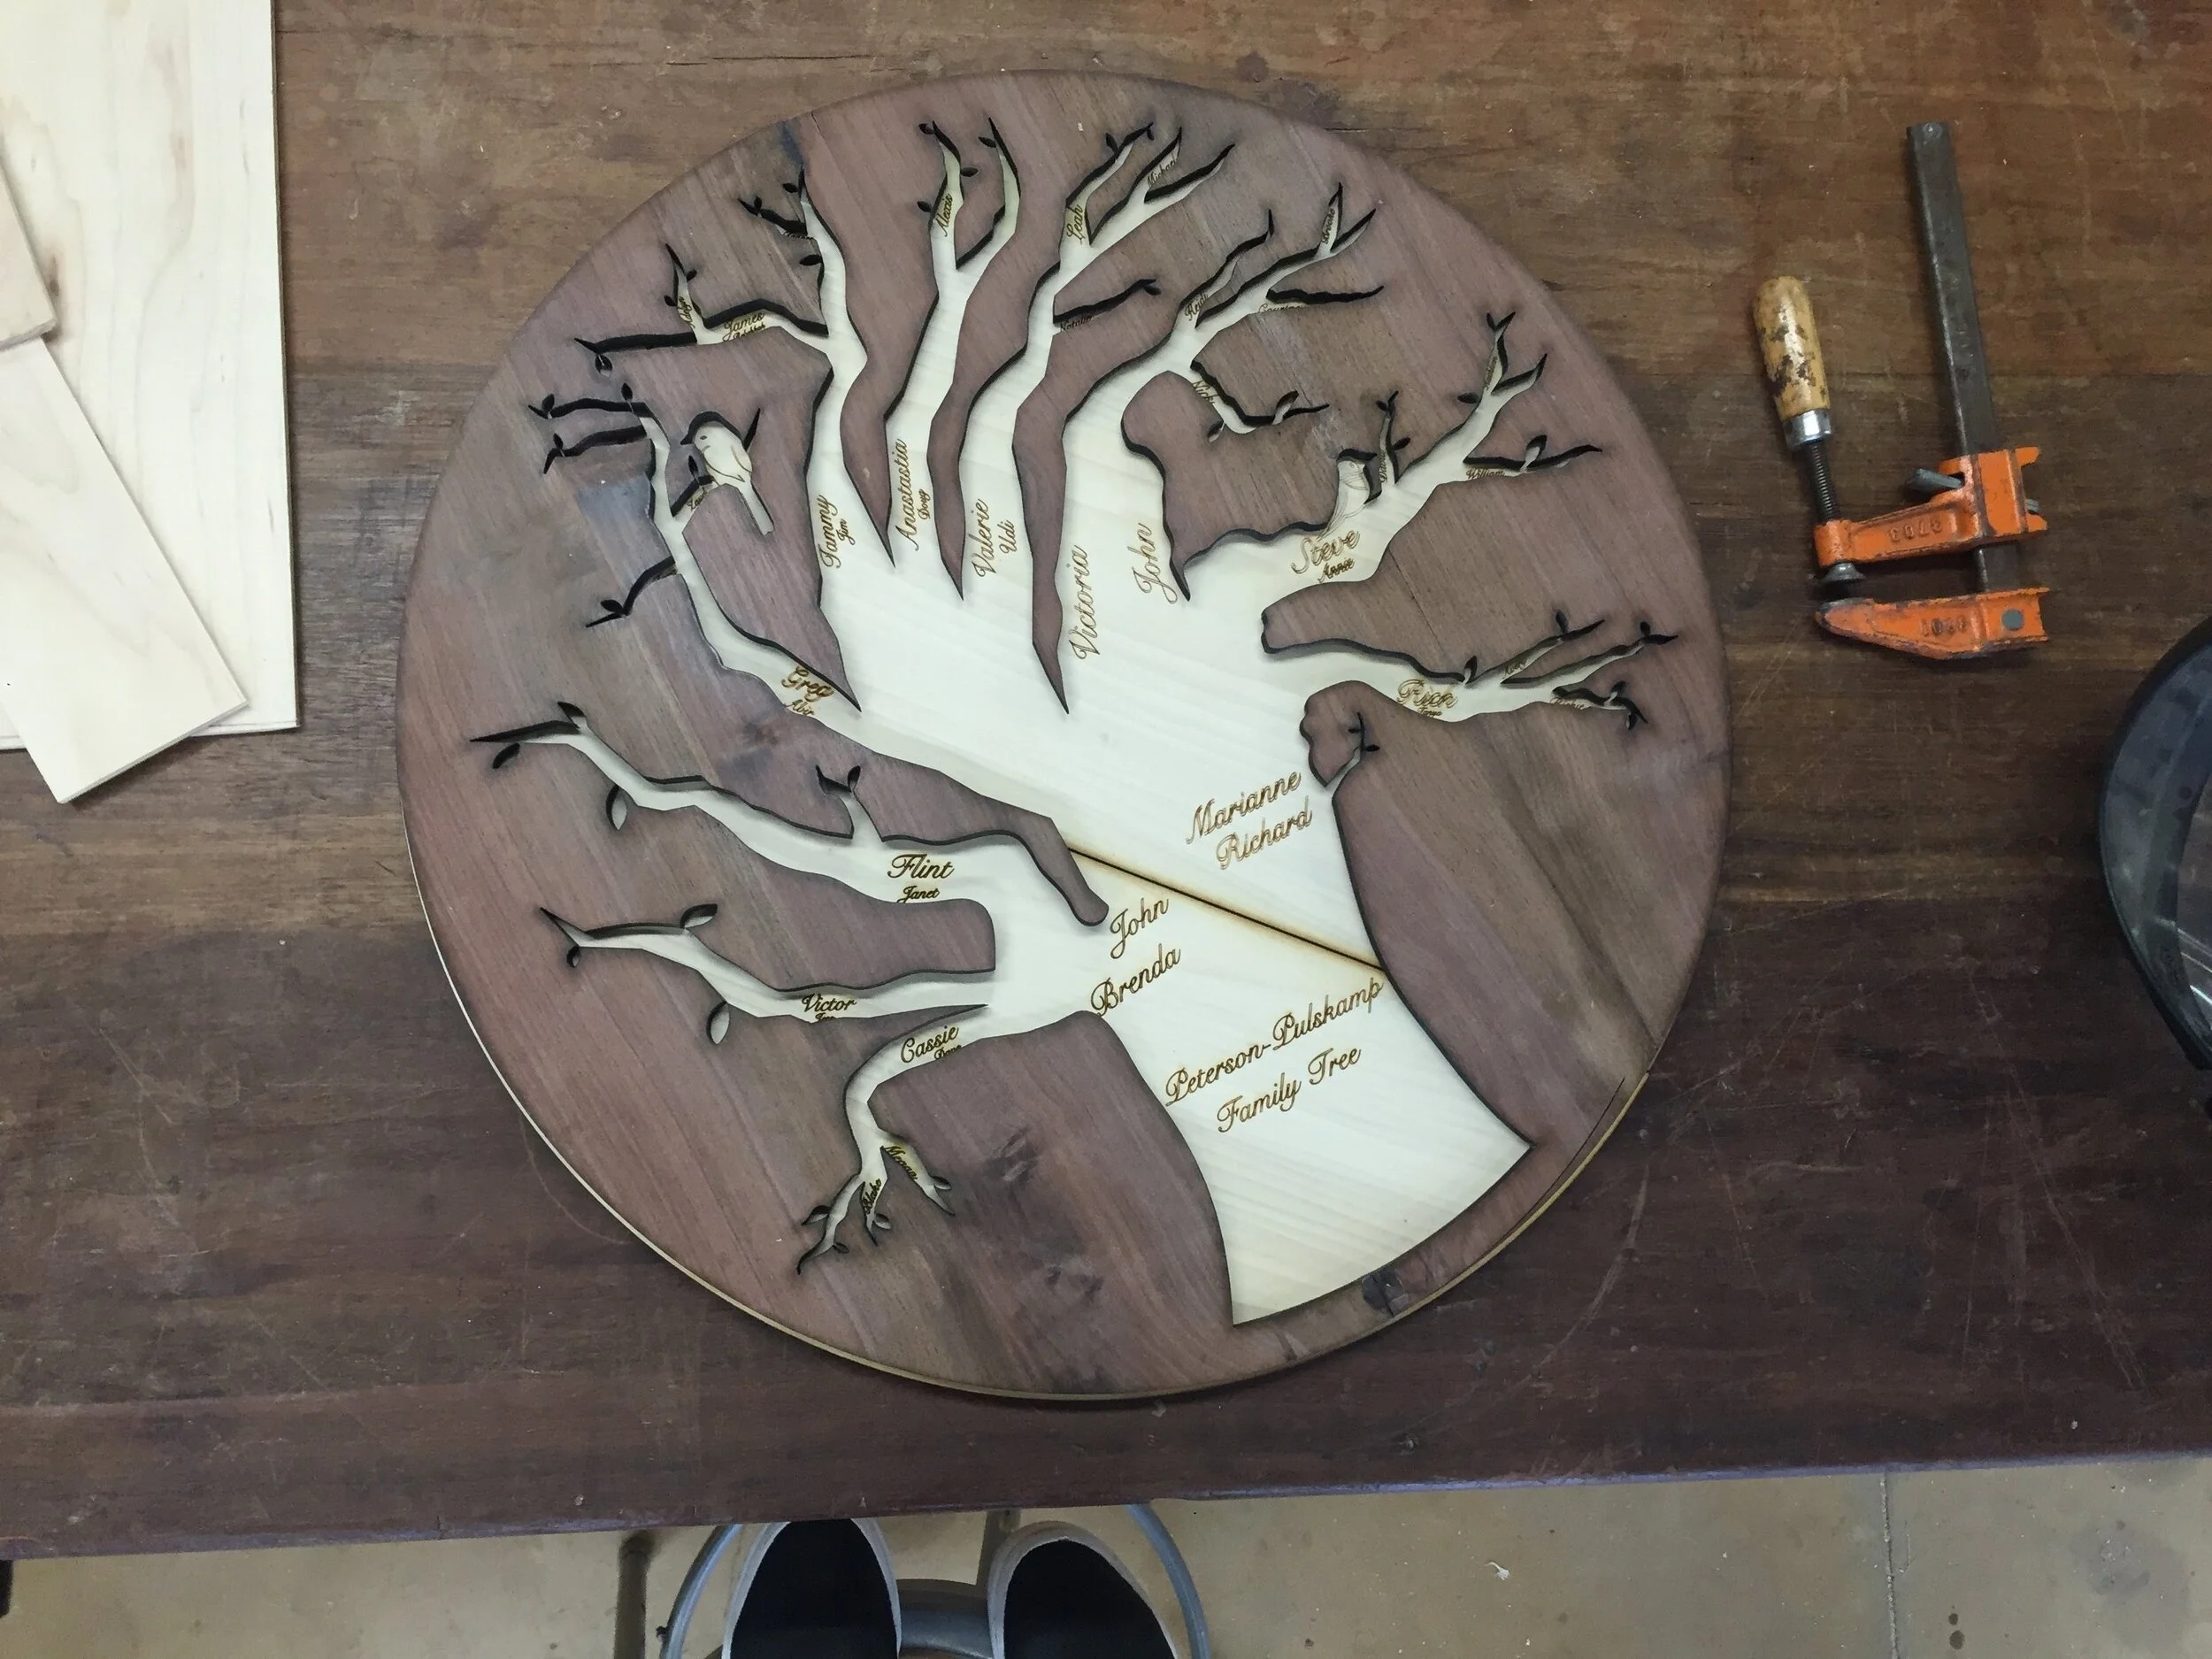
Final walnut overlay on engraved poplar
As you can see in the image above, the engravings on the right side of the poplar are much lighter than they are on the left side. On the bright side, however, I was able to successfully glue the walnut overlay flushed with the poplar, which was a huge feat considering they were not the same size at all.
Finalizing the Tabletop
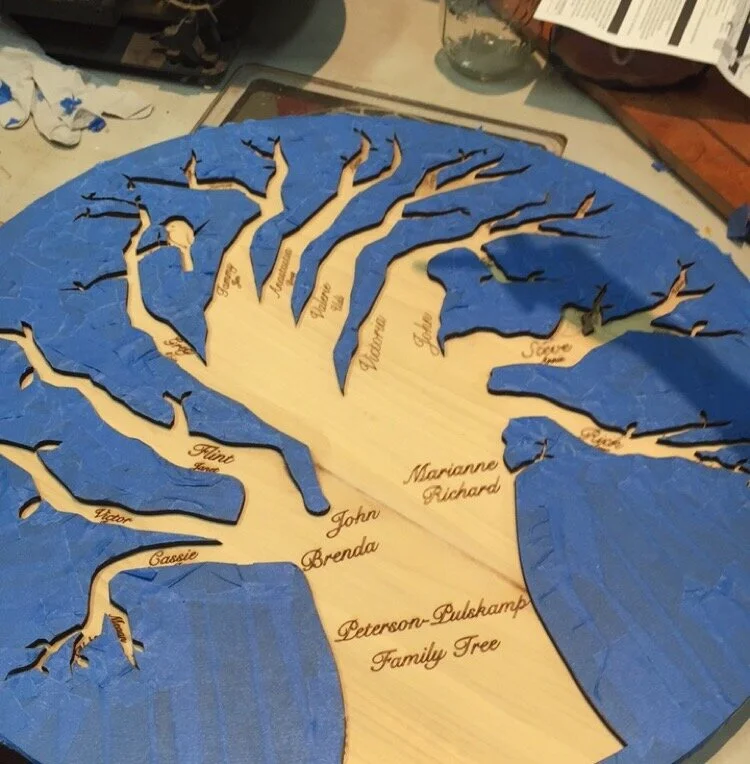
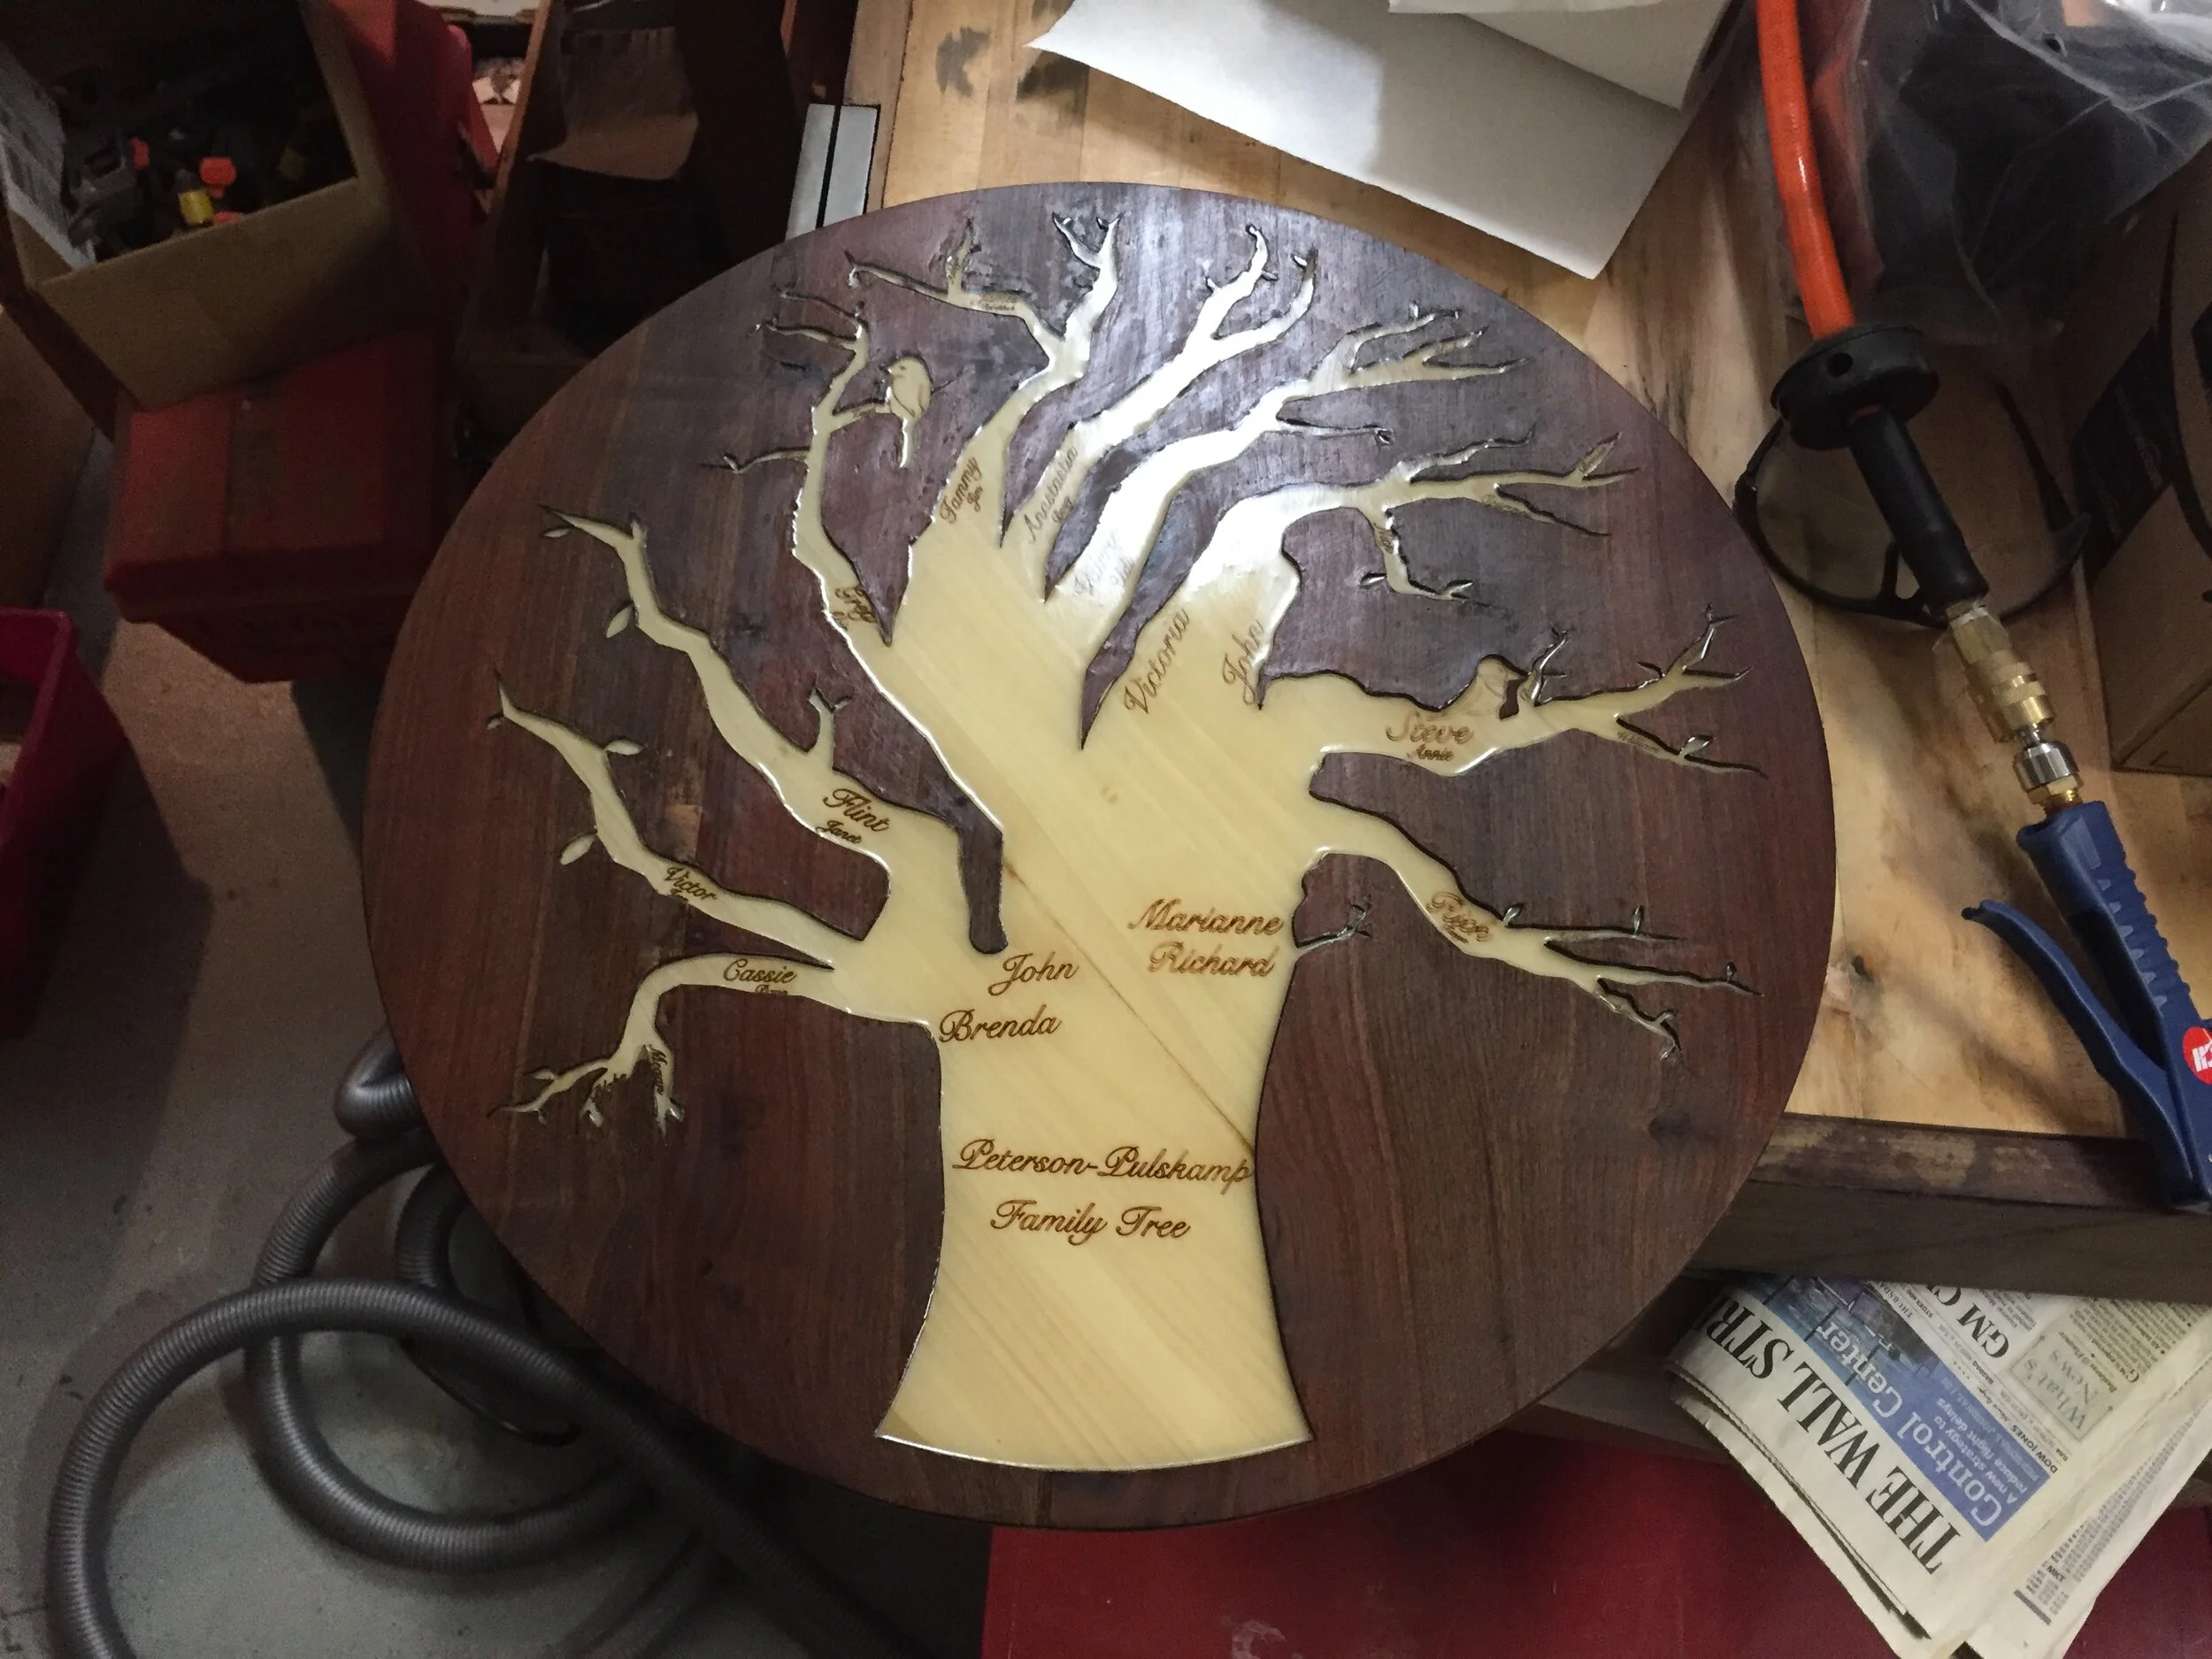
The last step in the process of building my tabletop was adding the resin into the negative space made by the walnut overlay. The goal was that the clear resin would make the engravings visible while also making the poplar wood appear flushed with the walnut. In order to do this, I had to tape every single piece of exposed walnut wood so as not to get resin on it, and then fill the middle. I let this sit for 48 hours and then removed the tape and was left with my final tabletop! I used beeswax to finish the wood and set it out to dry.
Finally after what felt like 10 years of working on the tabletop, it was time to start the center shaft.
Building the Table Shaft
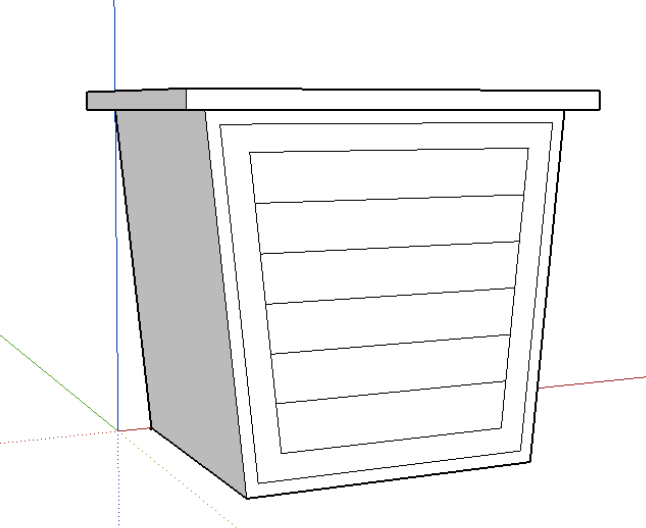
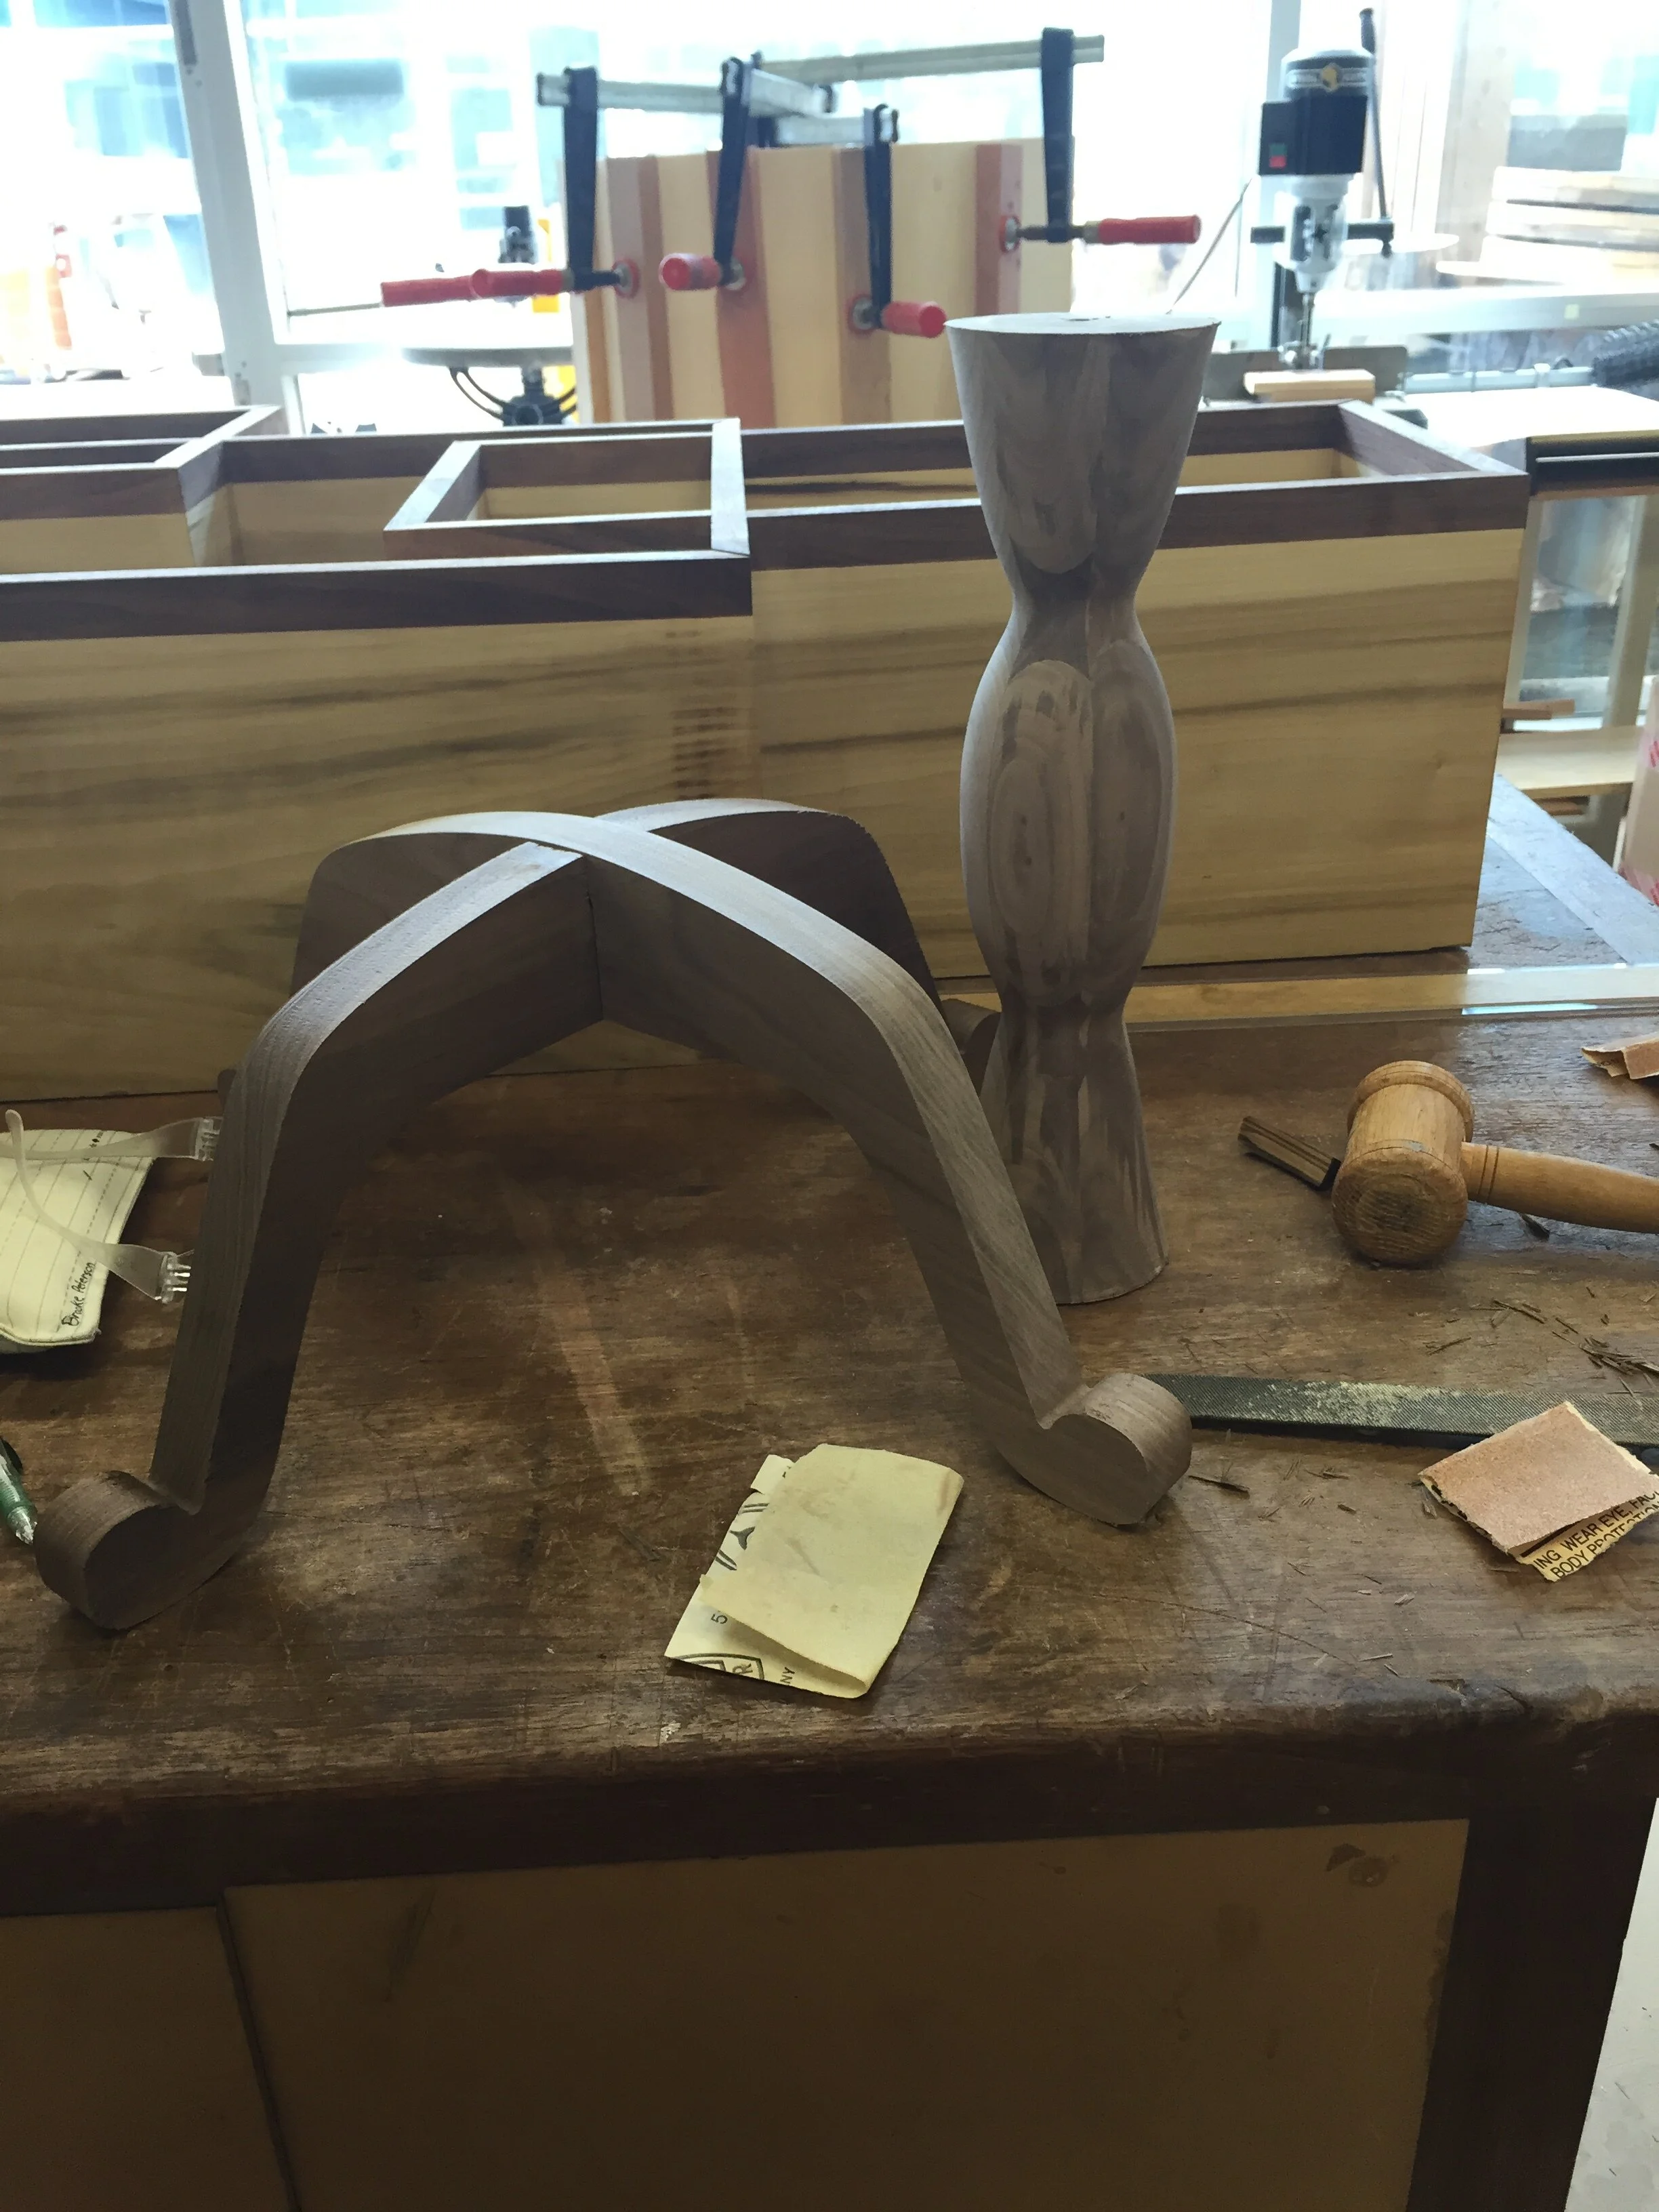
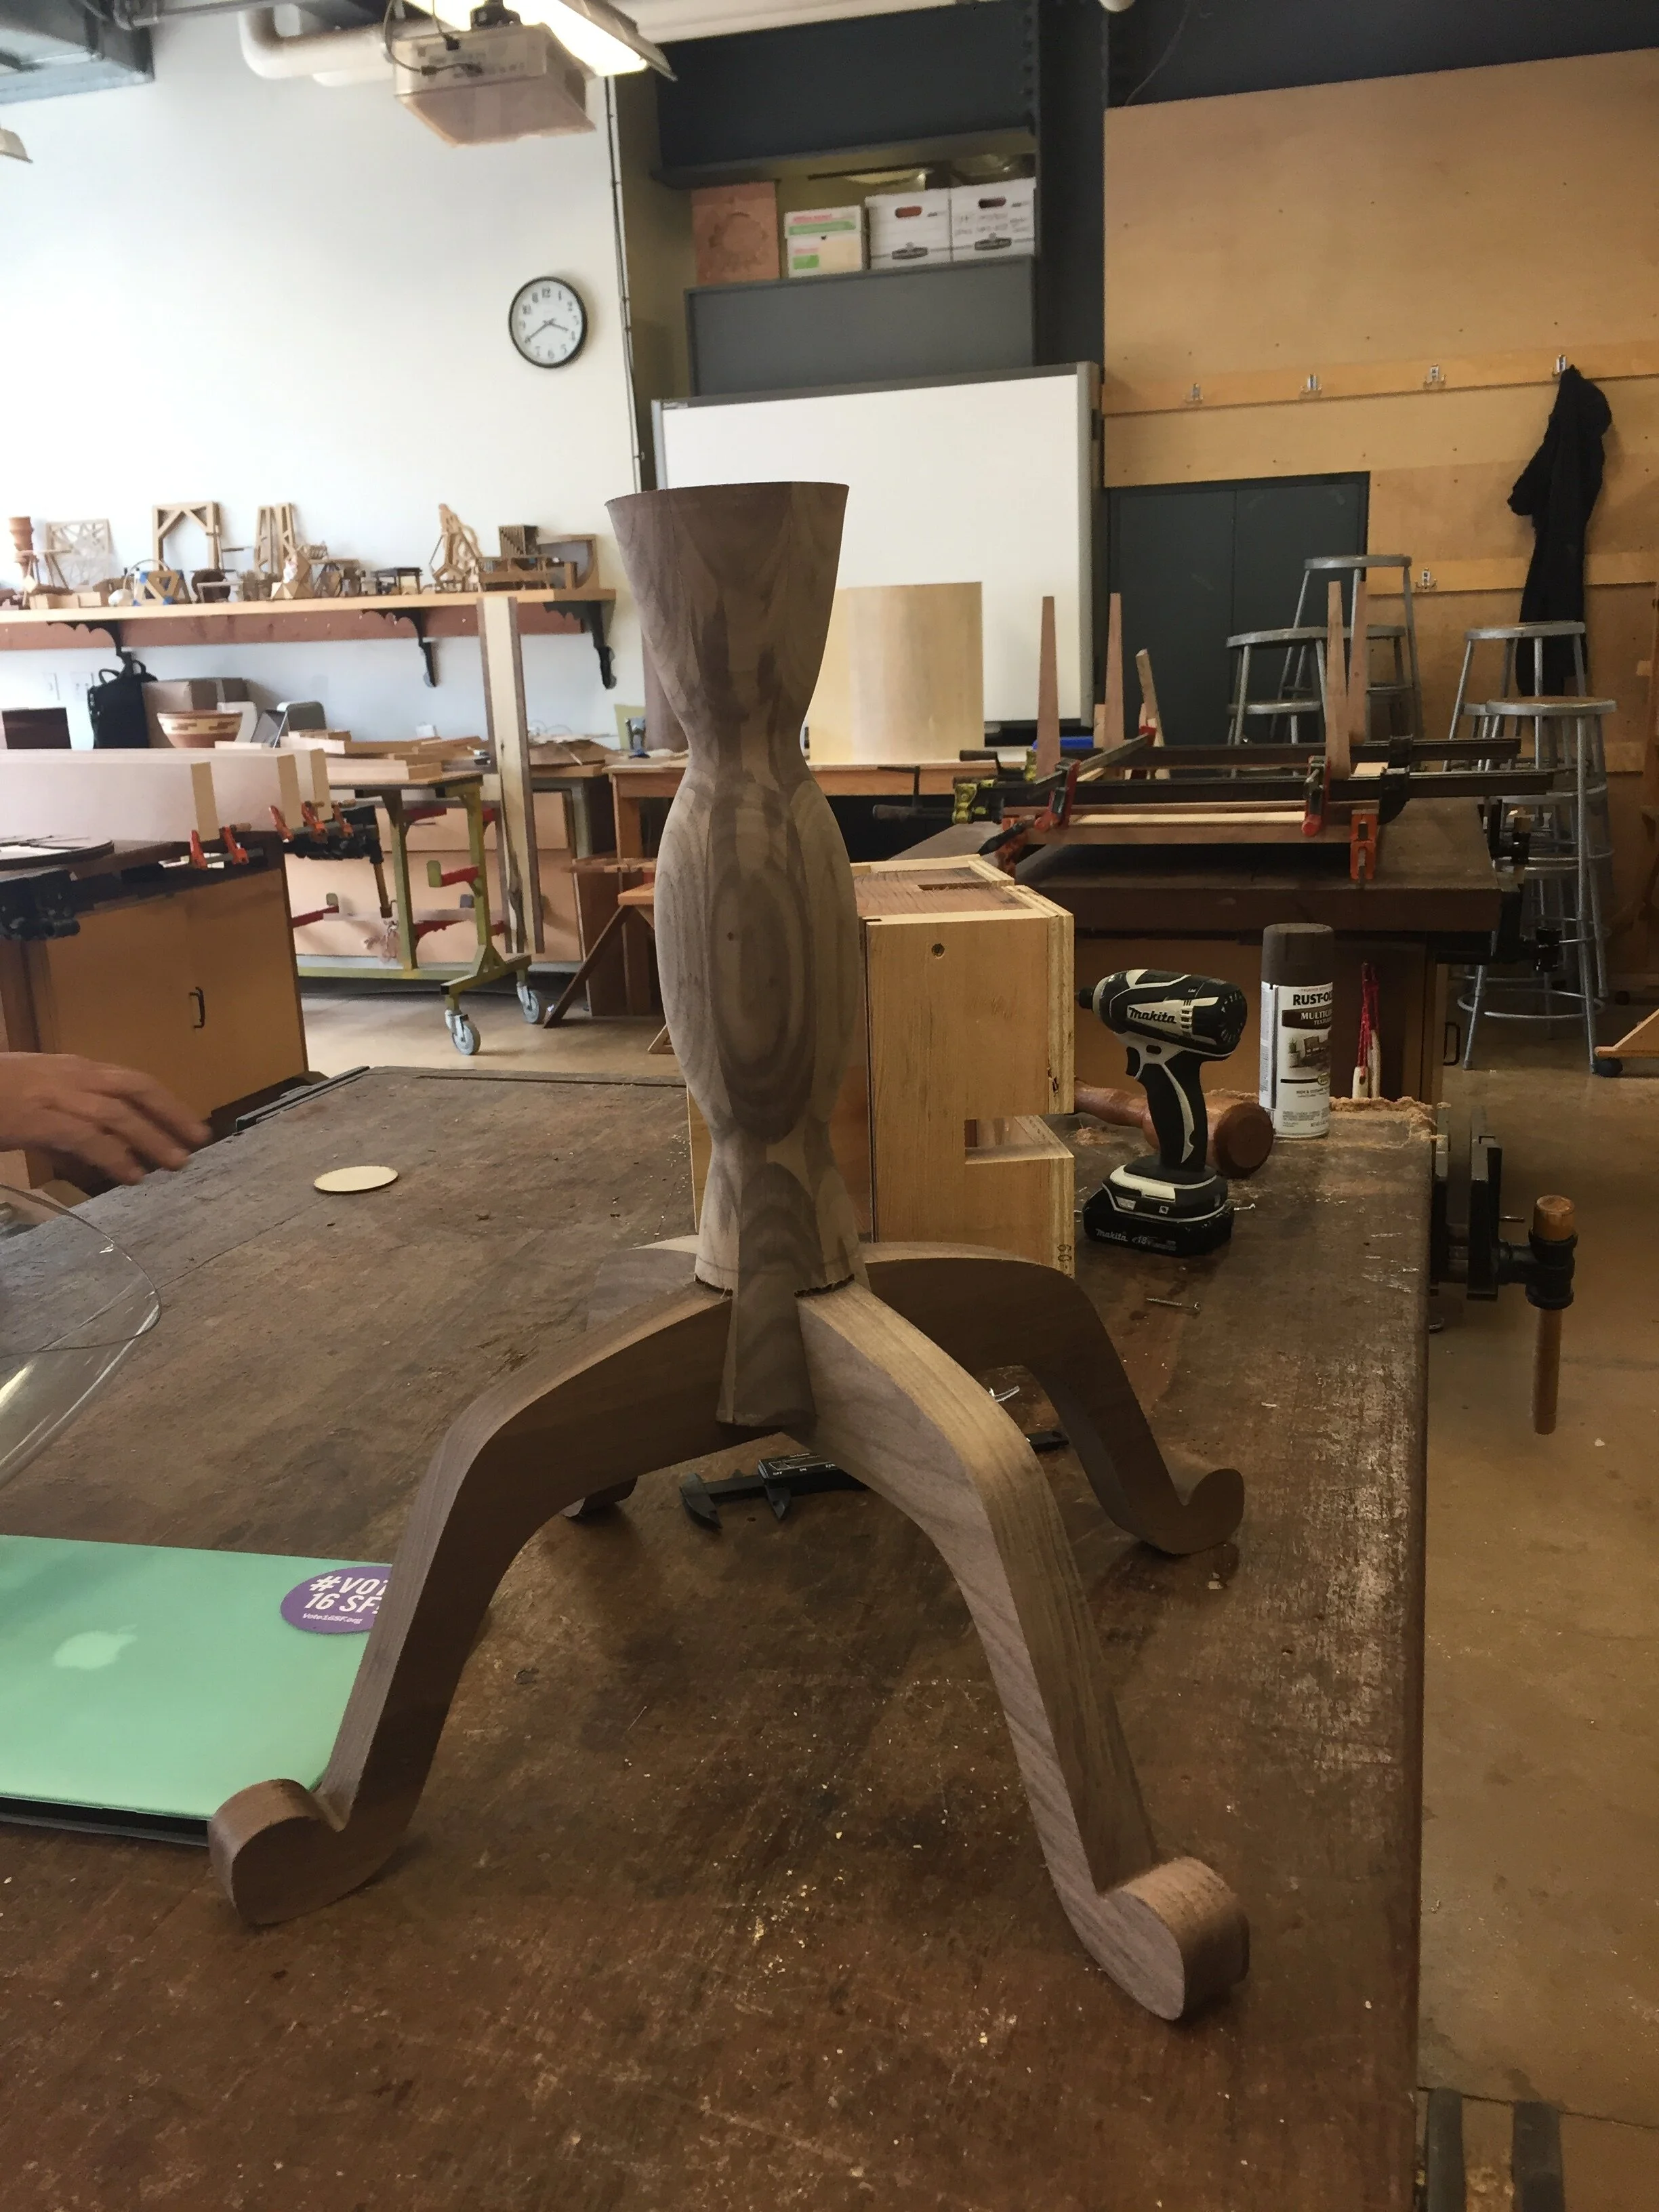
Designing and building the center shaft of the table was actually the most fun part of the project because it involved use of the lathe—a machine for shaping wood by means of a rotating drive which turns the piece being worked on against changeable cutting tools. I started tackling this section of the project by mapping out the desired shape and size of the center shaft with MDF.
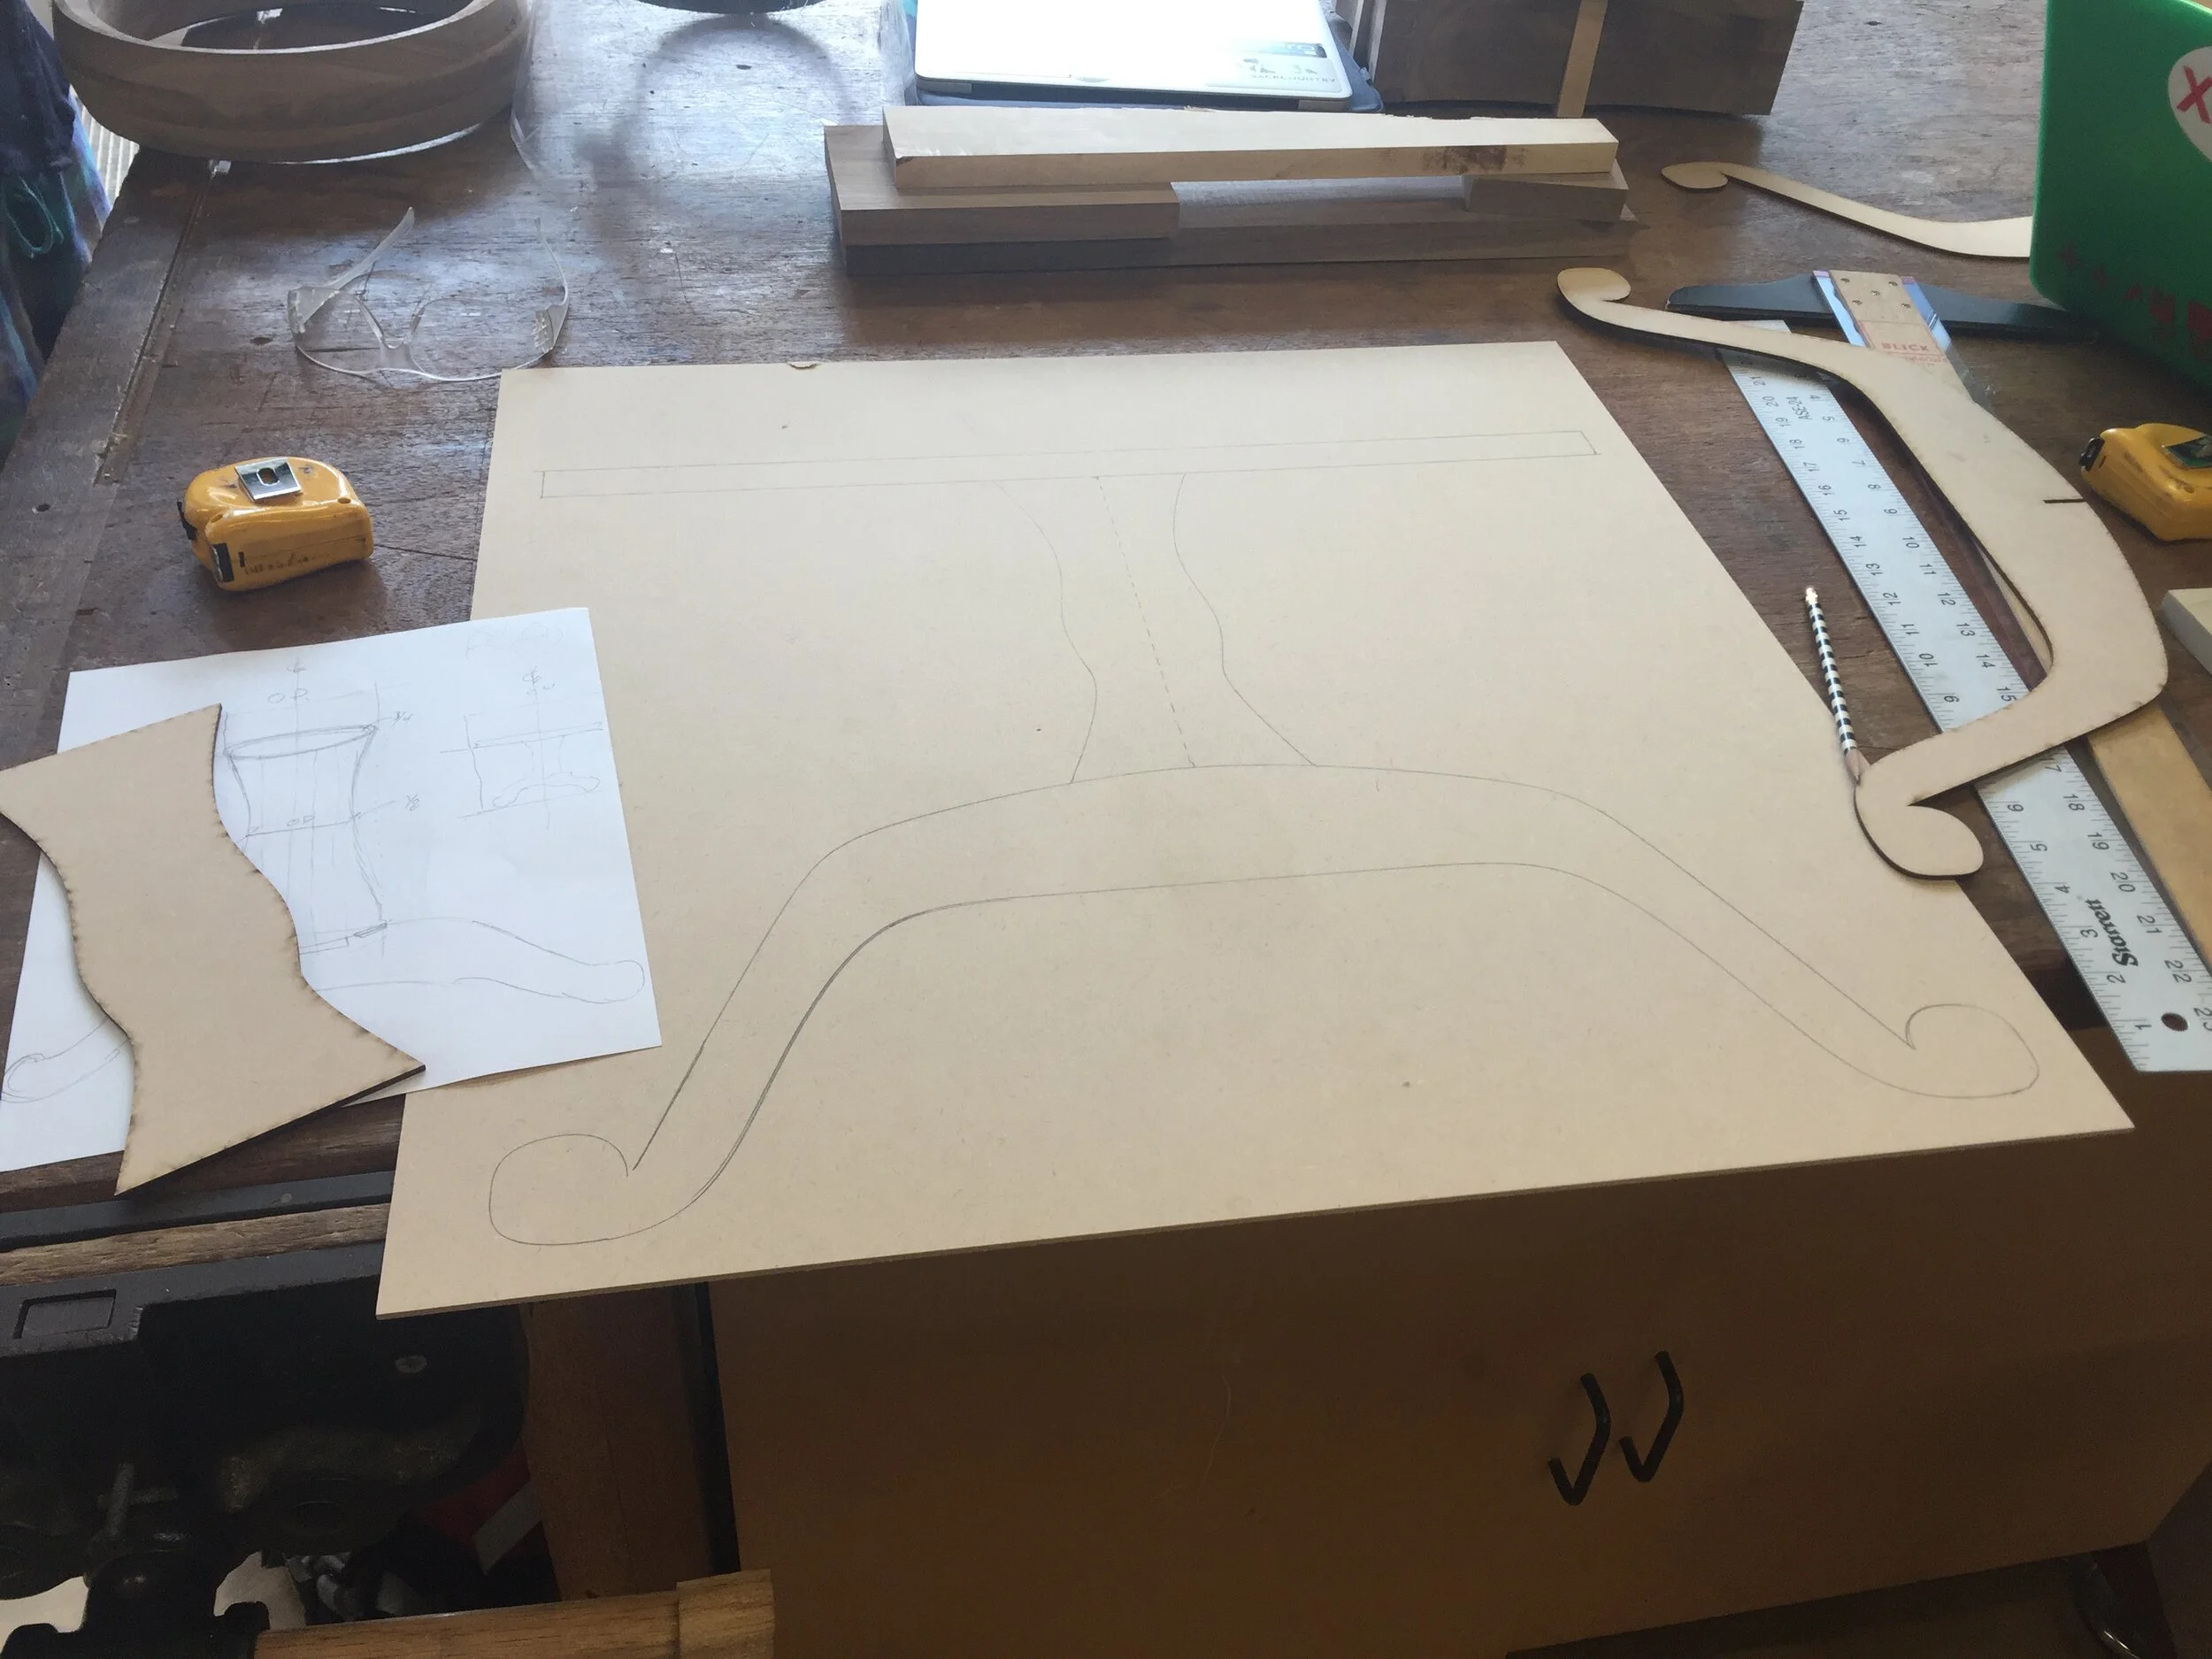
Full size prototype of center shaft shape and size, with added leg shape and tabletop for scale
Turning the Shaft
Once I had a good idea of how big and curvy I wanted the center of the table to be, I needed to make the actual wood that I would turn it out of, just as I had done for the tabletop piece. The entire process of building my turning block and turning the center shaft on the lathe only took about a week. I loved this part because it allowed a little more room for both creativity and error. Ultimately, I was the one turning the shaft, so I decided when I was done—and that was when I was satisfied with the shape and look of it.
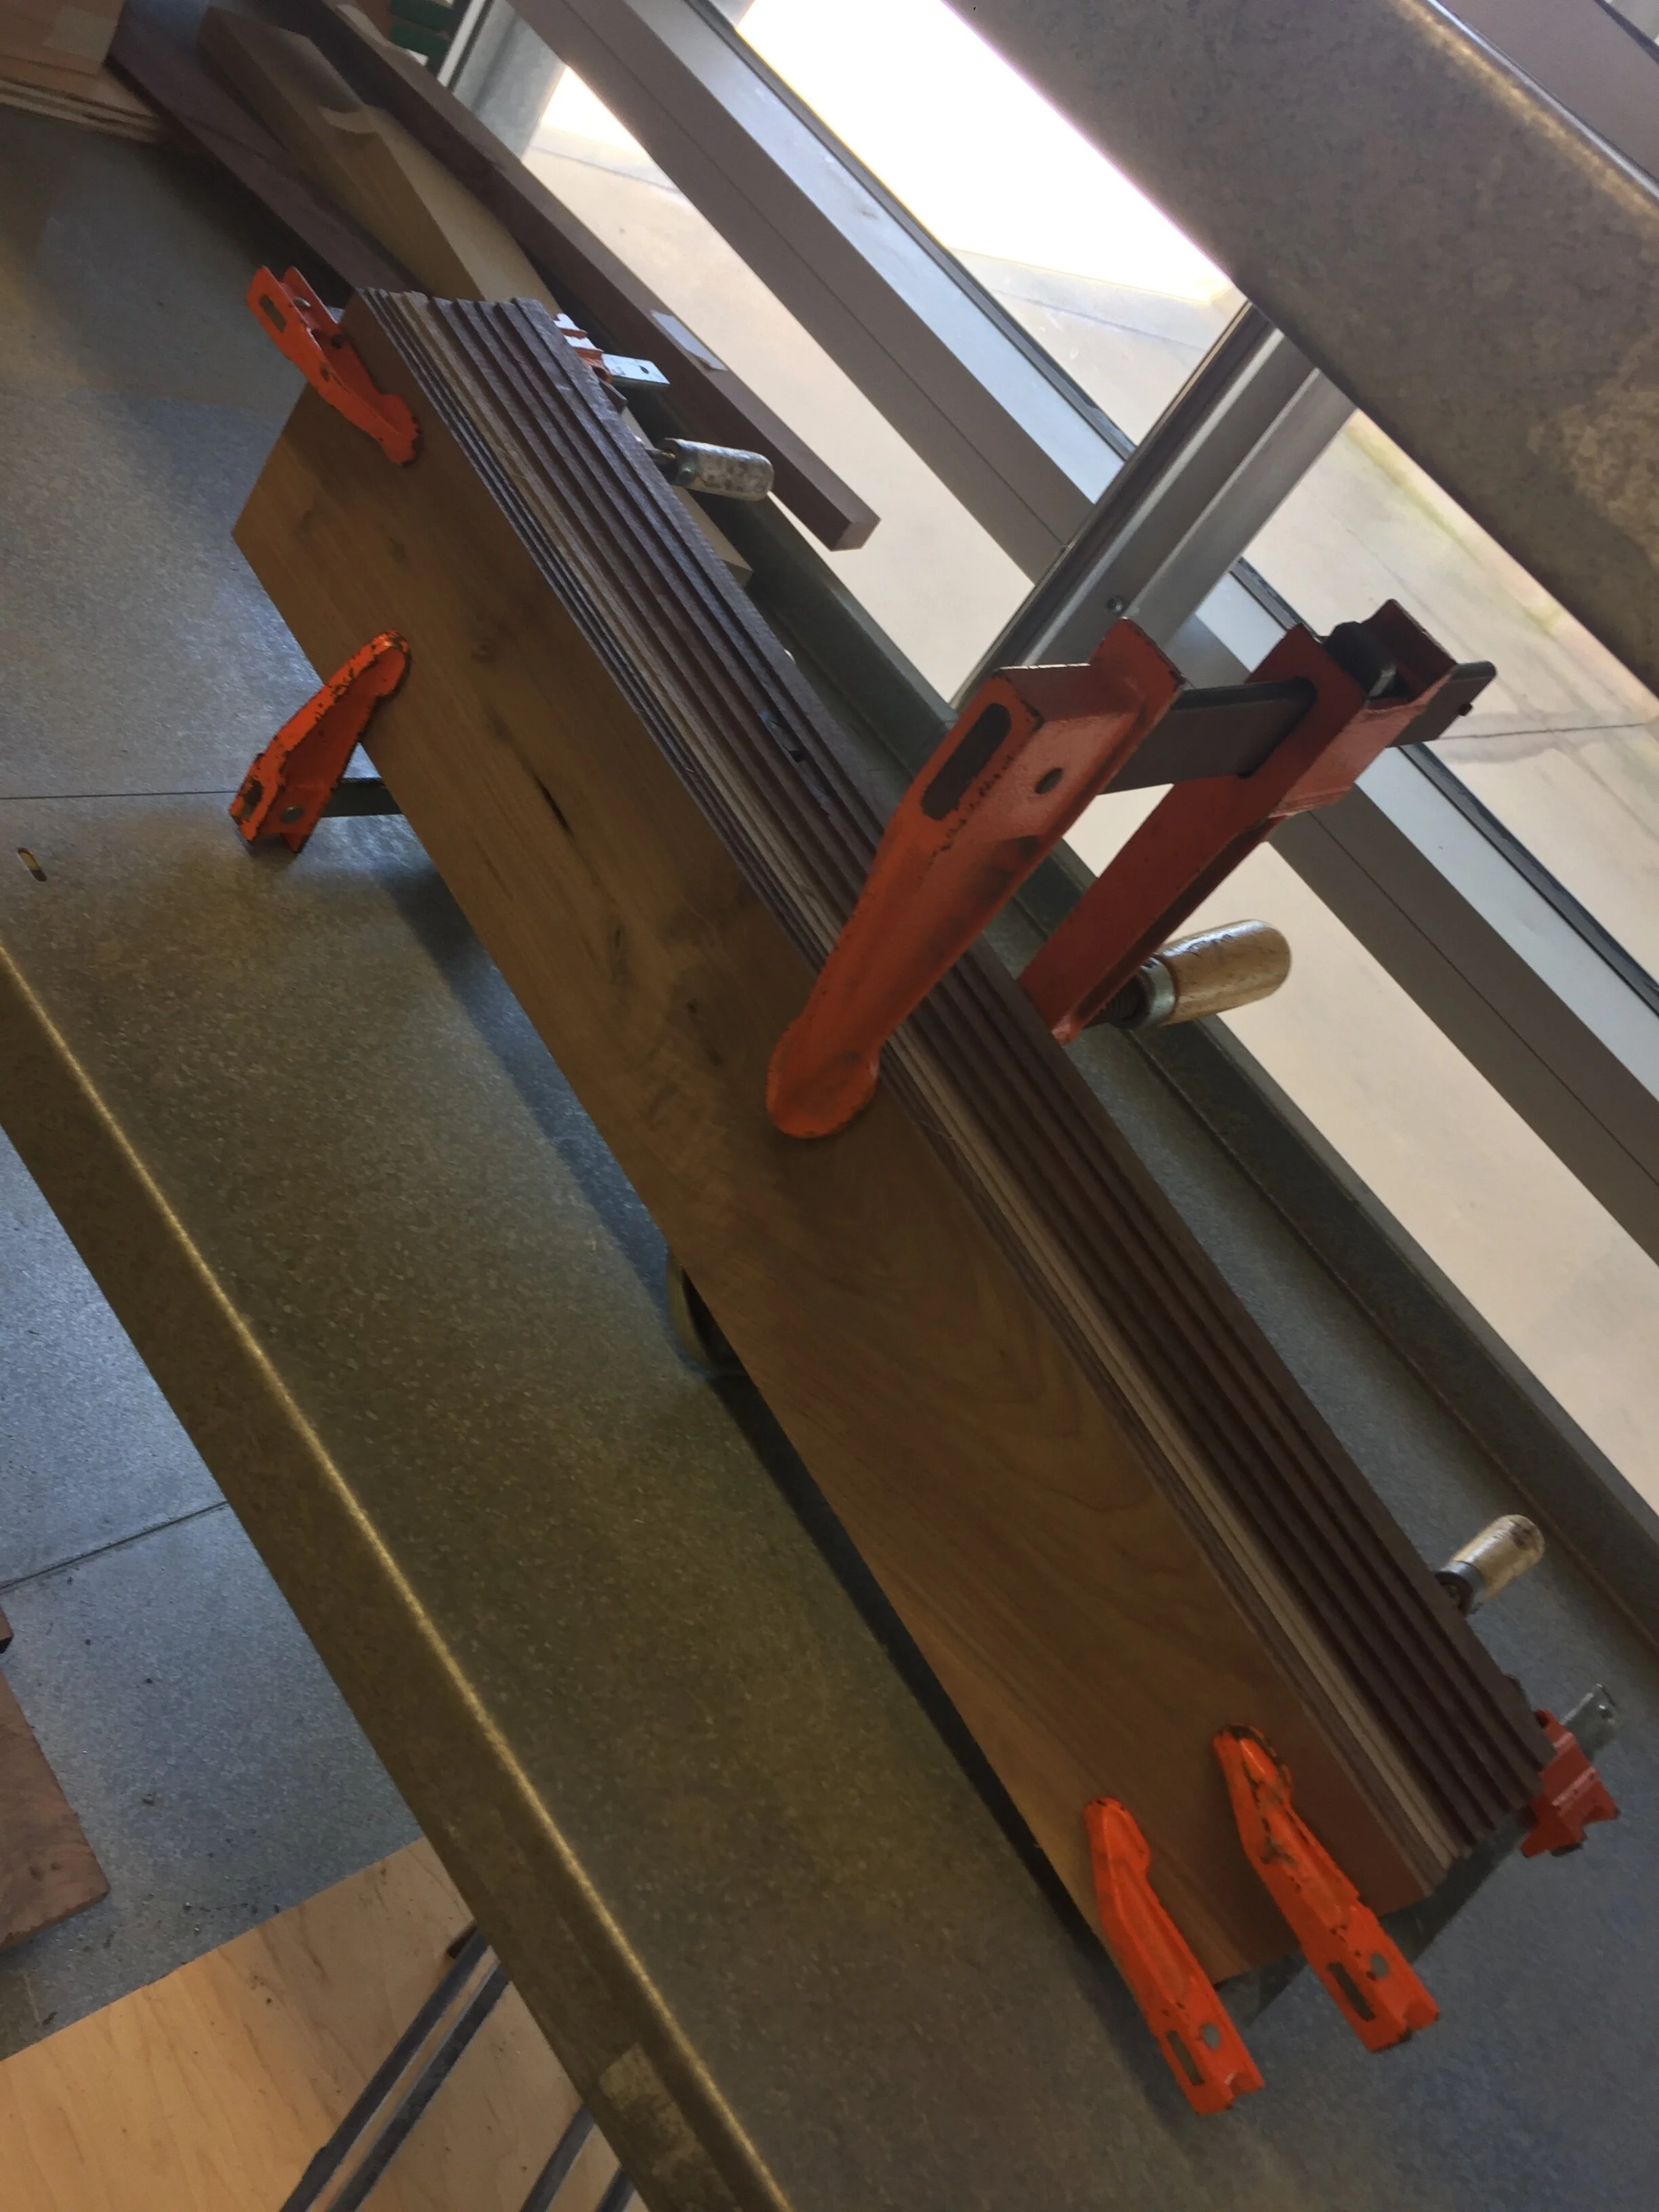
Walnut turning block
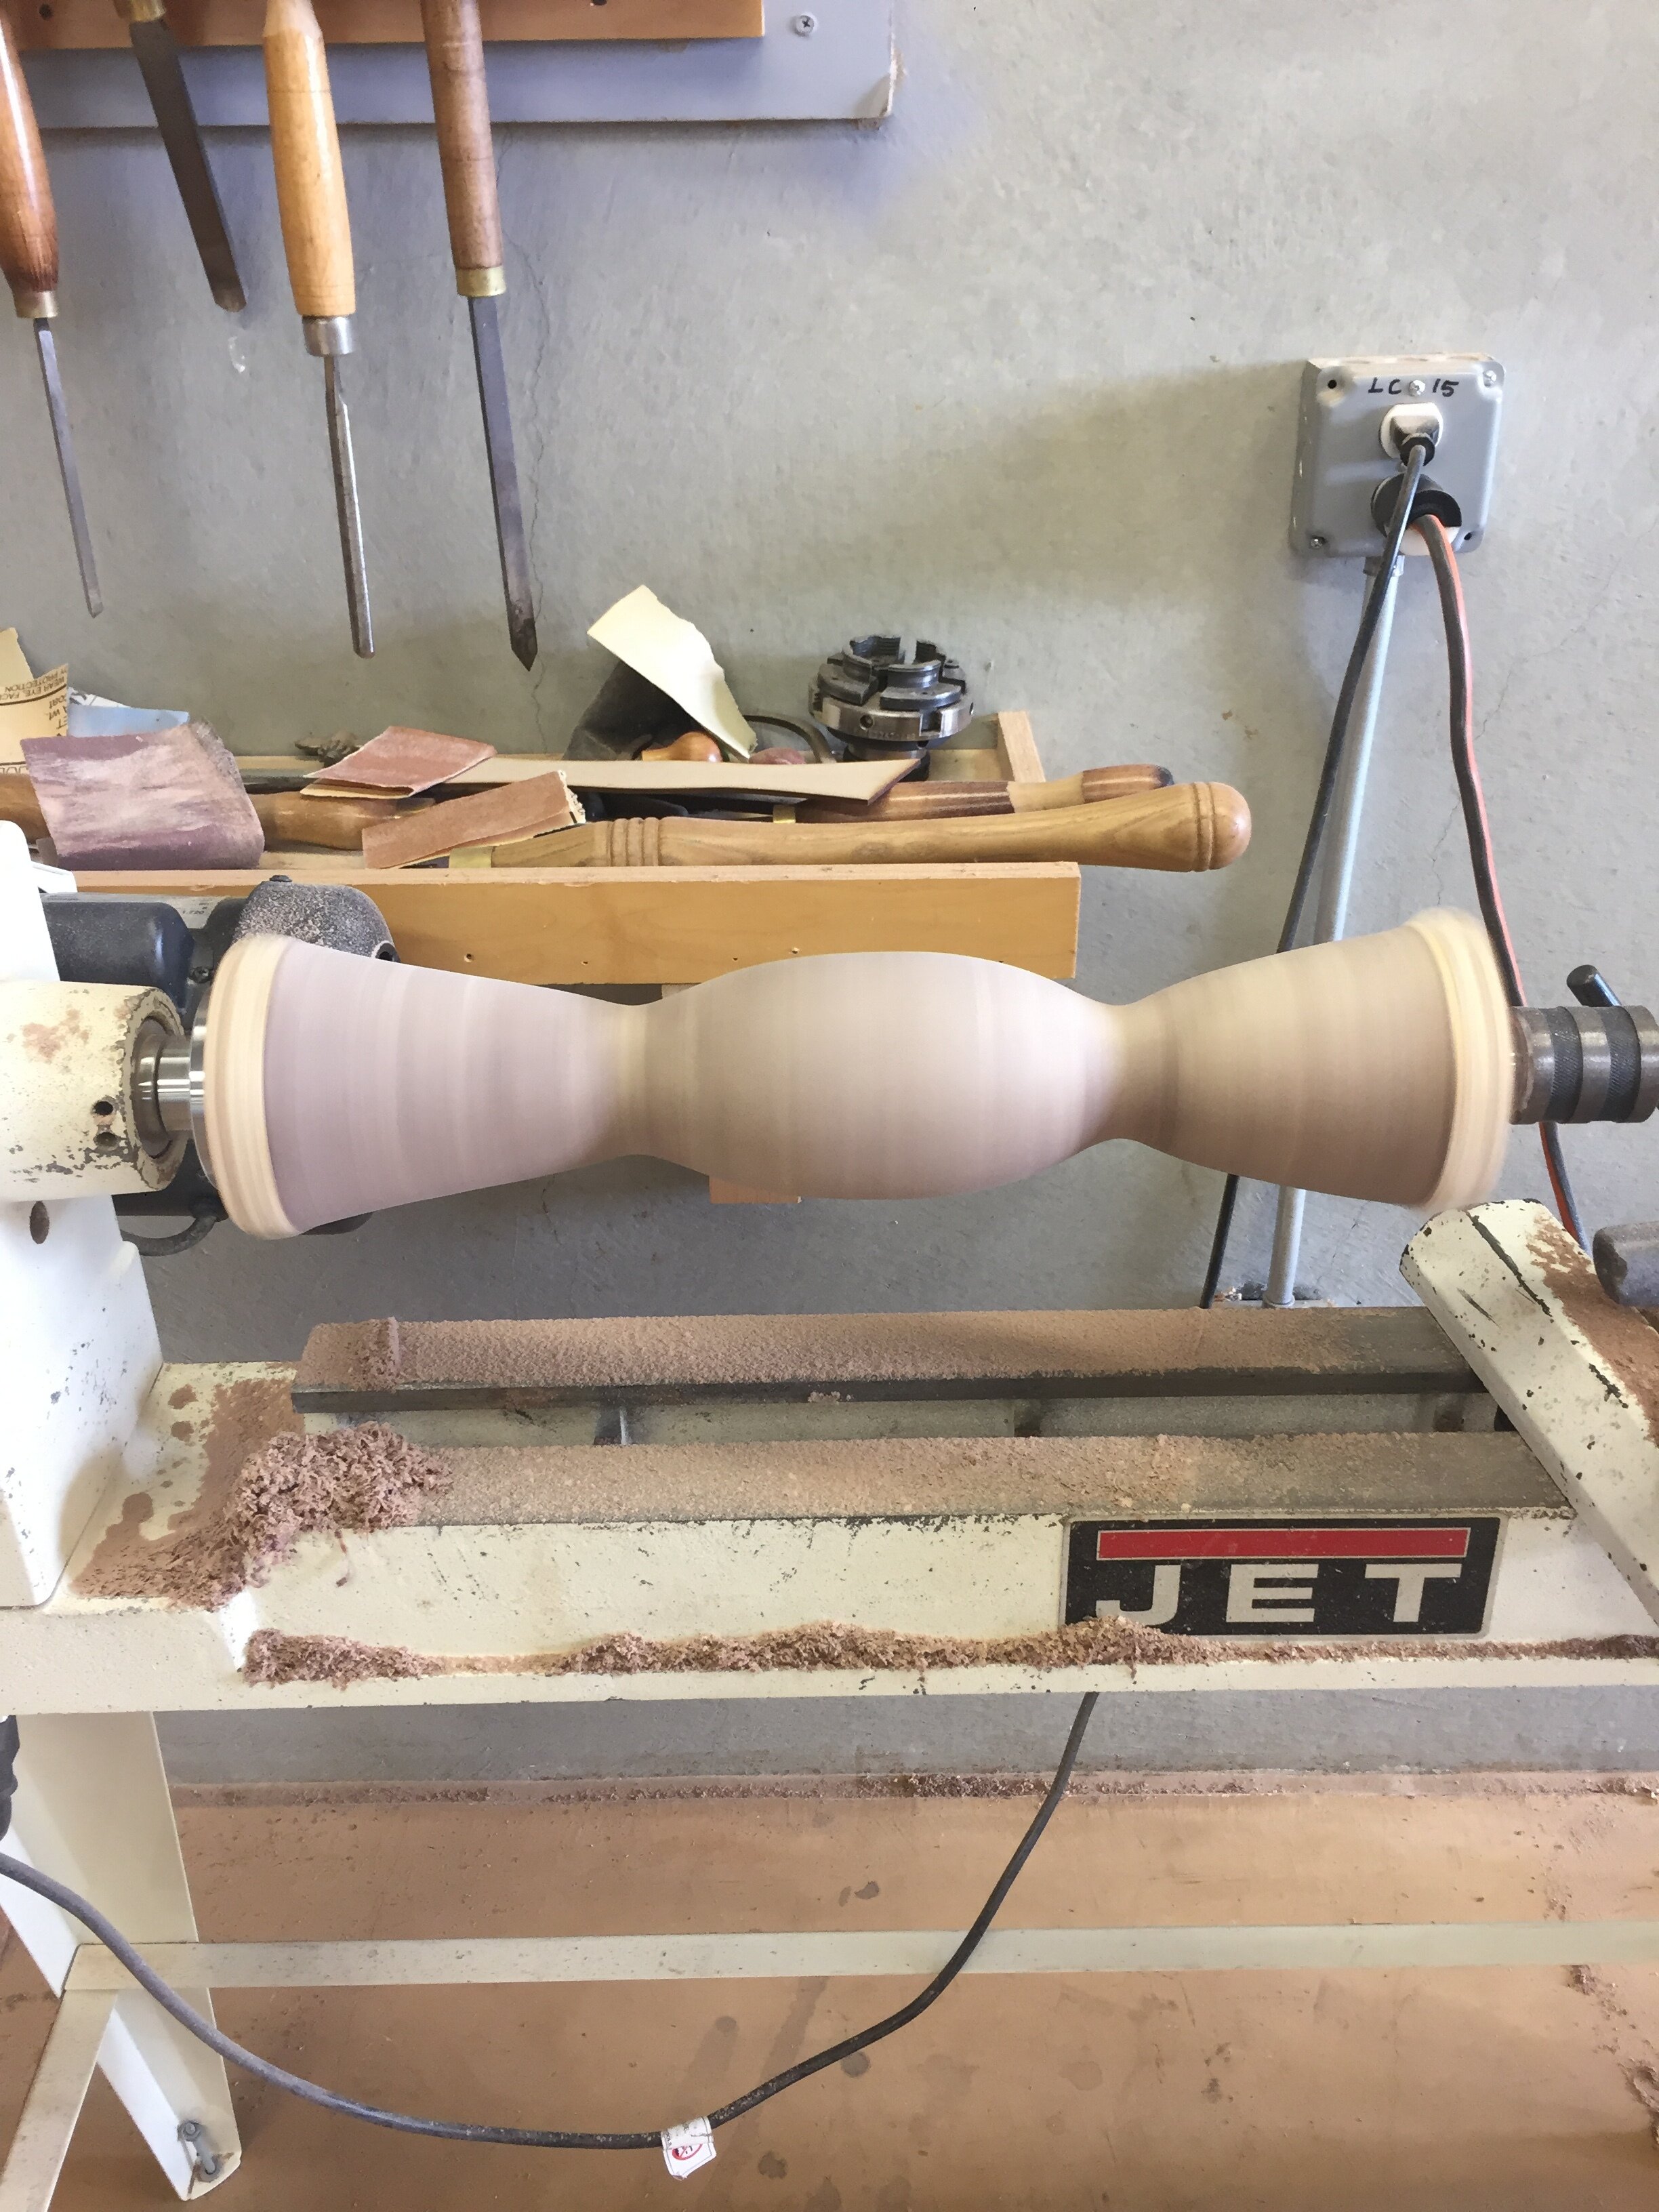
Center table shaft turning on lathe
Challenge #5: Attaching the Center Shaft to the Table Legs
As you can see in my sketched table design on MDF above, the shaft sits on the table legs. However, because the table legs curve down, I needed to find a way in which I could securely attach the shaft onto the legs that would allow the entire table to hold a decent amount of weight. I ultimately decided that the safest and most efficient way to achieve this would be by cutting a T shaped notch into the bottom of the center shaft so that it could just slip over the legs. This way, I wouldn’t even need any nails or screws to attach the legs to the shaft securely. In order to do this, however, I needed to create my own personal fixture for the table saw.
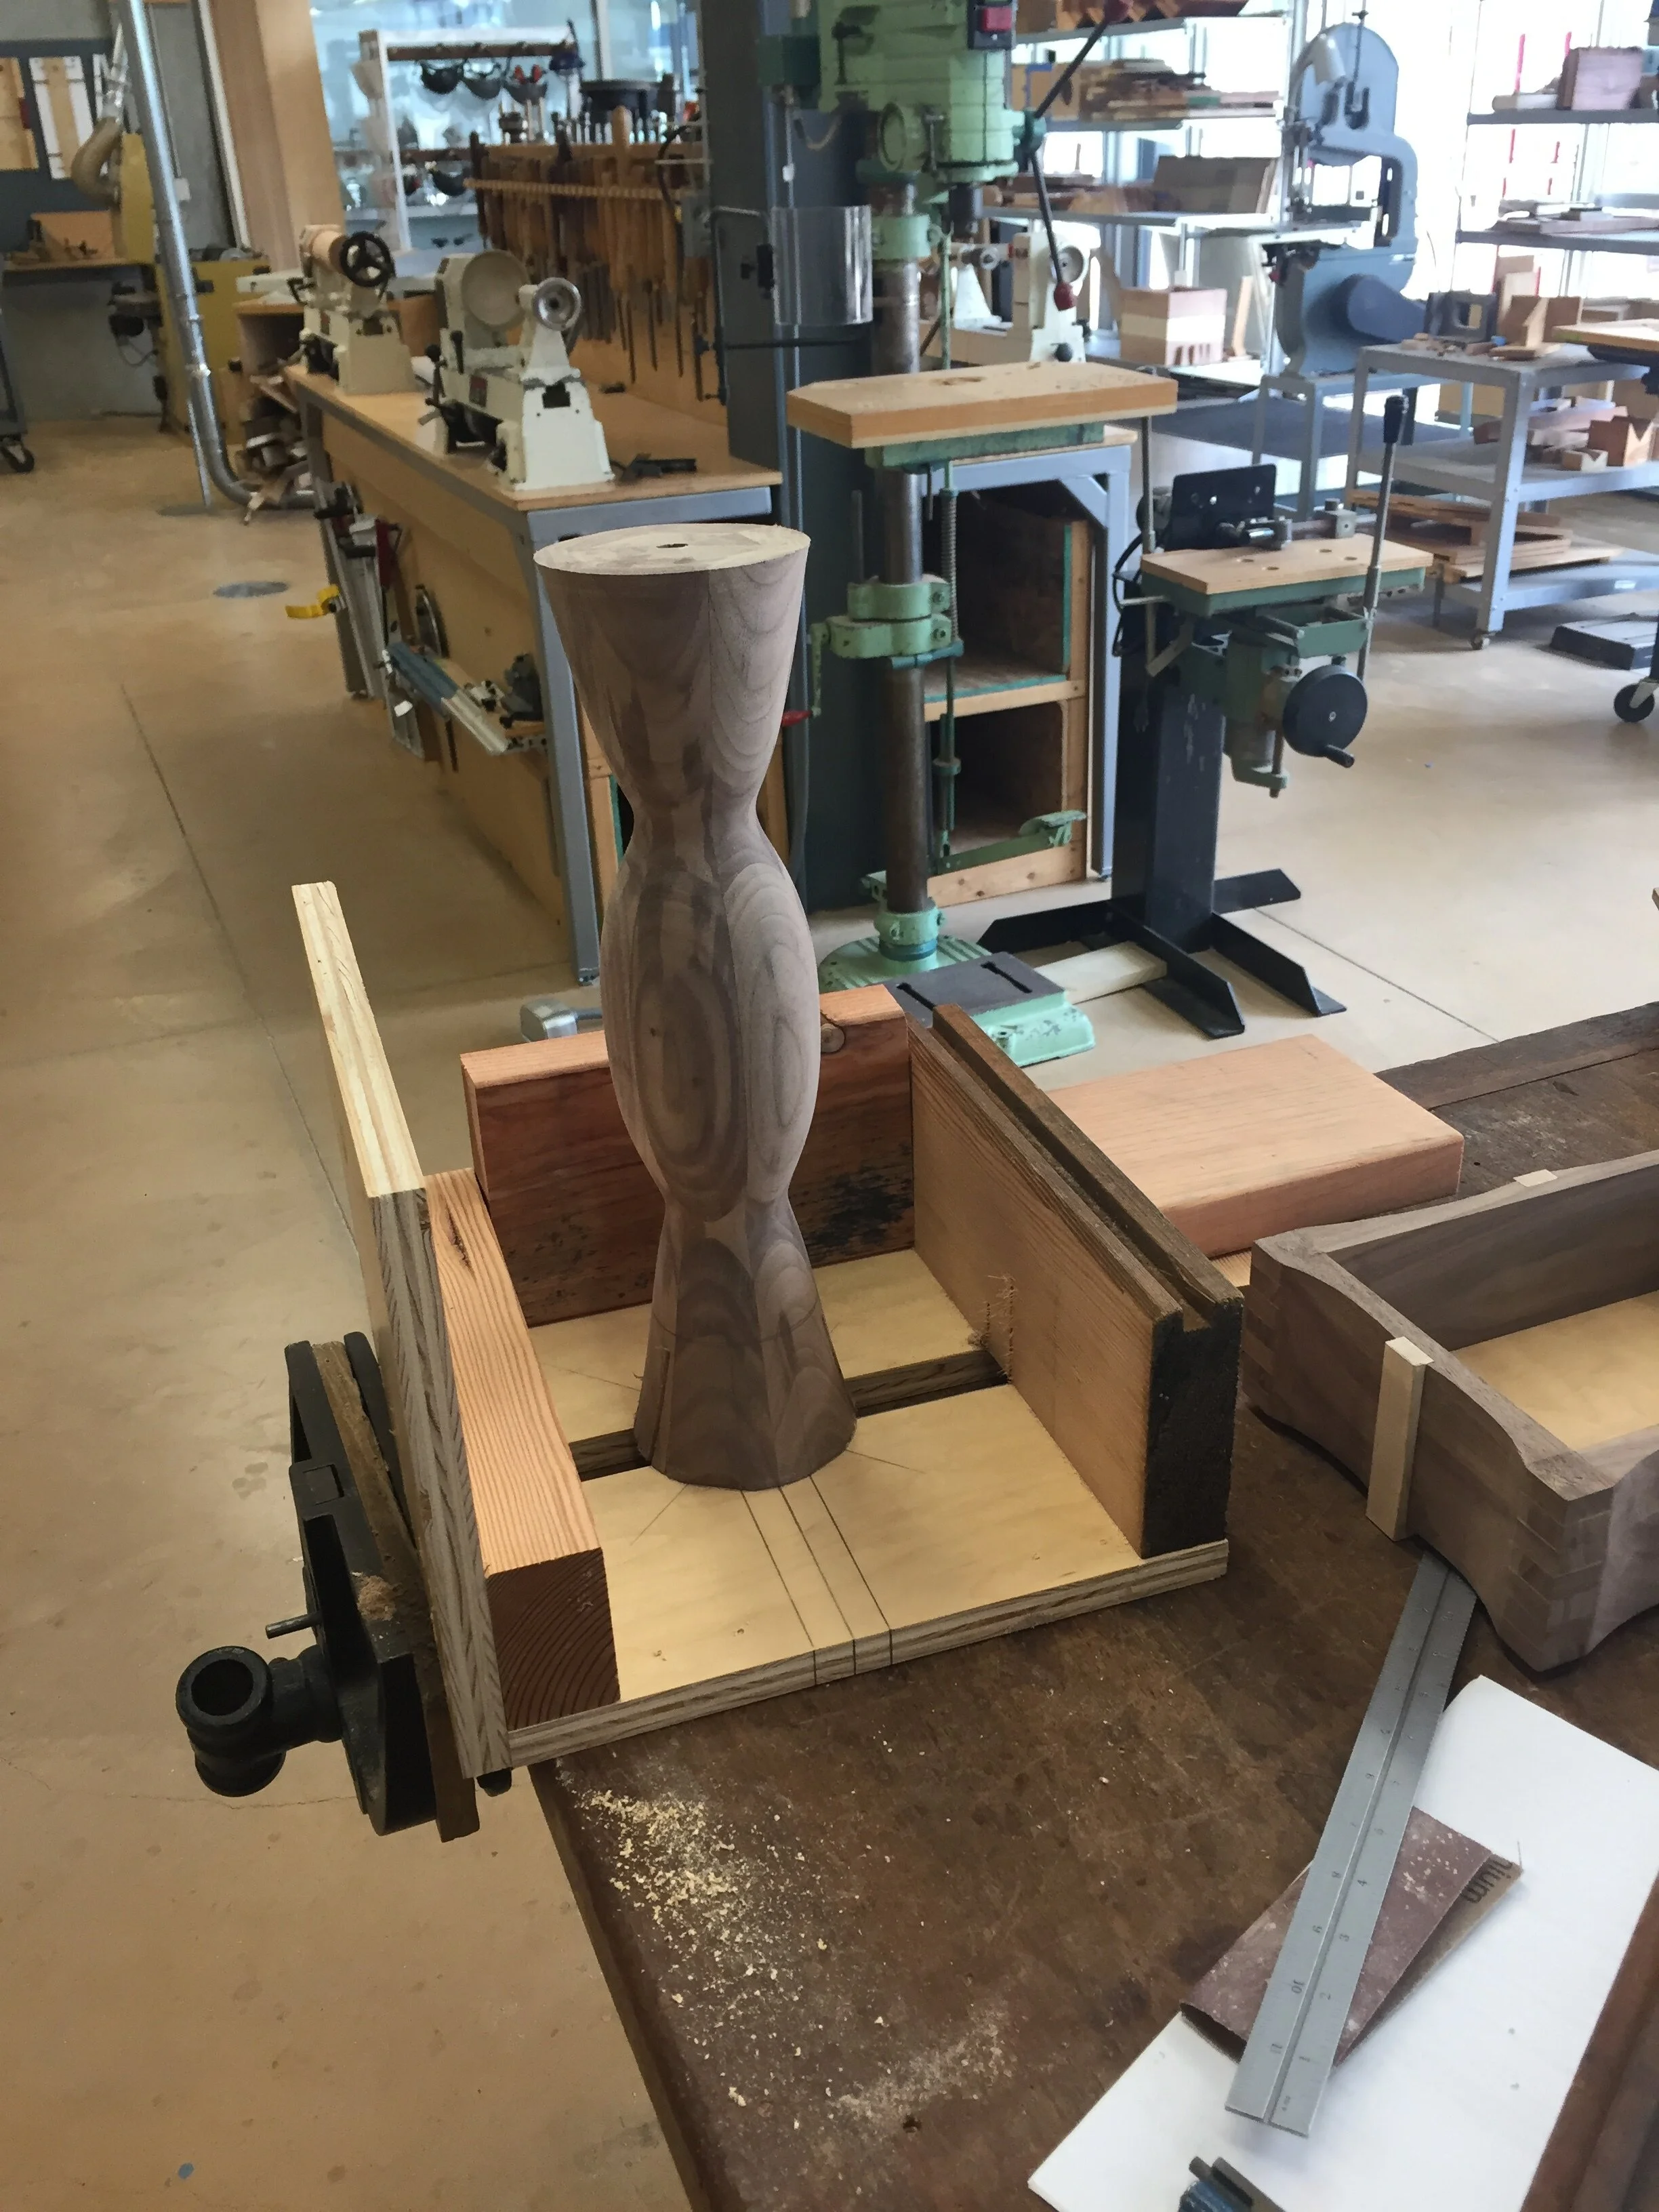
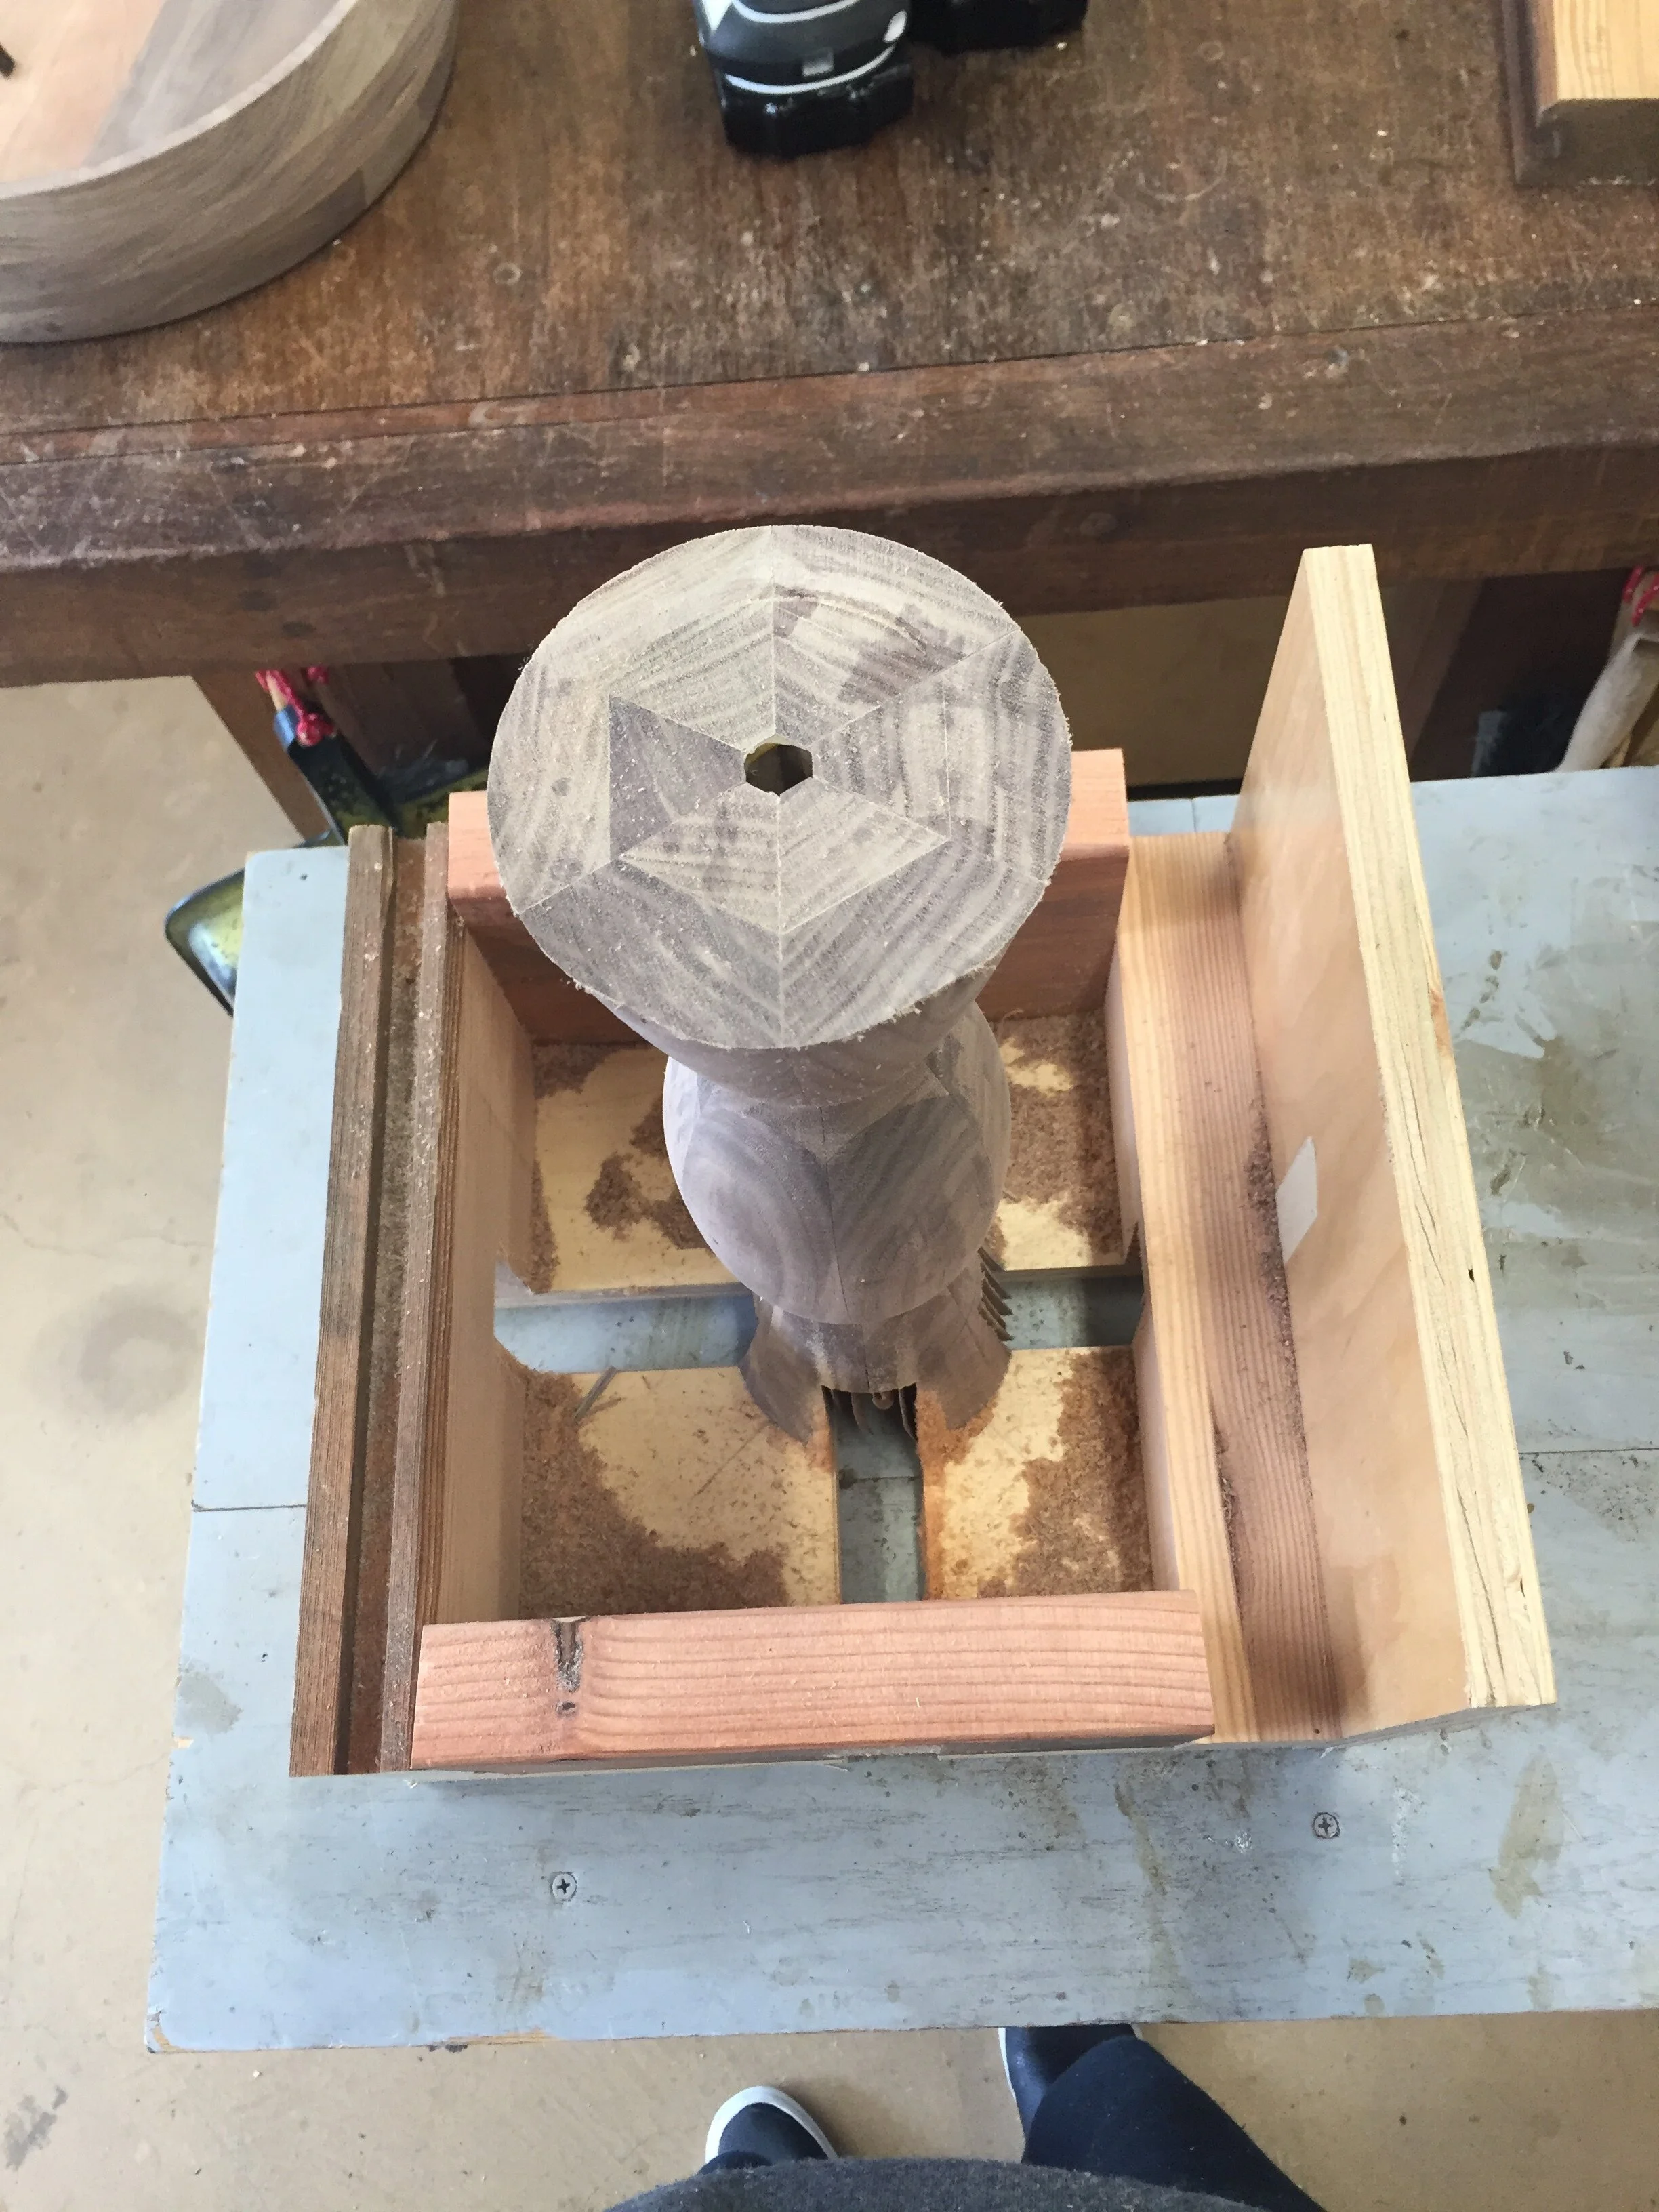
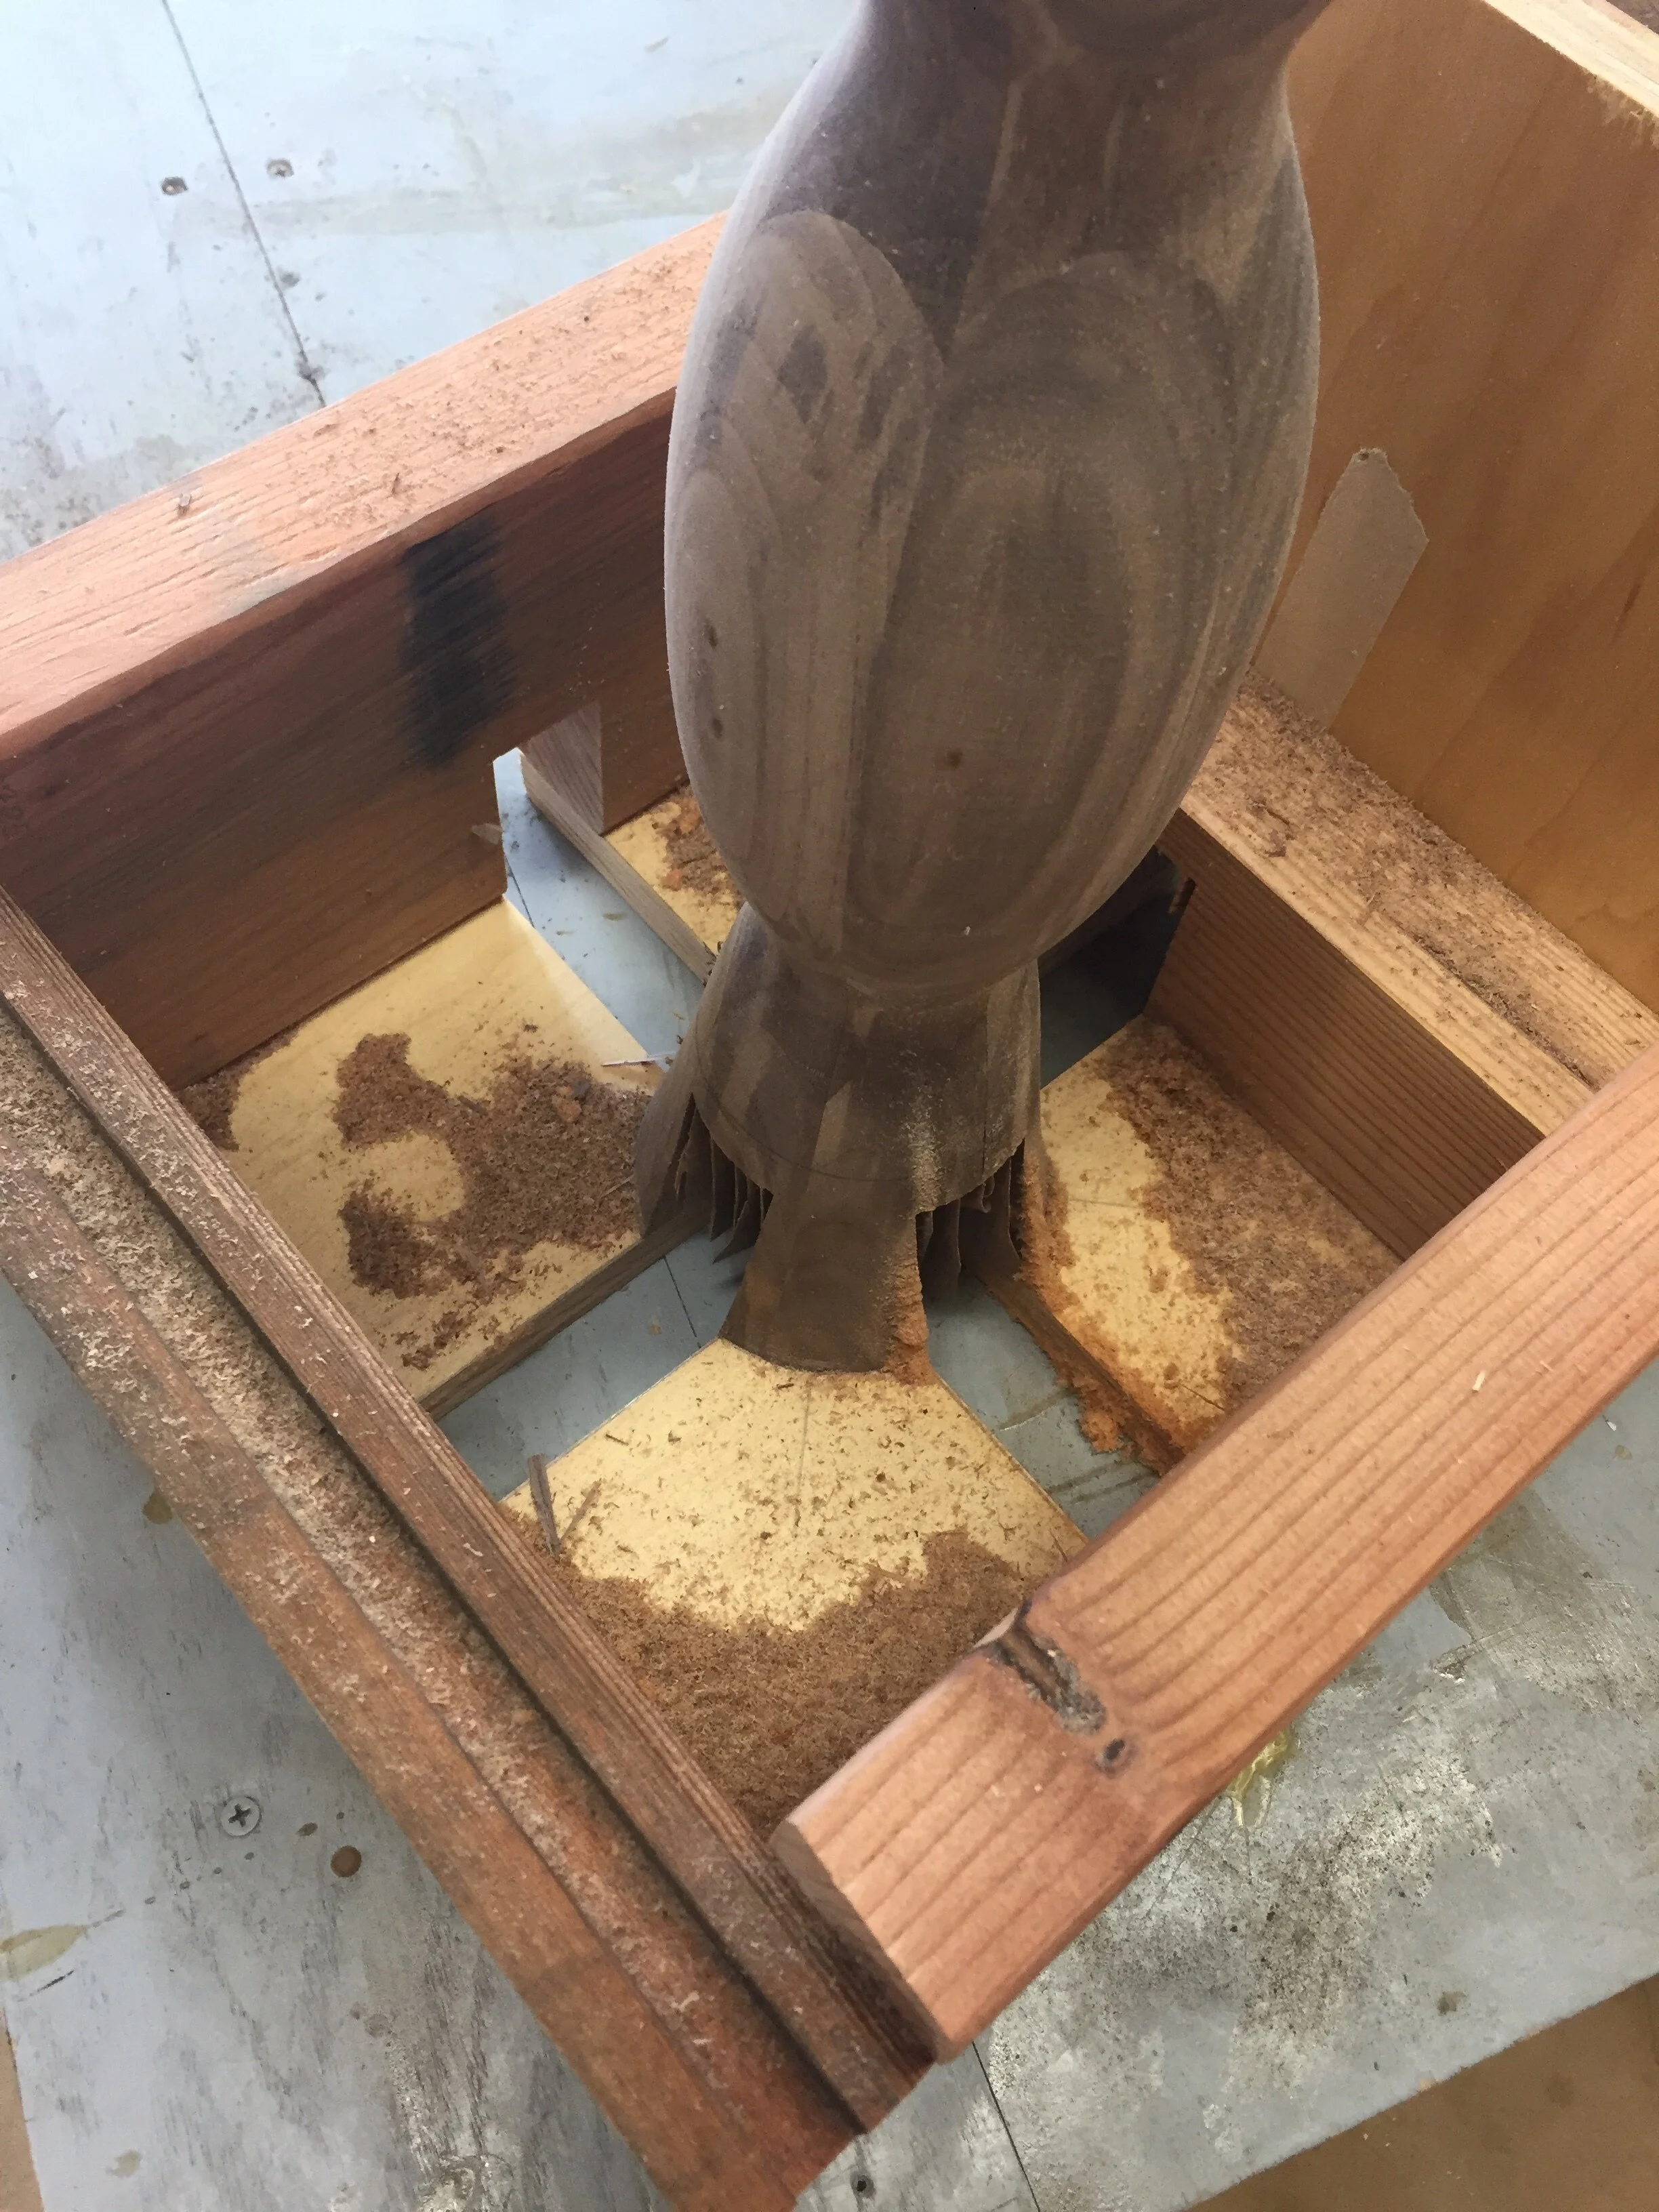
It required great patience and creativity to make my own table saw fixture, but it was well worth it when I was able to simply pass my center shaft through the table saw a few times in order to create the notches I needed. Each part of the box required careful thought with regard to the location of screws, the parts of the wood that could not be cut, and the safety of the overall process. Ultimately, I made this fixture, cut the wood, and fit it on my legs in a little under an hour.
Building the Table Legs
Like the center shaft, the table legs were fun to make and didn’t take much effort at all because I chose to use a computer numerical control (CNC) router—a computer-controlled machine used for cutting wood and other materials. The beauty of the CNC router was that once I fed it my digitalized table leg design, it did all the hard work for me.
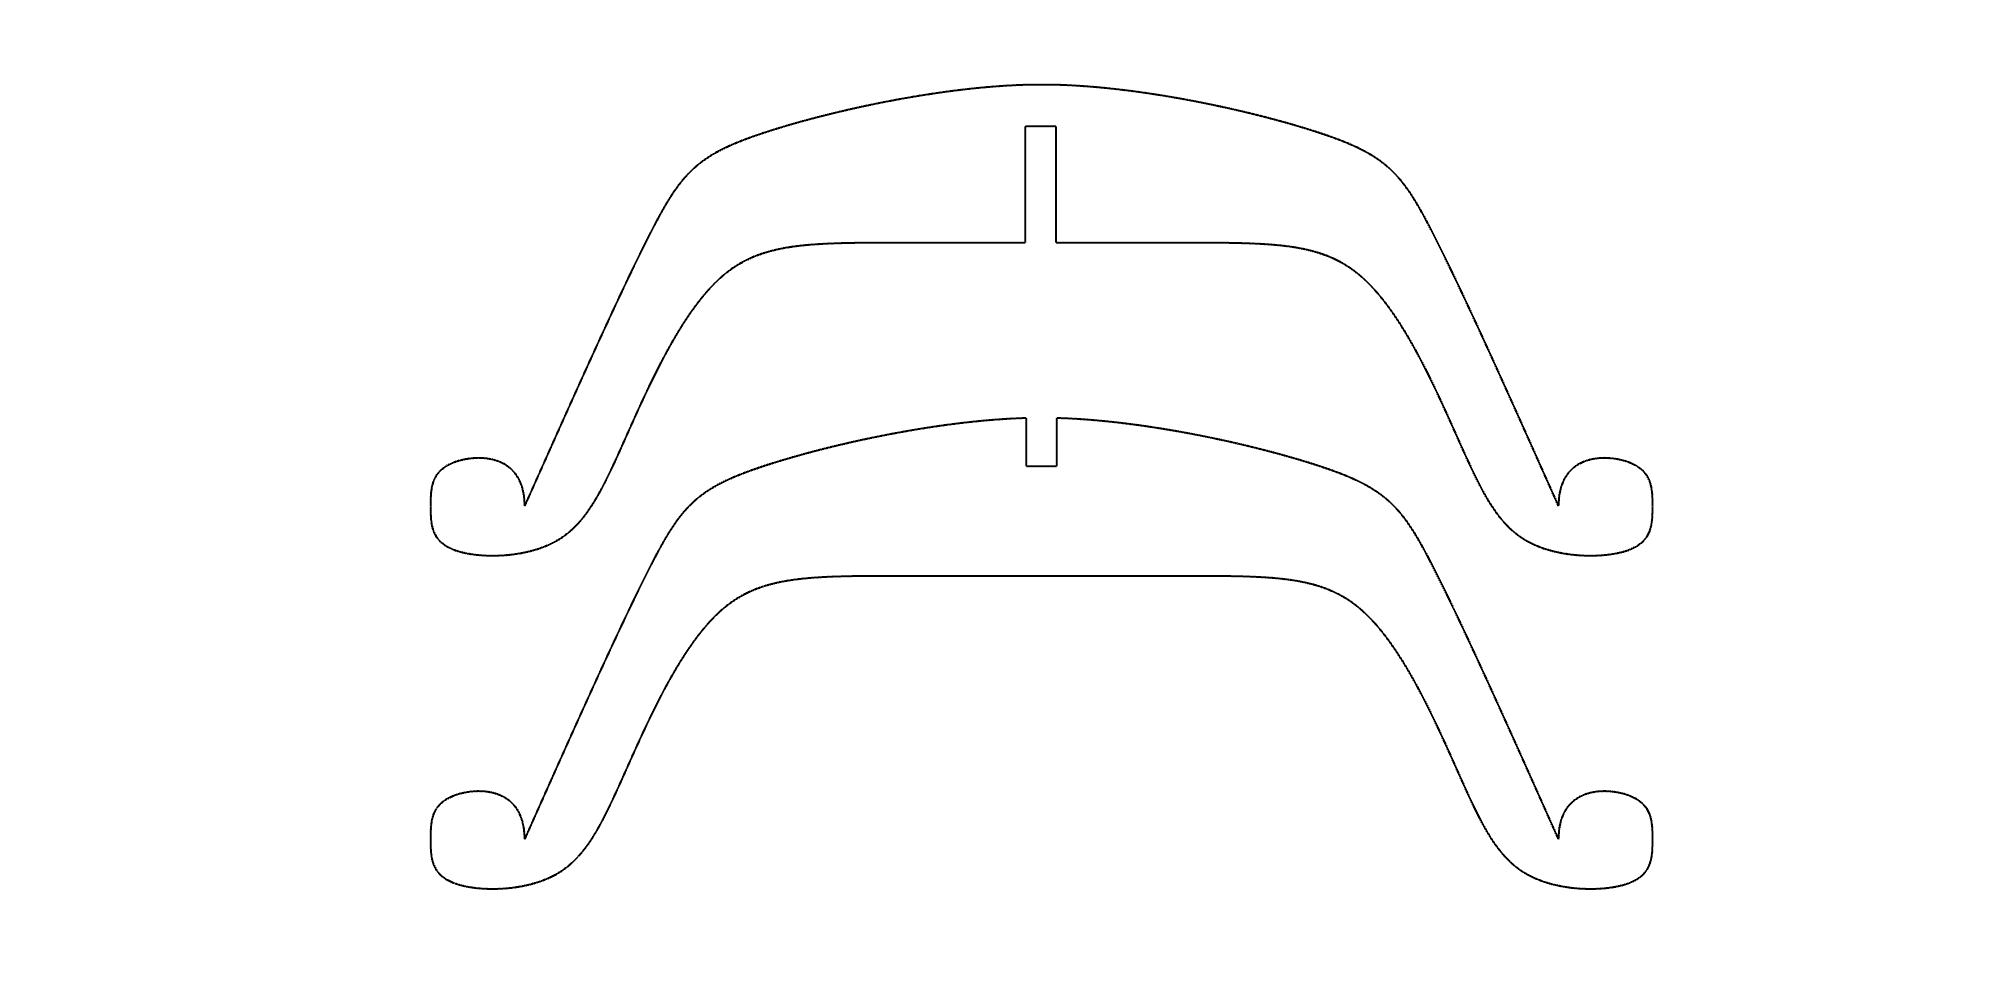
Digital leg design in Rhino
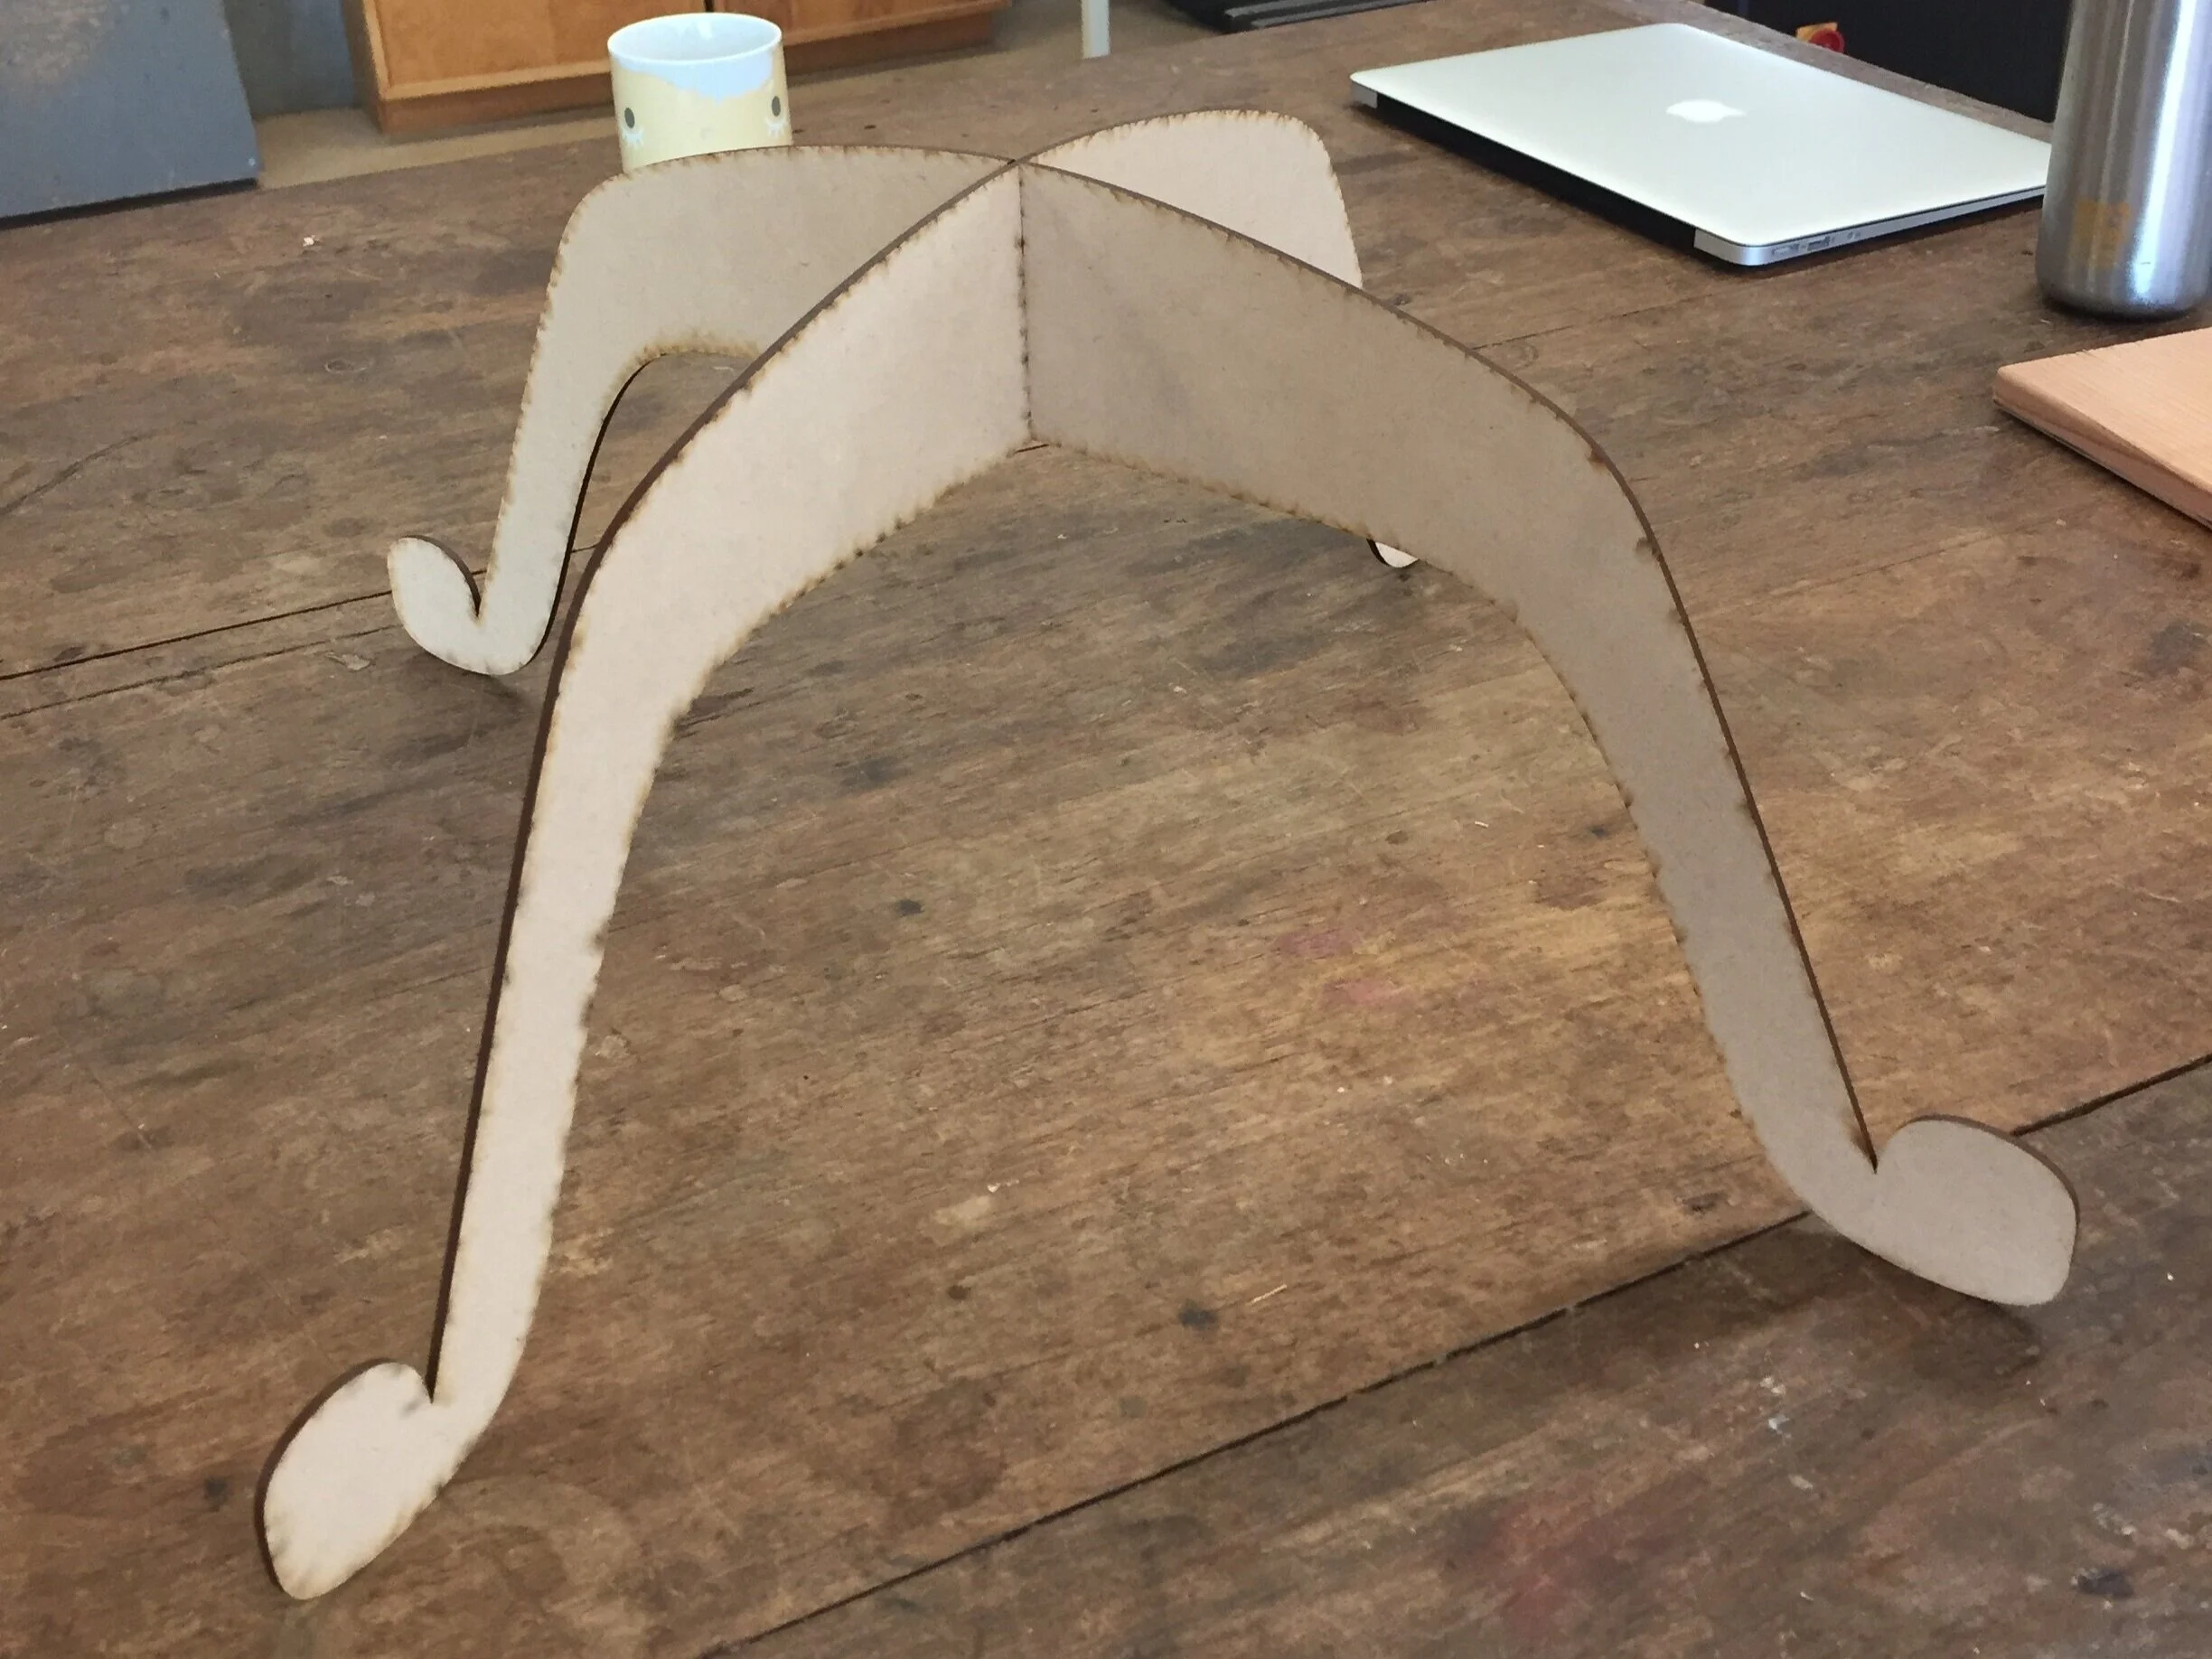
Full size leg prototype made out of MDF
As detailed above, my final leg design consisted of two interlocked legs, as opposed to four separate legs joined together. This decision both a) simplified the manufacturing process and b) made the legs more secure and stable since the center of gravity rested on pure, uncut, wood.
Once I was happy with my prototype, I moved on to make my actual legs with the CNC router.
CNC routed legs with center shaft
Shaft interlocked with table legs
The routing of the legs was very quick—it only took about 30 minutes to completely cut out both legs. Once finished, I was able to neatly place the center shaft on top of the legs, just as I had designed in the very beginning. Now was my favorite part of all—the assembly!
Assembling the Final Table
Once I had completed all the individual pieces (tabletop, center shaft, and legs), it was just a matter of putting them all together before I could call my project complete. A few screws, tons of glue, and lots of patience later and I had… my finished product!
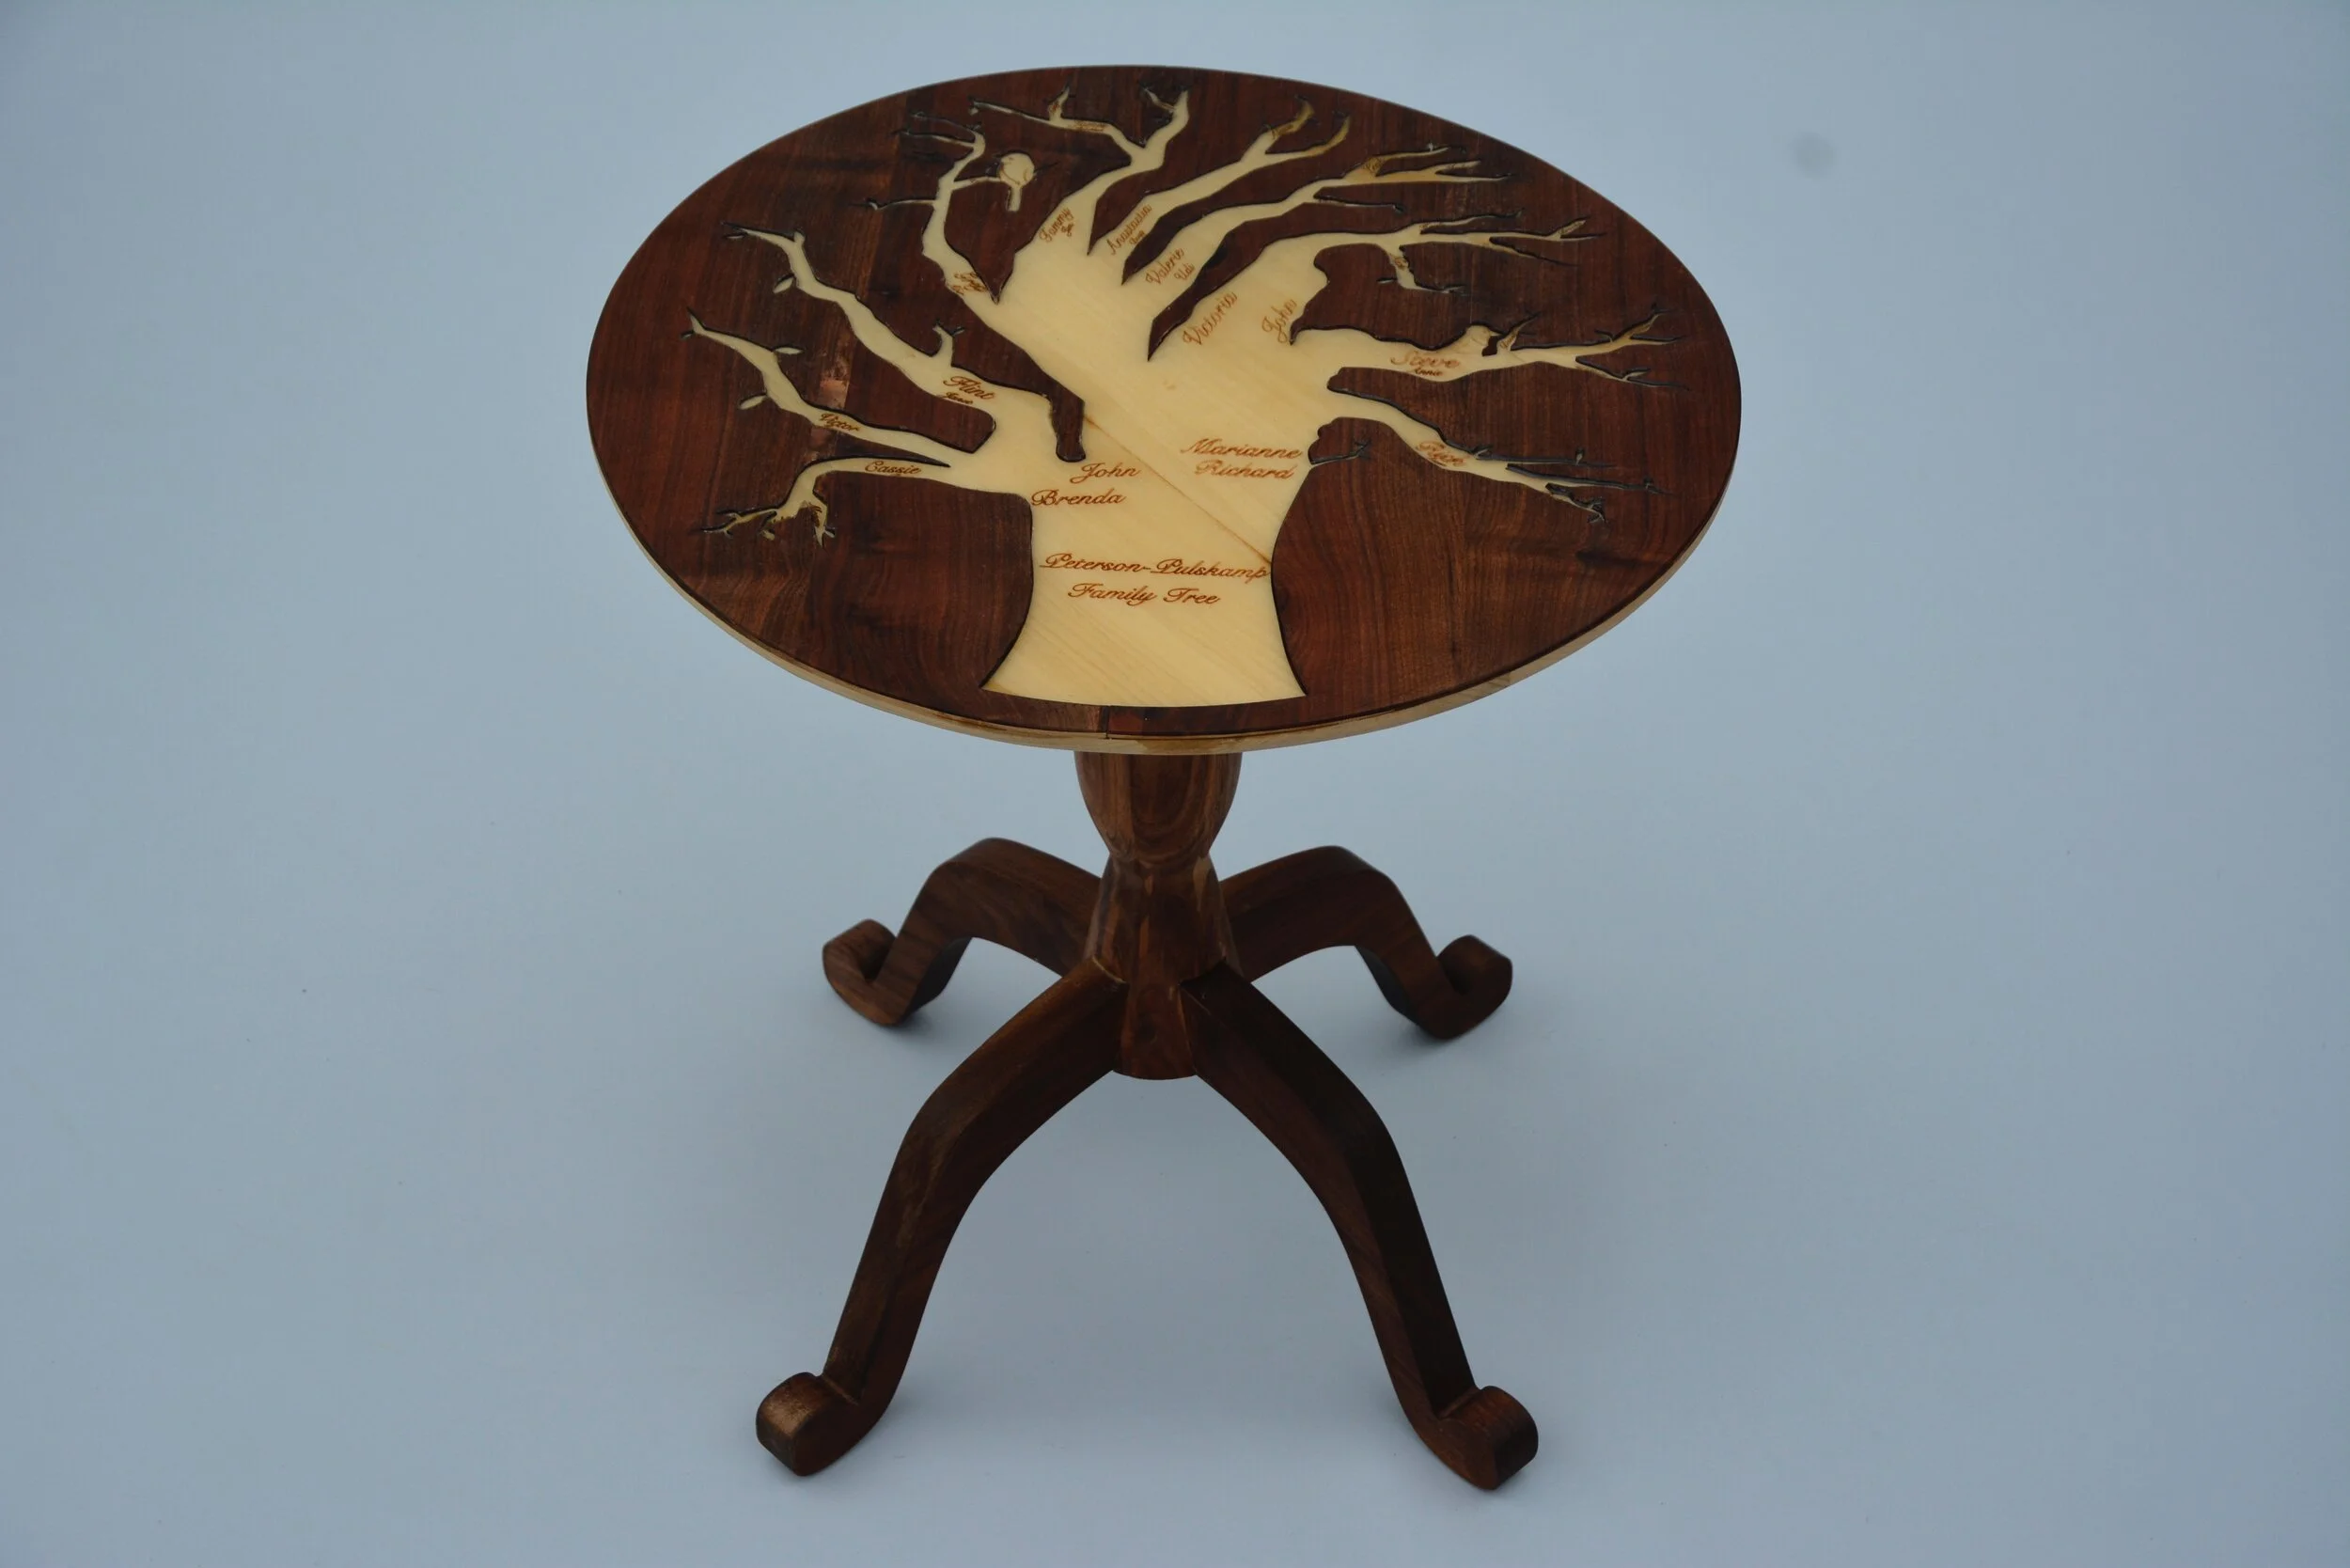
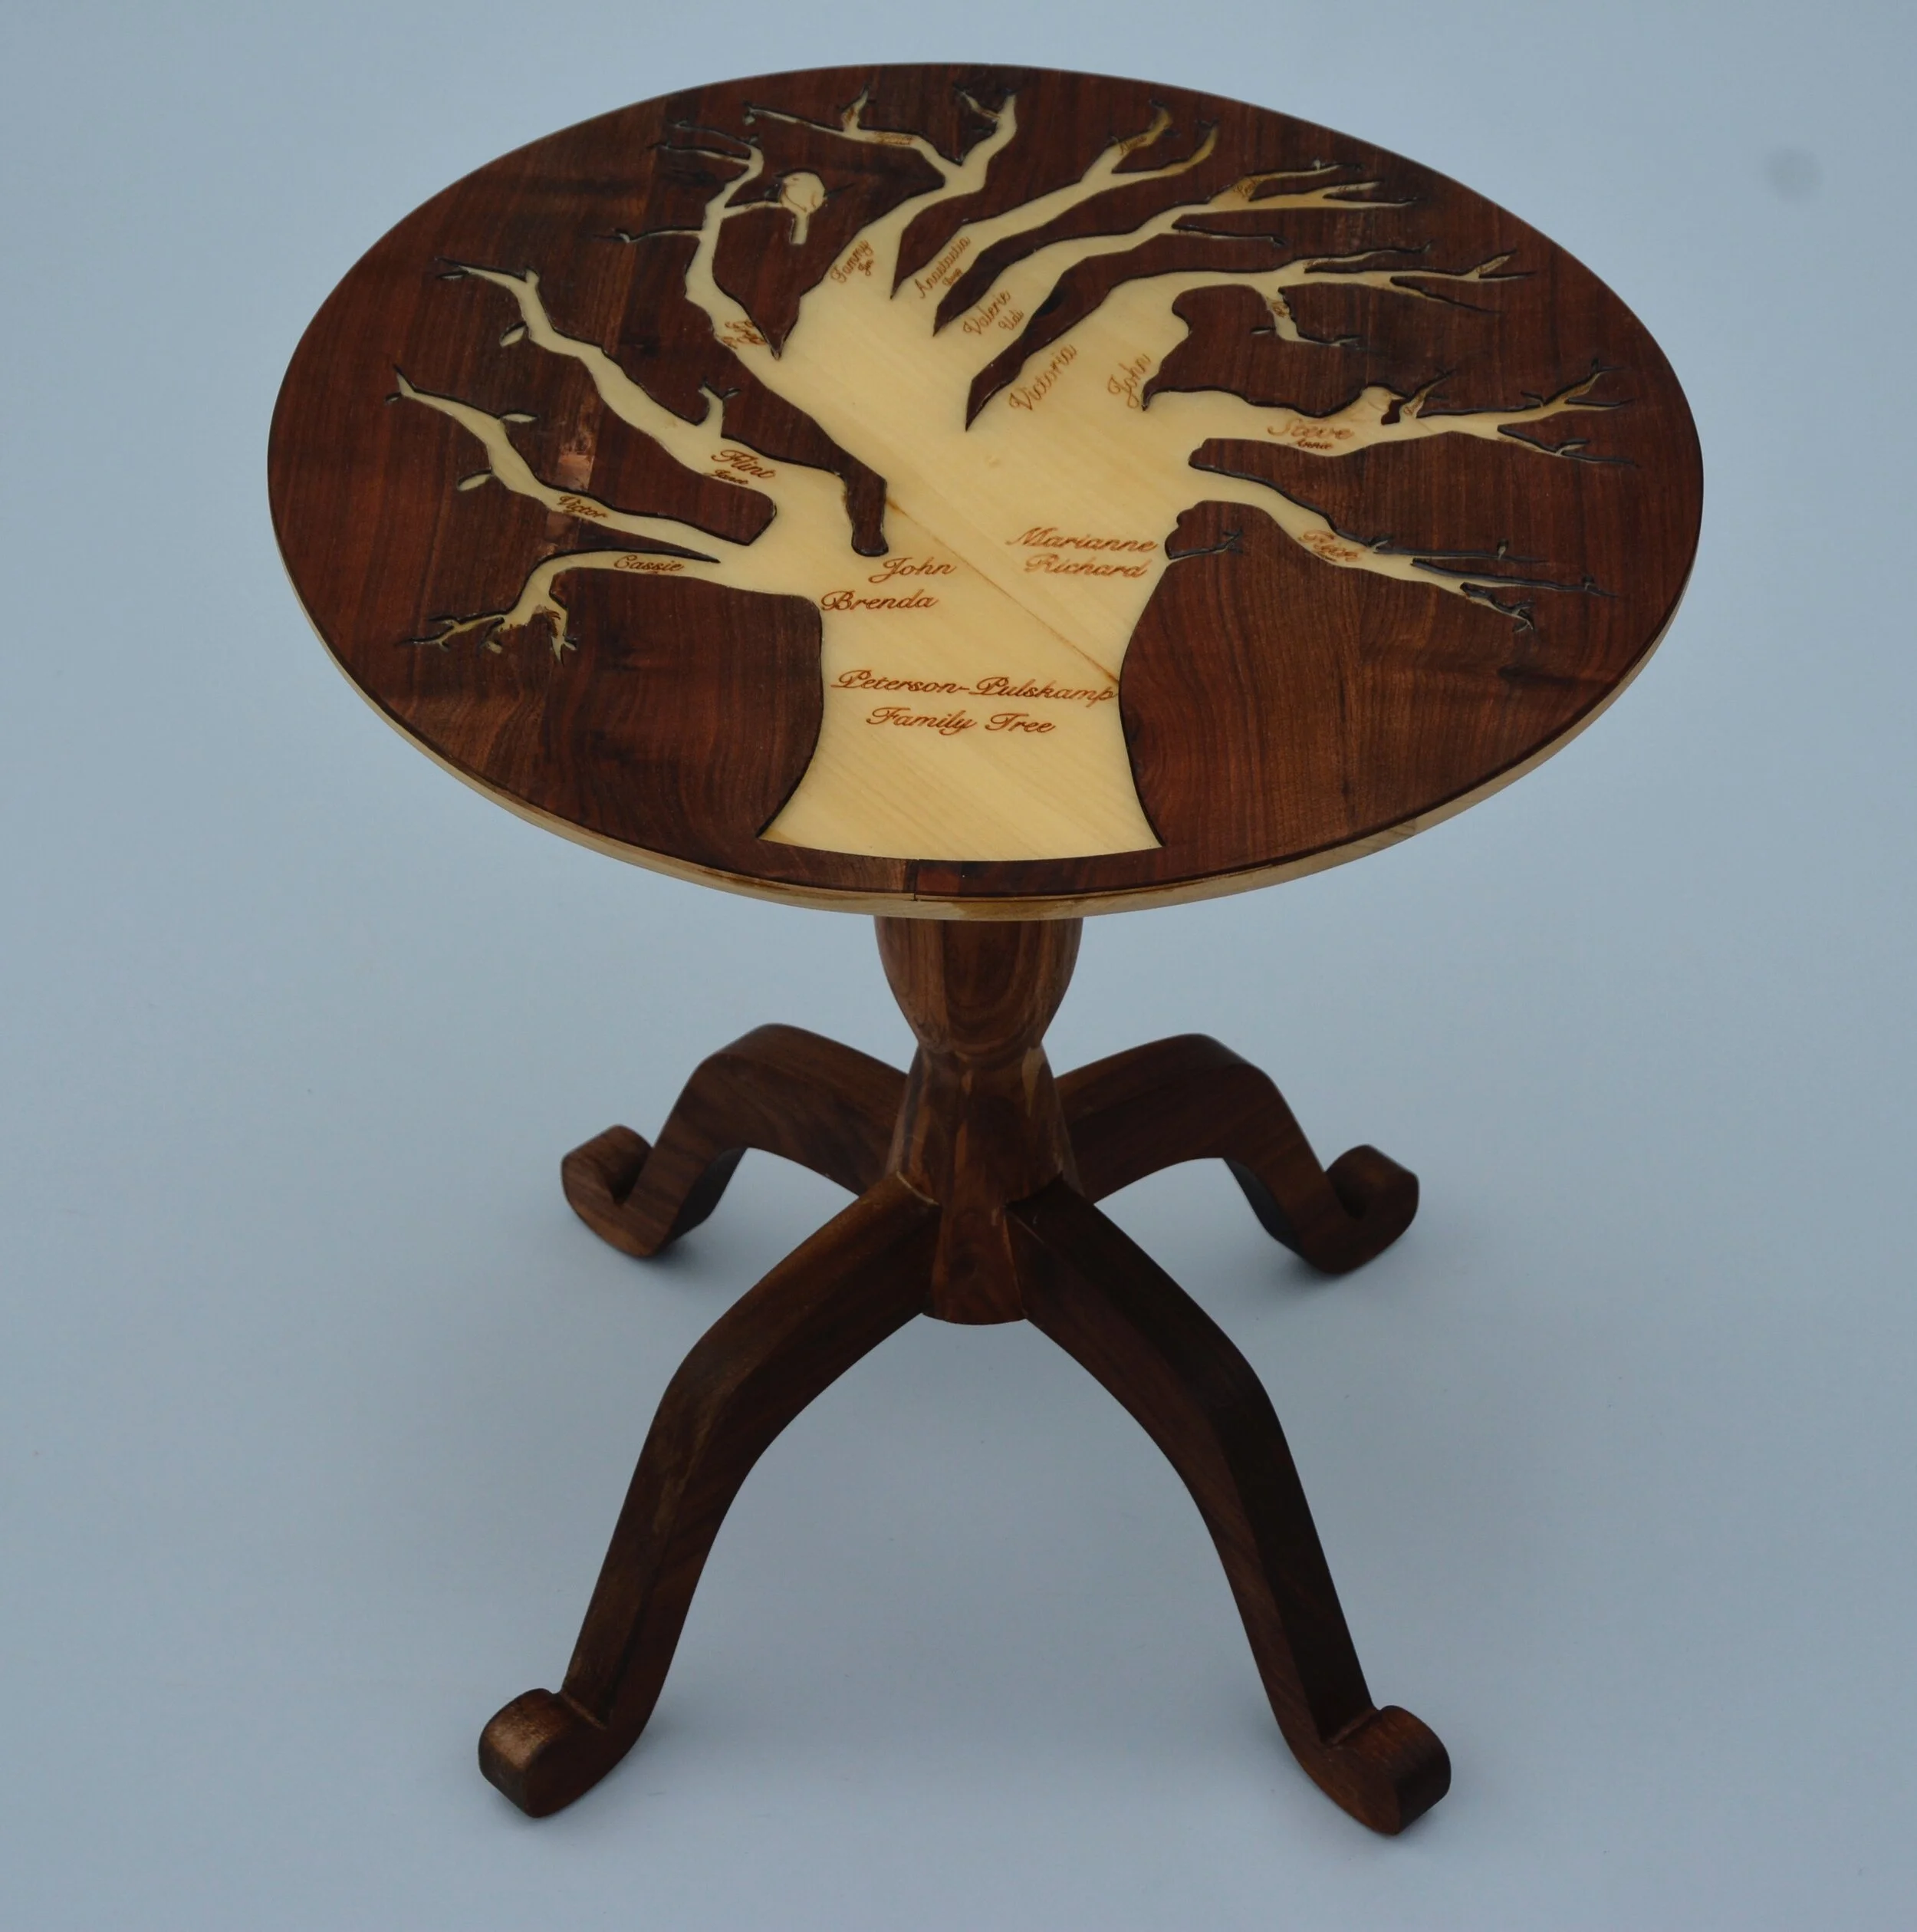
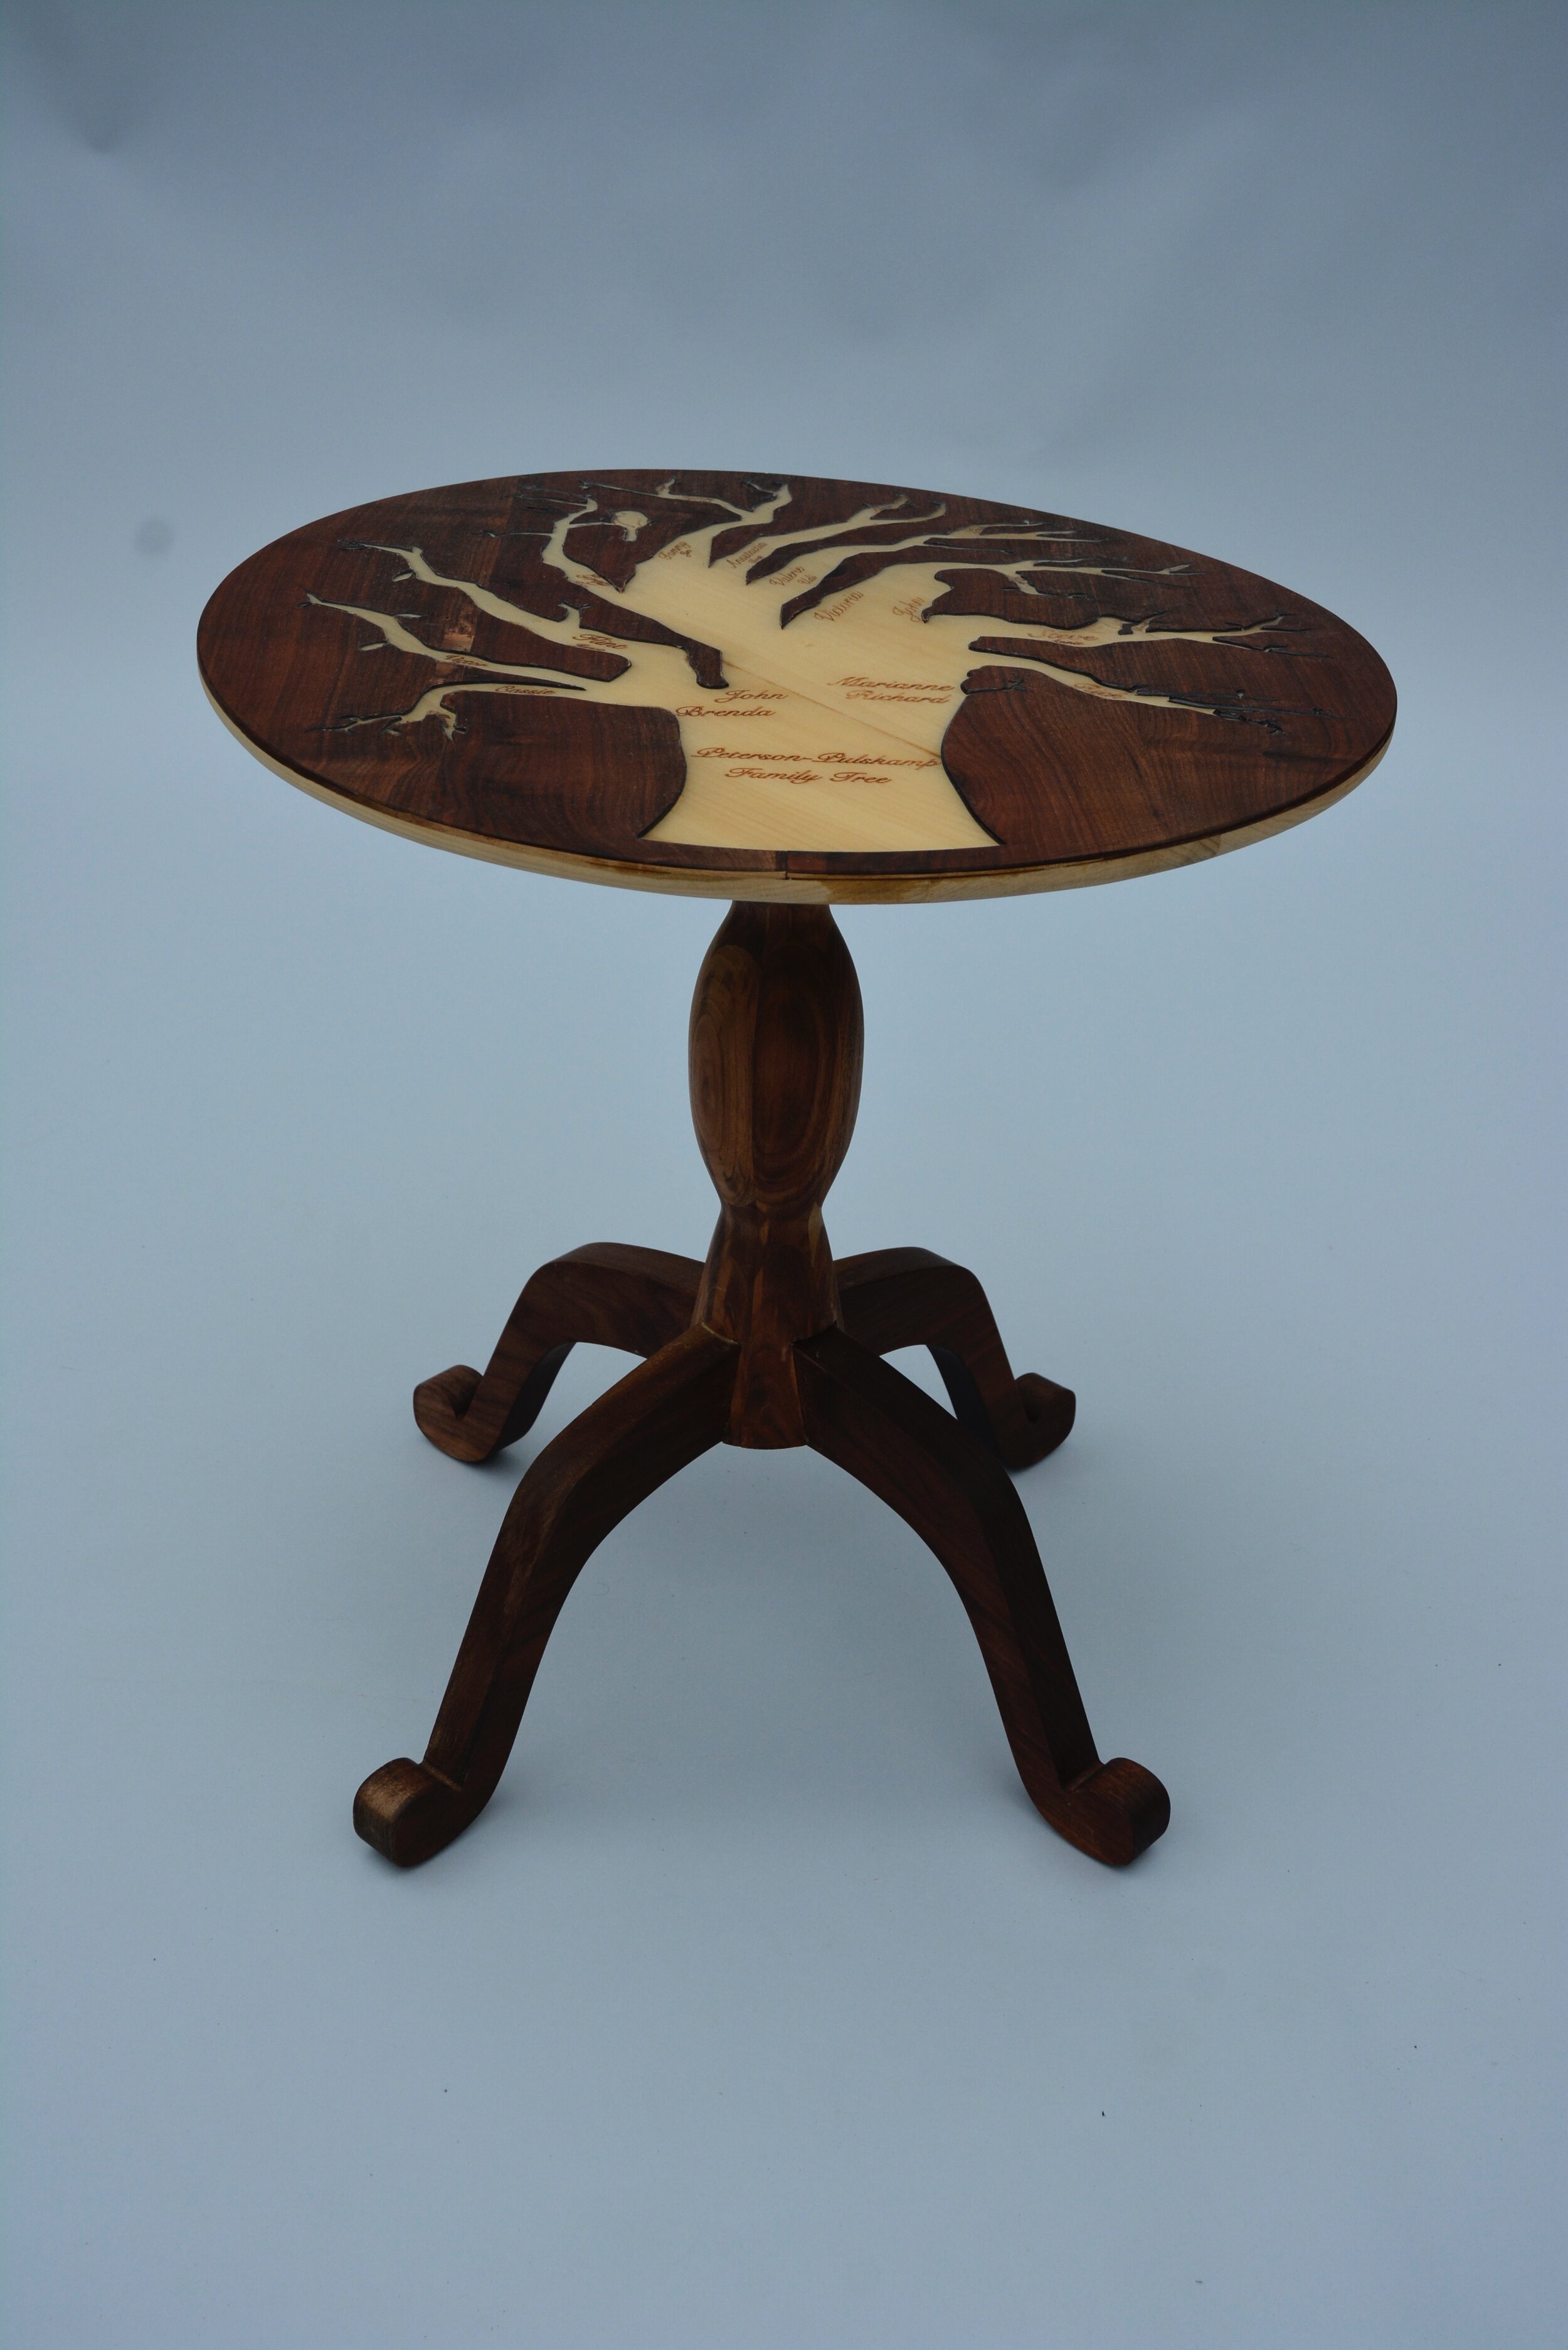
Final table
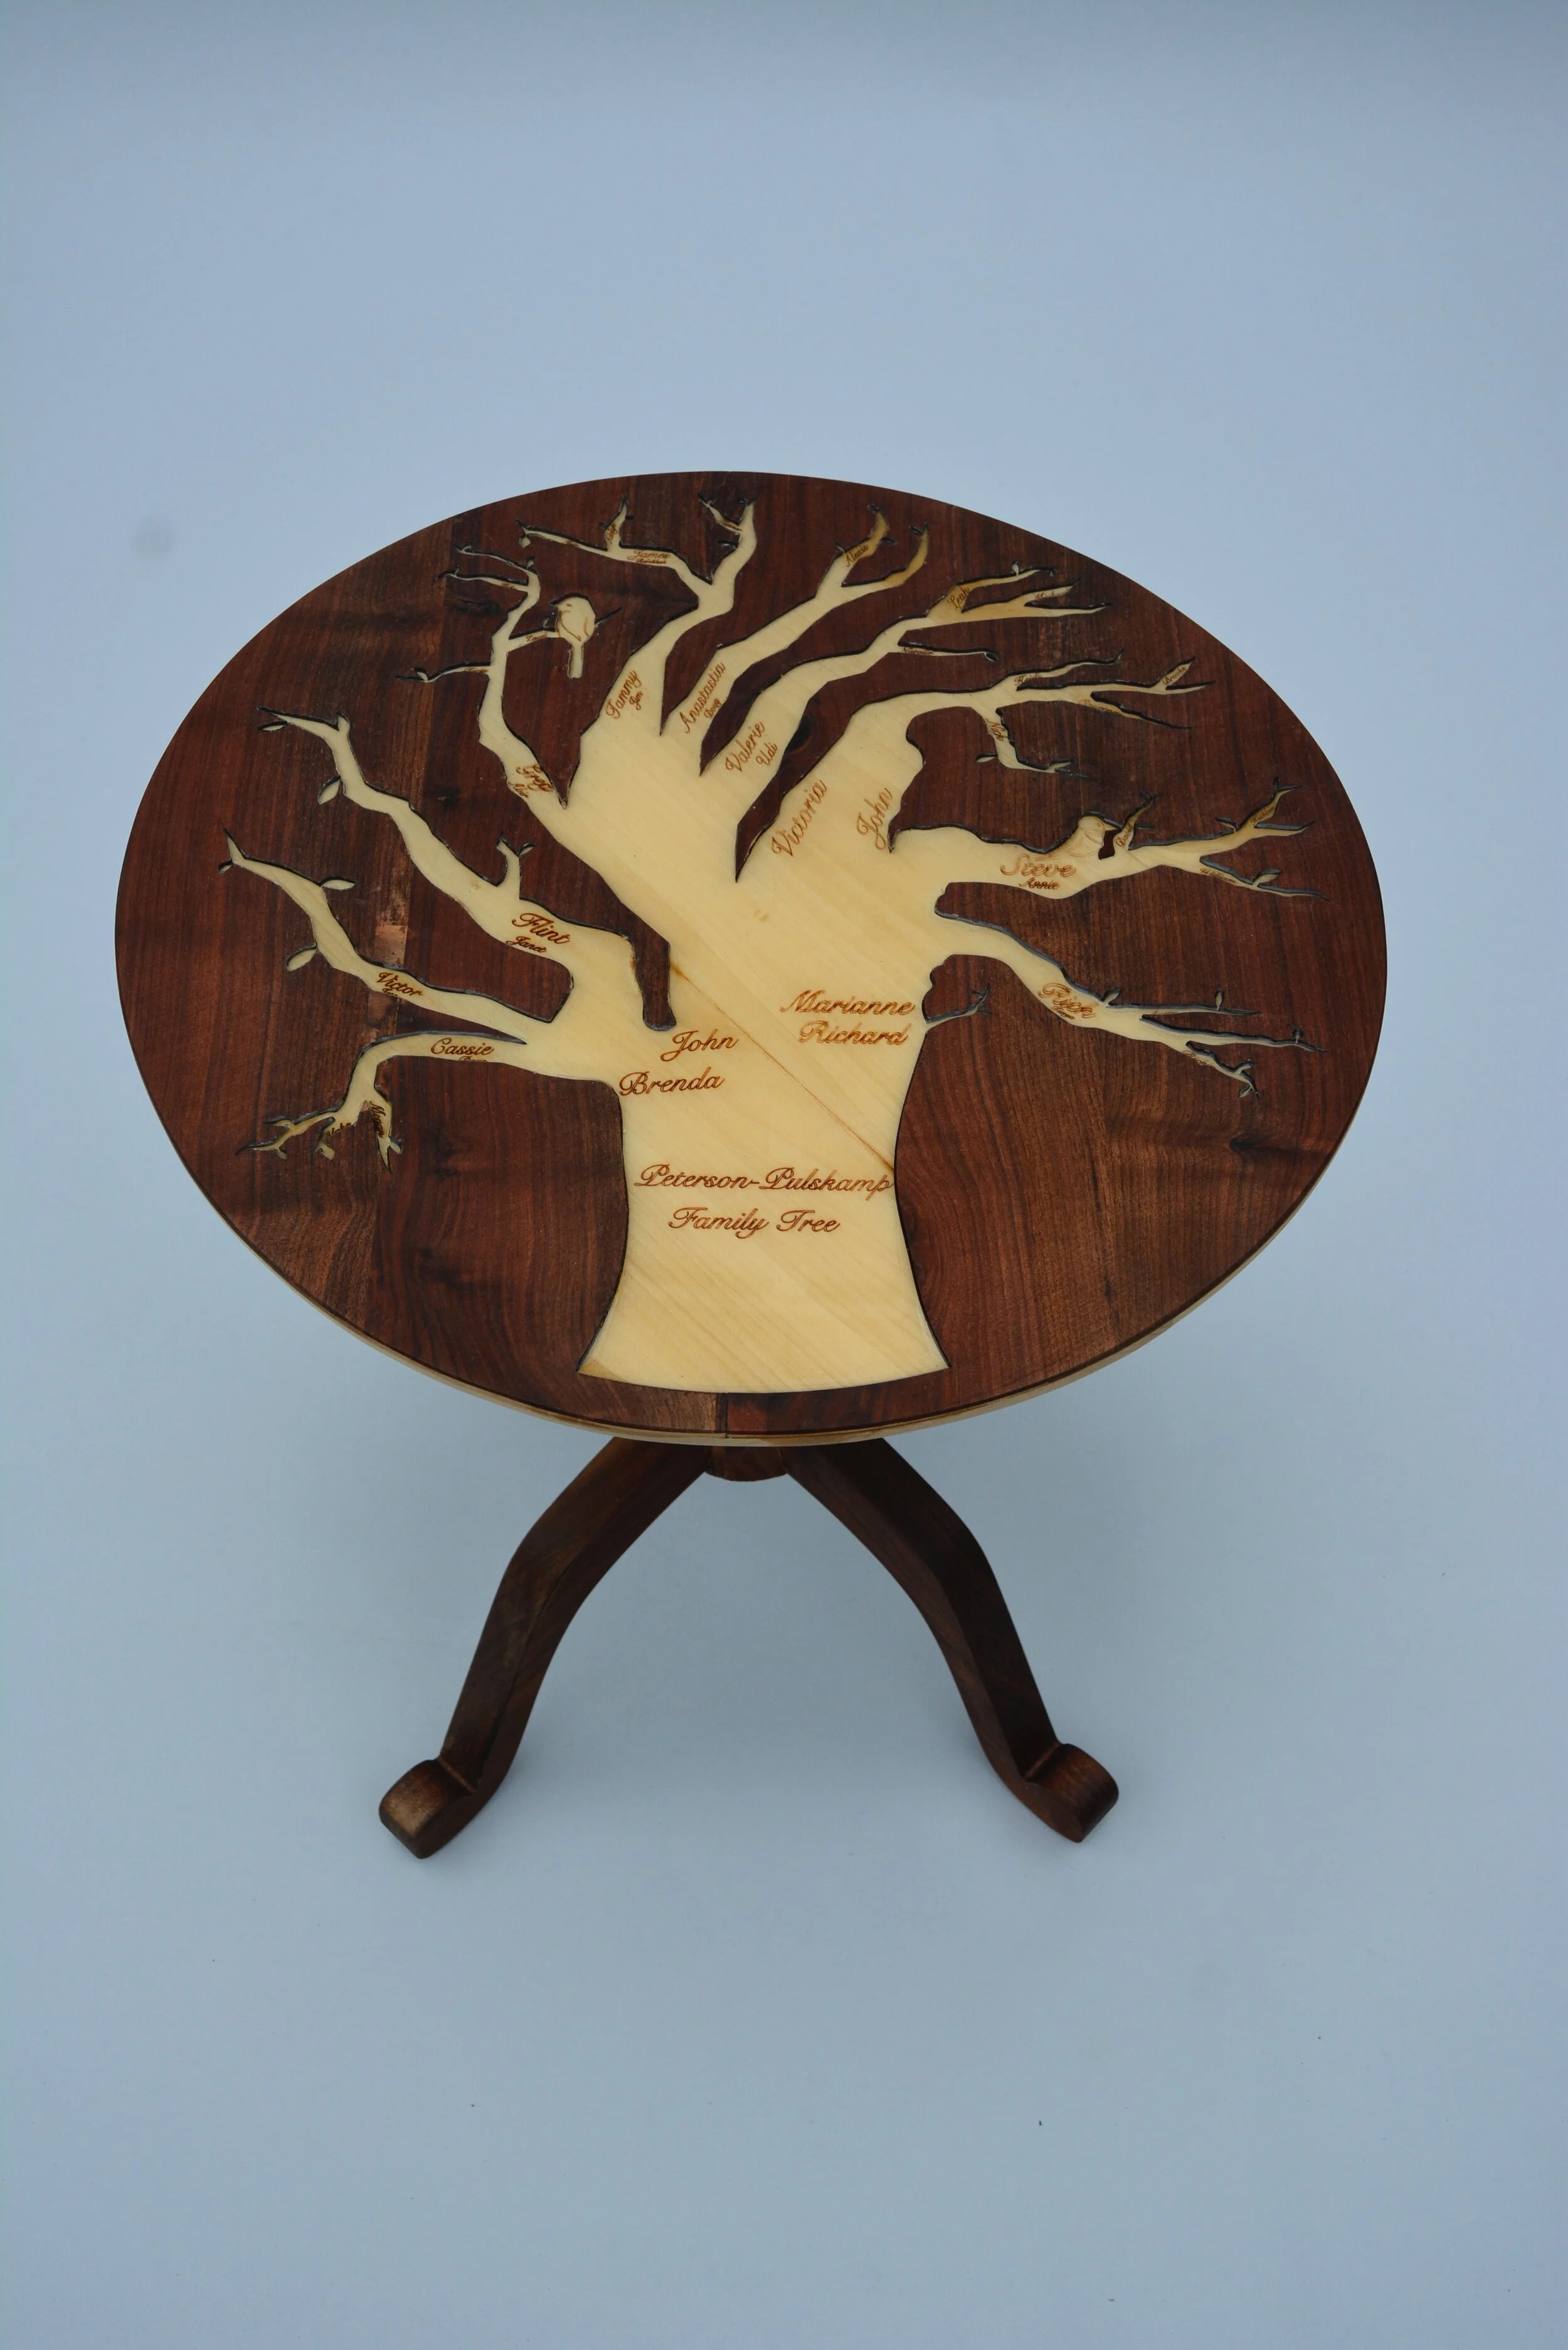
Close up of the final table top
Challenges and Takeaways
What did I learn from this experience?
I learned so much from the experience of making this table; in fact, I only covered a fraction of the lessons I took away in this project overview. Among some of the most salient lessons and virtues I have learned throughout this process are: attention to detail, confidence, accuracy, patience, and creativity (in design and thinking). This class and project taught me to think outside of the box in every way, shape, and form—whether it be in designing a project to executing it when things go wrong.
I have worked on a plethora of projects throughout my life, but this one will always be one of my favorites of all time. The fact that I was able to design something with technology and truly make it come to life is astonishing, and is one of the major reasons why I love the wood shop.

A mere idea
A tangible product